Most people trying to launch a hunting clothing brand hit the same wall. They have the passion. They know the market. But the moment they search for a manufacturer, they're buried in sketchy Alibaba listings, ignored emails, and factories with MOQs that could stock a small army.
The gap between "I want to build a hunting gear brand" and holding your first production sample feels miles wide. It doesn'T have to be.
This guide gives you a clear, step-by-step path to launching a private label hunting apparel brand through OEM/ODM manufacturers. Here's what we'll cover:
Locking down your brand positioning
Building a solid tech pack
Finding legitimate hunting camouflage clothing manufacturers
Getting through the sampling process
Putting your products into customers' hands through the right sales channels
Step 1: Define Your Hunting Clothing Brand Positioning Before Contacting Any Manufacturer
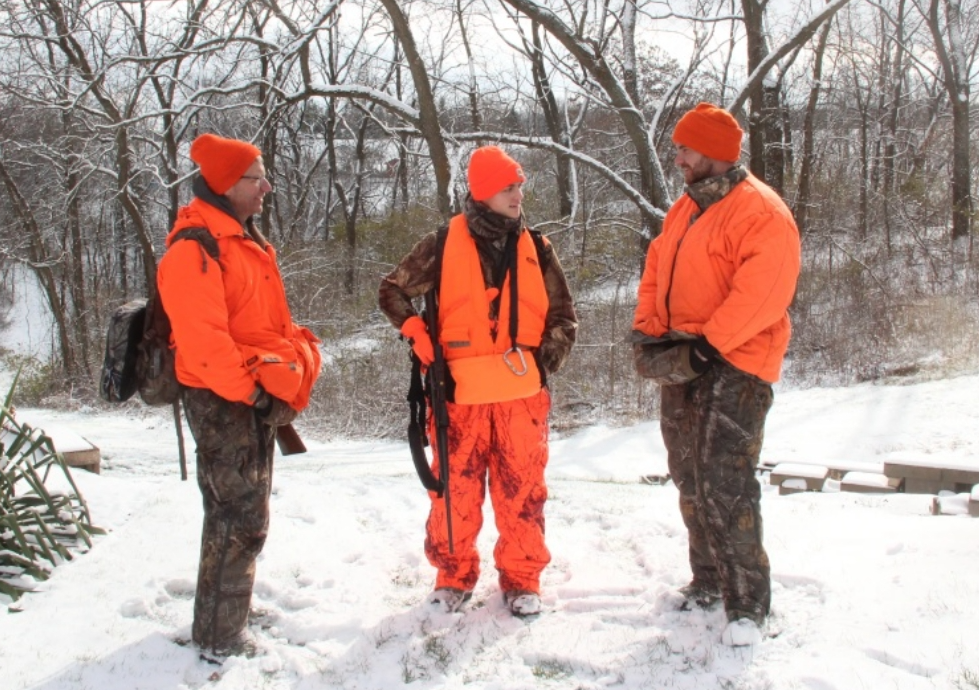
Brand positioning isn't a marketing exercise. It's the one decision that determines whether your hunting apparel manufacturer talks go somewhere useful — or waste time on bad samples and mismatched MOQs.
Before you send a single inquiry email, answer this question with full honesty: Who are you building this for?
The hunting apparel market isn't one market. It's five or six overlapping ones. Each has its own technical demands, price expectations, and buyer psychology.
The Three Positioning Lanes Worth Knowing
Performance / Technical — Think Sitka , Kuiu, First Lite. Customers spend $800–$1,500 per system. They hunt 10+ days per season and will pick apart your fabric specs before buying. Your shell fabrics need 20,000+ mm waterproofing and MVTR above 15,000 g/m²/24h. No exceptions.
Lifestyle / Casual — Think Drake, Huk. Hoodies run $40–$100. These buyers hunt 2–6 days a season. They care more about brand identity than RET ratings. Entry barriers are lower, but so are margins.
Hyper-Niche Vertical — One problem, one solution. Female hunters with fit issues. Waterfowl hunters whose waders fail within 20 days. Treestand hunters who can't find dead-silent insulation that still lets them draw a bow. These gaps are real, underserved, and hard to copy.
Score Your Position Before Moving Forward
Map your brand across three axes:
- Technical intensity (fabric specs, layering systems): 1–5
- Lifestyle appeal (logo-driven, everyday wearability): 1–5
- Vertical focus (species, body type, environment): 1–5
The goal isn't a perfect score. You're looking for the open coordinate your competitors haven't claimed.
That answer drives every manufacturing conversation that follows.
Step 2: OEM vs ODM for Hunting Apparel — Which Model Fits Your Stage
Two paths. One decision that shapes your cash flow, your timeline, and how fast you can get product in front of real hunters.
Here's the short version:
OEM = you own the design. The factory builds to your spec.
ODM = the factory owns the base design. You brand it as your own.
Neither is better. Each fits a different stage of business.
OEM: More Control, More Risk, More Capital Required
OEM hunting apparel makes sense once you know what you're building. You bring a tech pack, a specific camo pattern, a defined fit — and the factory executes it to your spec.
The trade-offs are real:
Development time : 2–6 months from first pattern draft to approved sample
Upfront costs : $500–$3,000+ per style. That covers pattern making, sample rounds, and custom camo screen setup
MOQ : 300–500 pieces per colorway minimum. Technical outerwear or custom camo prints can push that to 800+ pieces per color
Miss your functional specs — silent fabric, waterproofing, breathability — and you face another round of sampling. That adds 6–9 months to your launch. You could blow right past your target hunting season.
IP risk is real too. Your contract needs to state clearly that your patterns and cut files belong to you. Without that language, some factories will run similar designs for other small brands within a season or two.
ODM: Faster, Leaner, and Underrated for Early-Stage Brands
ODM gets dismissed as "generic." That's a mistake.
A well-sourced ODM program lets you put 3–5 solid hunting styles into the market in 2–6 weeks — not months. The factory already has the patterns, the production line, and the fabric relationships in place. You're selecting from proven options, not building from zero.
What you can customize:
Camo pattern : Pick from the factory's existing library — 3–8 patterns covering forest, reed, snow, and grassland. Or bring your own file for a one-time screen fee of $200–$800 per colorway
Colors : Choose from existing swatches. Custom Pantone colors require 20–30% higher fabric minimums
Logo placement : Embroidery, silicone patch, heat transfer — all standard options, starting at 200–500 pieces per logo method
Pocket layout : Small tweaks are on the table — position shifts, adding or dropping 1–2 pockets, zipper direction changes. Most of this stays within scope without rebuilding the pattern
Full private label : Hang tags, woven labels, wash labels — 100% your brand
MOQs run 100–200 pieces per style mixed. Some catalog styles are available at 50–100 pieces per colorway. That range lets you test real demand before putting serious capital on the line.
The Strategy That Works: ODM First, OEM Later
Don't debate the two models. Use both — in sequence.
Phase 1 (Months 1–4): Launch 3–5 ODM styles. Keep per-style quantities at 100–300 pieces. Cover 2–3 camo options. Gather real data: which patterns sell, which sizes run out first, what customers flag as problems.
Phase 2 (Month 5+): Look at your top 20–30% of sellers — the ones with repeat purchases and reviews focused on function. Build 1–2 OEM flagship styles around those. Fix the real complaints. Add features that stand out: silent shoulder panels for bowhunters, dedicated call pockets for waterfowl, removable insulation layers.
Ongoing: Keep your ODM line as the entry-level offering. Let your OEM flagship carry the brand's premium positioning and margin.
This approach cuts development risk, protects cash flow, and gives you real market data before you lock into high-MOQ OEM hunting apparel production runs.
Quick Reference: OEM vs ODM for Hunting Apparel
OEM
ODM
Design ownership
100% yours
Factory's base + your branding
Development time
2–6 months
2–6 weeks
Upfront cost per style
$500–$3,000+
$0–$200
Typical MOQ
300–800+ pcs/color
50–200 pcs/style
Best stage
Growth / flagship
Launch / validation
Step 3: Design Requirements & Tech Pack Basics for Hunting Garments
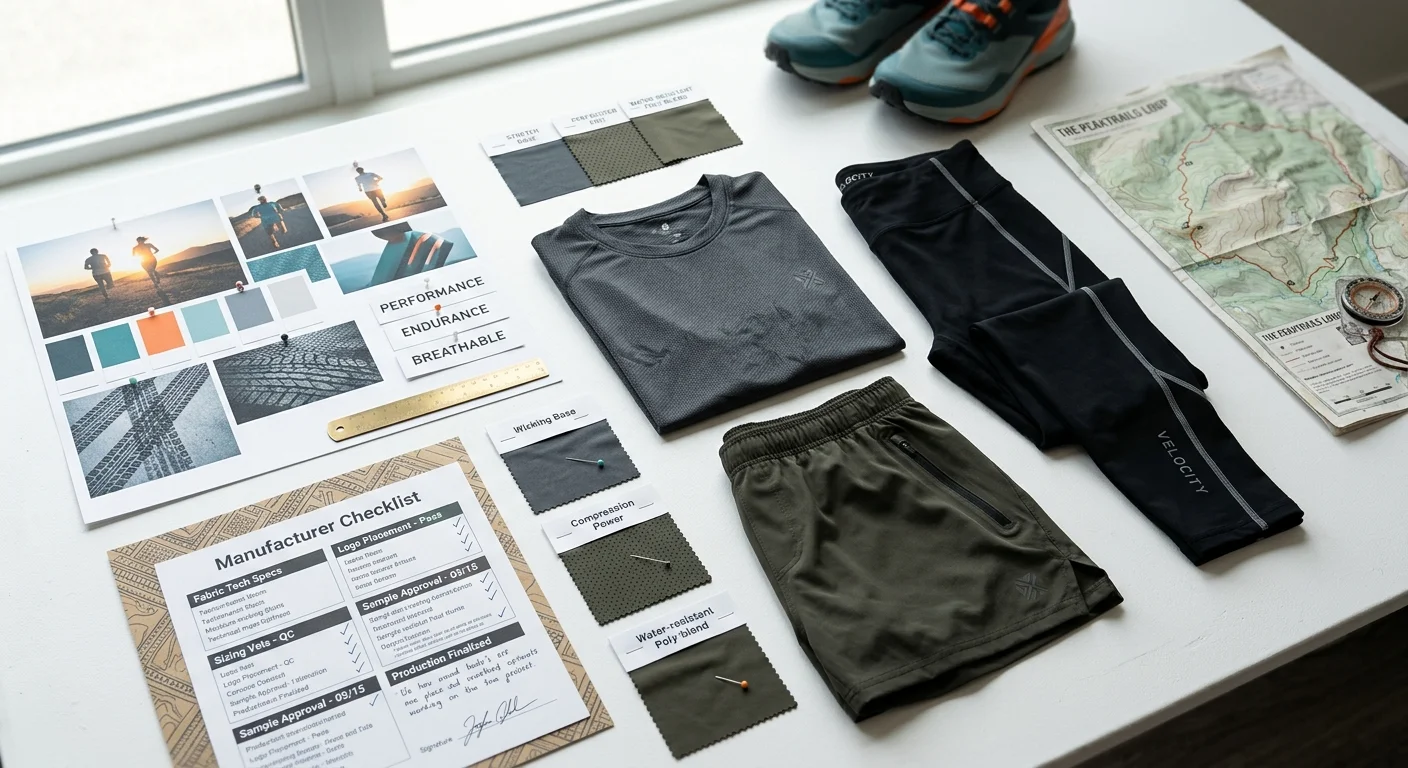
A tech pack isn't paperwork. It's the one document that decides whether your manufacturer builds what you had in mind — or ships something that gets turned away at port.
Hunting garments carry functional demands that standard outdoor apparel simply doesn't. Your tech pack has to capture every single one. Here's what that looks like in practice.
The Six Things Every Hunting Apparel Tech Pack Must Include
1. Flat Sketches with Detail Callouts
Front view, back view, and close-ups of every functional element. Label pocket dimensions (width × height), zipper lengths, tree-stand harness port position (60–90 mm below the rear collar center), and reinforcement panel outlines. No drawing and no dimensions means the factory guesses — and they'll guess wrong.
2. Size Chart + Grading Pick one sample size — M or l works. Add ±0 . 5–1.0 cm tolerances at each measurement point. Shooting mobility requires real room to move. Chest, upper arm, and shoulder measurements need 8–14 cm of ease beyond body measurements. That's not a suggestion. A jacket that fits fine on the rack can bind the moment you raise a bow.
3. Fabric Specs with Performance Numbers
For every fabric layer — shell, lining, insulation, reinforcement — define:
- Composition, weight (g/m²), and weave structure
- Waterproofing: ≥10,000 mmH₂O at entry-level, 20,000+ for serious waterfowl or late-season sits
- Breathability: 5,000–20,000 g/m²/24h
- Silent/brushed finish: brushed polyester at 150–260 g/m² — noticeably quieter than standard 70D nylon
- Scent control (if applicable): antimicrobial finish at ≥99% bacteria reduction (AATCC 100), or activated carbon layer at 80–150 g/m²
4. Colorway + Camo Details
One colorway code per pattern. For solid colors, use Pantone TCX numbers — not print codes. For camo, specify rapport size (e.g., 64×64 cm), pattern direction, and whether you own the IP or are licensing it.
5. Trims Bill of Materials
List every single trim piece. That means every zipper (YKK brand, #3 or #5 coil, waterproof or standard), velcro width, buckle material, drawcord diameter, and rubber-wrapped zipper pull (25–35 mm length for gloved hands). Metal hardware that clanks will ruin a hunt. Call out plastic or fabric-covered alternatives by name — don't leave it open to interpretation.
6. Logo and Label Placement
Reference the exact position from a seam line or center front. Include dimensions, application method (embroidery, heat transfer, silicone patch), and a linked AI/PDF artwork file. Skip the written description. Measure it, mark it, and move on.
Hunting-Specific Details Most Brands Miss
Add these to your "Special Design Requirements" page:
Knee/elbow/seat reinforcement : 400–600D nylon oxford, abrasion resistance ≥20,000 Martindale cycles
Insulation weight by use case : 60–100 g/m² for active styles; 160–200 g/m² for late-season ambush jackets
DWR spec : C6 or fluorine-free, AATCC 22 spray rating ≥80, holding ≥70 after 5 home washes
Seam taping : All shoulder, hood, and top seams — 20 mm tape width, rated to match shell waterproofing
Get all of this down before you send anything to a manufacturer. A complete tech pack cuts your sample rounds in half. It also gives you something solid to stand on if a sample comes back wrong.
Step 4: How to Find Legitimate Hunting Clothing OEM/ODM Manufacturers
Finding a factory that can execute hunting apparel — seam-sealed shells, brushed silent fabrics, camo print registration — is a different problem from finding someone to stitch a plain hoodie. These are specialized builds. Not every factory can pull them off.
Here's how to build your shortlist without wasting months on dead ends.
Start on Alibaba, But Filter Like You Mean It
Use these search terms to pull real hunting factories: "hunting apparel manufacturer," "camouflage jacket manufacturer," "waterproof hunting jacket manufacturer," or "seam sealed rainwear factory."
Then filter hard. You're looking for:
Verified Supplier badge + Trade Assurance enabled
Listed as Factory/Manufacturer — not trading company
4–5 star rating with completed transaction history
Product photos and videos showing real camo and outdoor outerwear
Drop them fast if: no Trade Assurance, pricing looks too low to be real, or their replies stay vague about process details. No response within 5 business days ? Gone. MOQ doesn't match your launch quantity? Gone. Price comes back 30%+ over your target? Gone.
Narrow to 3–4 factories before you request samples.
Reverse-Engineer the Supply Chain With Trade Data
Most first-time founders skip this step: use ImportYeti to look up which factories already supply established hunting brands.
Pull the import records for brands in your target tier. You'll see hunting apparel supplier names, shipment frequency, port of origin, and volume. The factories showing up over and over for recognized brands? Those are your top leads — already cleared by someone else's quality control team.
This beats directory browsing. It shows you real "brand → factory" relationships that are already in place. You can approach those factories with actual context, not a cold inquiry.
Know What a Real Factory Looks Like
Prioritize manufacturers with proven experience in:
Camo printing (rapport size control, multi-color registration)
Seam sealing / taped seams for waterproof construction
Functional fabric processing — DWR application, bonding, brushed finishes
Tactical, military, or outdoor categories — not just fast fashion
A factory that can clearly explain their seam tape width, coating spec, hydrostatic HEAD test results, and fabric weight range is worth ten factories that can only quote a price.
Ask for physical samples of comparable past styles. They have them and they're clean? That tells you more than any certification page ever will.
Send the Right Information Package
Skip the vague inquiry email. Send a real RFQ that includes:
Style sketch or reference image
Tech pack (or draft version)
Target quantity for first order
Required delivery timeline
Size chart and Pantone color codes
Fabric requirements (waterproofing rating, finish type, camo if applicable)
Any certification requirements (export certs, fabric testing)
Send the same package to 5–10 factories at the same time. Compare their responses across six metrics: sample fee, MOQ, lead time, sampling speed, relevant past work, and how specific their technical answers are.
The ones who engage with your specs — not just your quantity — are the ones worth moving forward with.
Verify Before You Commit
After narrowing to 2–3 finalists post-sampling, run a third-party audit through SGS, Bureau Veritas, or QIMA. These audits confirm production capacity, equipment, quality systems, and compliance. Do this after sampling approval, before your bulk order hits the line.
It's a small cost. A failed production run arriving two weeks before hunting season opens is not.
Step 5: Factory Evaluation Checklist — How to Separate Reliable Partners from Time-Wasters
Picking the wrong factory doesn't just cost you money. It costs you your launch window. In hunting apparel, missing the August–September shelf-ready deadline means waiting a full year to try again.
Here's what to verify before you sign anything.
Technical Capability: What Their Equipment Tells You
Waterproof seam sealing is the first filter. Ask for samples from at least three different production batches — not three colors from the same run. Visit on-site. Confirm they have a dedicated hot-air seam sealing machine. Check whether operators can recite the critical parameters — temperature, speed, pressure tolerances — from memory. Good factories keep seam leak defect rates at ≤1–2% per batch. No inspection records proving that? Walk away.
Laser cutting matters for camo registration. Acceptable positioning accuracy for camouflage fabric is ±0.5mm, with a minimum cutting width of 1.6–1.8m. Ask for cutting samples across at least three fabric types. Also request their last three months of dimension defect rate data. Anything above 1% per batch is a red flag.
Camo print quality has three checkpoints:
- Color consistency: ΔE ≤ 1.0–1.5 between batches
- Pattern alignment at pocket and shoulder seam positions
- Wash fastness rated at Grade 4 or above
Factories that hand you test reports on the spot are playing a different game than factories that promise to "send them later."
Commercial Terms: The Numbers That Matter
Term | What to Ask | Healthy Range |
|---|---|---|
MOQ per style | Total pieces + per-colorway minimum | 500–1,000 pcs/style; 200–300 pcs/color |
Sample fee | Per style, and whether it offsets bulk order | $100–$300 for technical styles |
Sample turnaround | From payment to first physical sample | 5–10 days standard; 10–20 days complex |
Bulk lead time | From deposit to ex-factory | 30–45 days standard; 45–60 days with custom camo fabric |
Volume pricing | At least three quantity tiers | 3–8% drop from 500→1,000 units; 5–10% from 1,000→3,000 |
One thing worth pushing on: ask whether they'll accept a trial order at 30–50% below their standard MOQ for a first run, with a modest price premium. Factories confident in their quality say yes. Factories that need volume to hide problems say no.
Reliability Signals You Can Measure
NDA willingness is a baseline. A factory with real brand relationships keeps a standard template ready to go. They balk at signing — or hand you something unenforceable — that's not a negotiating tactic. That tells you how they'll treat your camo patterns six months from now.
Response speed reveals their operational discipline. Track these benchmarks:
- First inquiry reply: within 12–24 hours
- Sample pricing: within 2–3 business days
- Technical feasibility questions: within 1–2 business days
Log this in a simple spreadsheet. More than 20–30% of your messages go unanswered for 48+ hours during the evaluation phase — while they're still trying to win your business — picture what happens once production gets complicated.
Brand references need to be verifiable. Ask for 3–5 brands they've worked with in the last two years. Get at least one contact you can email directly. A factory proud of their client list makes those introductions without hesitation. One that deflects to vague names and loose descriptions is hiding something.
Shortlist rule: After sampling, narrow down to 2–3 finalists. Run a third-party audit through SGS, Bureau Veritas, or QIMA before committing to bulk. It's a small line item. A production failure landing two weeks before opening day is not.
Step 6: How to Contact Hunting Clothing Manufacturers — The First Message That Gets Responses
Your first email to a factory is a job application. They're screening you just as hard as you're screening them.
Most inquiry emails get ignored — not because the brand is too small, but because the message reads like a time-waster. Vague product descriptions. No quantity reference. Five words where fifty are needed. Factories get dozens of these every day. Yours needs to stand out in the first ten seconds.
Keep it to 150–250 words, 8–12 lines . Hit these seven points in order:
Brand intro (1–2 sentences): Name, country, and a clear category description — "technical hunting apparel for North American whitetail hunters." This tells them right away whether you're their buyer.
Target market and channel: US/Canada + DTC or wholesale. Factories focus on projects with EU/US potential and long-term order volume.
Product type and technical specs (bullet points): List your styles — softshell jacket, waterproof bib, fleece mid-layer. Then add the specs that set you apart from a fashion order: "10K/10K waterproofing, taped seams, YKK zippers, digital camo all-over print."
Realistic quantity range: First bulk orders at 500–1,000 pcs per style are credible. Don't open with 10,000 units you can't back up. Factories spot inflated numbers fast and move those inquiries to the bottom of the pile.
Your preparation level: One sentence confirming you have tech packs, measurement charts, and reference samples ready. This separates serious buyers from idea-stage inquiries right away.
5–6 specific questions: Ask about MOQ per style, FOB price range at 500 and 1,000 pcs, sample lead time and cost, bulk production lead time post-PP sample approval, and relevant certifications (BSCI, ISO9001, OEKO-TEX).
Clear next step: "If this fits your capability, send your MOQ, sample policy, and an estimated price range so we can share full tech packs."
OEM vs ODM Inquiry: The Preparation Difference
OEM inquiries need to signal that the design work is done. Say it plainly: "We have complete tech packs and patterns — we're looking for OEM manufacturing only." Attach style sketches or offer to send them on request. You're showing production-readiness, not asking for ideas.
ODM inquiries run a different way. Share style references — Sitka or First Lite as positioning examples, without logos — and your functional targets: waterproofing rating, target weight under 800g per L-size jacket, and a broad market tier like "mid-to-high US hunting market." Then ask: "Do you have existing hunting jacket patterns available for ODM with small modifications — logo, camo print, trim changes?"
Run All Five to Ten Factories in Parallel
Contact every factory on your shortlist at the same time. Then build a comparison spreadsheet — one factory per row. Track these data points:
FOB price at 500 and 1,000 pcs
Sample fee and whether it's deductible
Proto sample turnaround
Bulk lead time
MOQ per style and per colorway
Communication quality score from 1–5
Score communication on three things: first response under 24 hours (5 points), specific answers with actual numbers — not "depends on quantity" — and whether their team uses terms like seam sealing, lamination, and DWR without needing a definition.
Weight the final score like this: price 30%, communication quality 20%, lead time 20%, sampling policy 15%, experience and certifications 15%. The factories at the top of that list are the ones worth sending samples to.
Step 7: Sampling Process — How to Validate Your Hunting Gear Before Mass Production
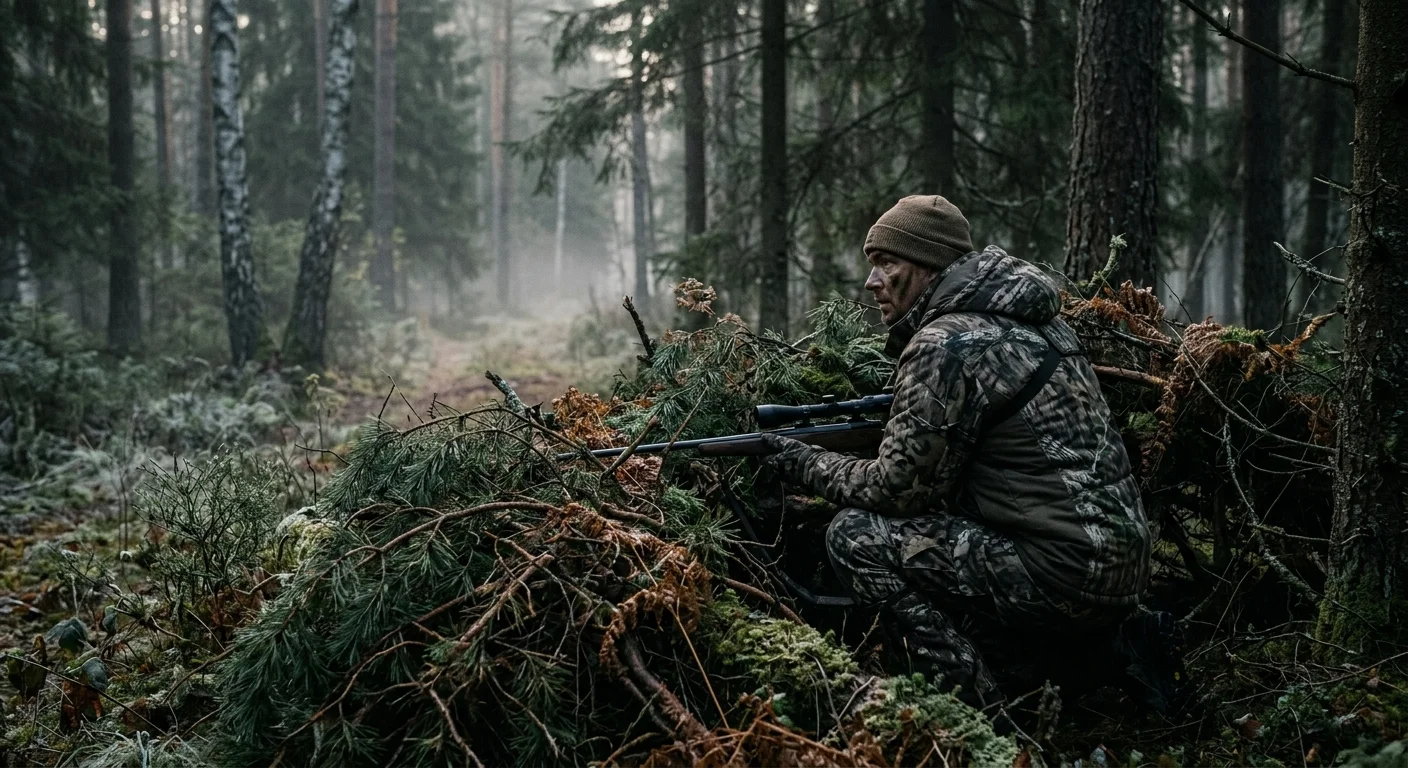
Samples lie. Not on purpose — but a jacket that looks right on a table will fail the moment a hunter crouches behind a blind at 5 a.m.
This is where most new brands lose money. They approve a sample based on how it looks, not how it performs. Then 500 units arrive. The camo bleeds in the wash. The seams leak in drizzle. The fabric sounds like a trash bag every time the hunter moves.
The fix is a structured validation process before you sign off on mass production.
What You're Testing — The Three Things That Matter
Three things matter in hunting apparel samples. Everything else is secondary.
Noise. A fabric that tests at 40 dB(A) or above during friction is audible to game at close range — full stop. Your target: peak friction noise ≤35 dB(A), walking Leq ≤40 dB(A). Test each sample at least three times across S/M/L sizes. Use a sound level meter in a room with ambient noise under 20 dB(A). Simulate field conditions: rub two 20×20 cm swatches at 0.2–0.3 m/s. Have someone walk at 90–110 steps per minute while you measure from 1 meter away. Numbers over target? Send it back.
Seam integrity. Critical seams — shoulders, crotch, underarms — need to hold at ≥150 N minimum. Heavy hunting pants push that to 200 N. After 10–20 home washes, taped seams should still test at ≥5,000 mmH₂O. No tape should lift more than 5 mm at any point. Run ISO 811 hydrostatic head testing on every waterproof style. This isn't optional.
Camo accuracy. Edge blur should stay under 1–1.5 mm. Color deviation between production and your approved standard: ΔE ≤1.5 per key tone. Between garment pieces from different production runs: ΔE ≤2.0. Pants that are a shade lighter than the jacket aren't camouflage — that's a liability.
The Sample Rounds: What Happens and How Long It Takes
Round | Purpose | Typical Timeline |
|---|---|---|
Proto 1 | Fit, construction, base fabric check | 7–14 days |
Proto 2–3 | Full fabric system, lab functional tests | 10–20 days per round |
Fit Sample | Full size run (5–7 sizes) | 7–10 days post-fit approval |
PPS | Final production-line sample, all approved materials | 10–15 days |
Budget 2–3 rounds of functional iteration before you reach PPS. That's just how performance hunting apparel works. Brands that try to jump from Proto 1 straight to bulk order end up paying for it in returns.
Field Testing: Put It in the Woods Before It Goes to Production
Lab numbers confirm baseline specs. Field testing catches everything else.
Run your samples across at least two terrain types — dense forest and open ground at minimum. Each test session should run 2–3 hours. Include both active movement and static sits. Track results with real numbers:
Concealment: Station an observer at 50 m, 100 m, and 150 m. Record whether they spot a stationary hunter within 5 seconds. Your target: detection rate ≤50% at 100 m in the intended environment.
Mobility: Test a high-overhead draw, kneeling for 5 minutes, and a treestand sit for 30 minutes. Score pull, noise, and restriction 1–10 per movement. Anything averaging below 7 on a critical action goes back for revision.
Sweat and breathability: At a moderate hiking pace (3–4 km/h), core layer saturation should stay below 30–40% of surface area after two hours.
Write down every issue — note the position, how often it happens, and how bad it is. Move to the next round after P1 issues (critical) hit ≥90% resolved, and P2 issues hit ≥70%. That standard stops you from approving samples that fall apart in the field six months down the line.
Step 8: Budget, MOQ & Timeline — What to Expect
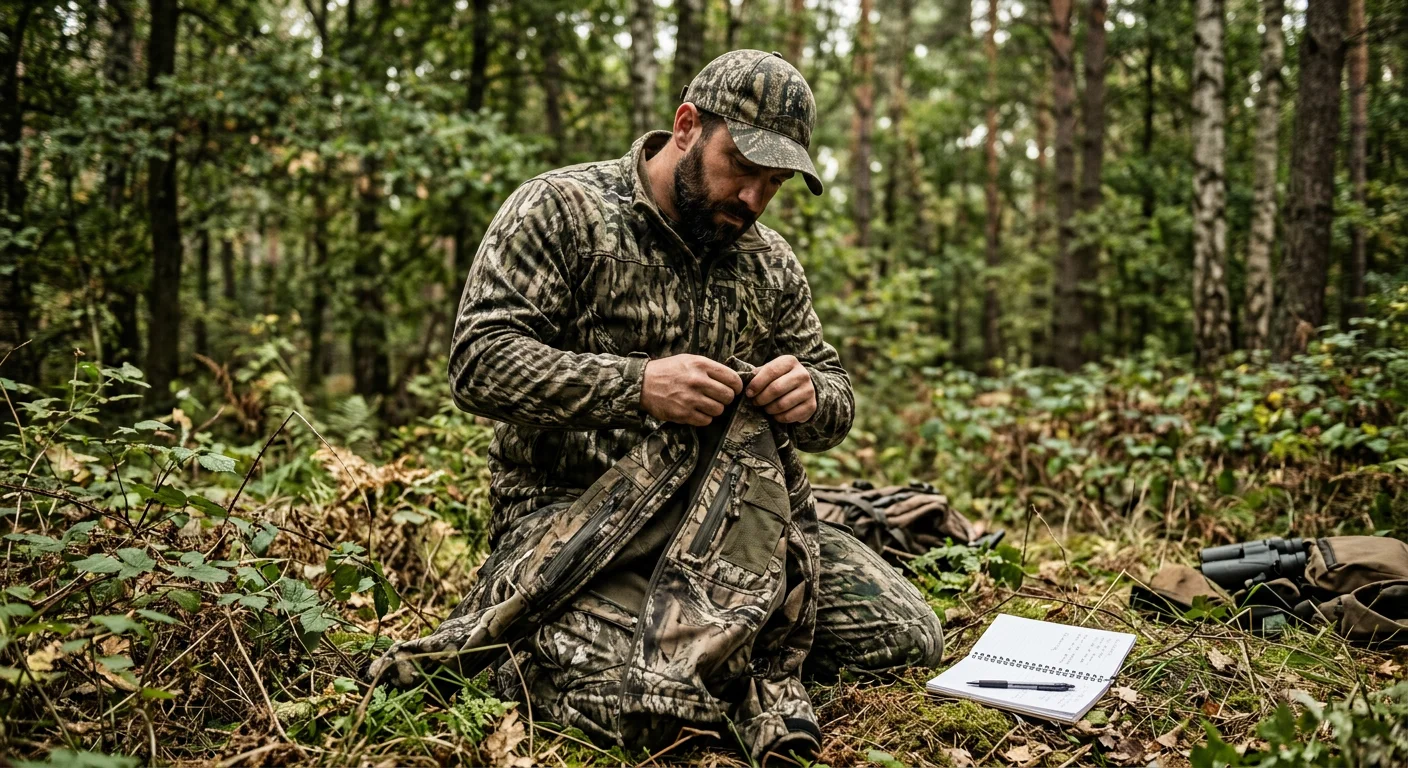
Numbers don't lie. In hunting apparel manufacturing, the numbers tell a story most brand guides skip over.
Here's what a three-style launch costs — one camo T-shirt, one softshell jacket, one insulated bib — at 300 pieces per style from a Chinese OEM hunting apparel factory.
What You'll Spend
Sampling runs $800–$1,000 total across all three styles. Plan for 2–3 rounds per style. Softshell jackets and insulated bibs take up most of that budget.
Production FOB costs break down like this:
Style | Factory Price Range | 300-Unit Batch |
|---|---|---|
Camo T-shirt (functional fabric) | $5–$8/pc | ~$1,350–$2,400 |
Softshell jacket (3-layer + YKK) | $22–$36/pc | ~$6,600–$10,800 |
Insulated bib (high-density shell) | $33–$46/pc | ~$9,900–$13,800 |
Trademark registration : $700–$1,400 for China plus one export market. Non-negotiable for any serious brand build.
Shipping : Sea freight LCL for ~900 pieces runs $600–$1,300. Need to air freight for an urgent launch? That same volume will cost $2,600–$4,300.
Startup budget: $28,000–$40,000 total. That covers sampling, production, compliance, and freight — not a single dollar of marketing included.
MOQ Reality Check
Standard factory MOQs sit at 300–500 pieces per style per colorway. Technical outerwear with custom camo printing can push to 500+ pieces per color. That's just the nature of the printing process.
Some factories will offer a first-order trial run at 50–60% of their standard MOQ. You pay a small price premium for the flexibility. Ask for it. Factories that trust their own quality will say yes.
The Timeline Nobody Tells You About
From concept to warehouse, plan on 16–28 weeks . That's 4–7 months, even on the shorter end.
Tech pack prep : 1–2 weeks
Factory sourcing + quotes : 1–3 weeks
Sampling rounds : 4–8 weeks for complex styles
Bulk production : 4–8 weeks at 300–500 pieces
Sea freight + clearance : 6–9 weeks to North America
Miss the August pre-season window and you lose a full year. Work backward from your target launch date. Then add a two-week buffer. You'll use every day of it.
Step 9: Brand Legal Foundations — Trademarks, IP, and Manufacturer Contracts
Legal mistakes in hunting apparel don't announce themselves. They show up six months after launch. A factory starts running your camo pattern for a competitor. A trademark dispute pulls your Amazon listings down two weeks before deer season.
Lock this down before bulk production starts. Not after.
Trademark: Register Early, Register Right
File in your primary sales market first — USPTO for the US ($250–$350/class, plus $400–$1,000 in attorney fees). Class 25 covers apparel. Plan to expand into gear and accessories within three years? Add Class 18 now.
Timing matters more than most brands expect. Start the process at least 6–9 months before your launch date . USPTO registration runs 9–12 months under normal conditions. Your product isn't live yet? File on intent-to-use. Just make sure you use it within three years, or you risk cancellation.
Manufacturer Contracts: The Four Clauses That Protect You
IP ownership: Your OEM contract must state that all patterns, cut files, and tech packs belong to you. Full transfer — not just a license.
Camo pattern rights: Spell out whether the pattern is brand-developed or factory-sourced. Define exclusivity terms. Assign infringement liability to the right party.
Tooling ownership: Pay for molds as a separate line item ($500–$5,000/set). Invoice them on their own. Include a clause that requires return or destruction within 30 days of contract termination.
Liquidated damages: Set a fixed penalty — 20–50% of order value — for unauthorized use of your designs or logo. Cap late-delivery penalties at 10–15% of total order value.
Push for Exclusivity at the Right Time
Don't chase exclusivity on your first order. Your annual volume needs to hit 60–80% of the factory's capacity for that style — otherwise the clause won't hold up in practice. Build your reorder history first. Get real leverage. Then negotiate.
Step 10: Launch Strategy & Sales Channels for Your Private Label Hunting Clothing Brand
Production approved. Inventory en route. Now the real work starts.
Most hunting apparel brands treat launch as the finish line. It's the starting gun — and how you fire first matters more than how long you've been preparing.
Channel One: Your DTC Website
Build your Shopify storefront around two or three hero products. Lead with hard specs on the product page:
Waterproofing rating
Fabric weight
Temperature comfort range
Add 5–8 real field photos. Include a 30–60 second fit video too. Before launch, collect 10–20 photo reviews through beta testers. This gives buyers something real to read before they commit.
Install a popup offering 10–15% off the first order. Industry average opt-in runs 3–8%. Hunting buyers already deep in the specs tend to convert closer to the top end of that range.
Channel Two: Amazon
Price your core SKUs at 90–95% of the category average. Stack a 10–20% launch coupon on top of that. For each listing, aim for 7–9 images. Here's a breakdown that works:
One white-background hero shot
Three to four spec-callout images with actual numbers
One sizing diagram
One field photo
Each image should pull its weight. Buyers scan fast — make every image count.
Channel Three: Local Wholesale
Call on 10–20 independent hunting stores within 200 km. Offer your first two or three accounts a 90-day consignment deal with size exchanges. This lowers their risk and makes it easy to say yes.
Wholesale at 50–60% of retail. Keep the opening order small — 60 to 120 pieces across 3–5 SKUs. Small orders mean less hesitation. Buyers say yes faster, and you start building shelf presence without heavy upfront commitments on their end.
FAQ: Common Questions About Starting a Hunting Clothing Brand With OEM/ODM
Every week, someone asks the same question: "I know what I want to build — I just don't know how the manufacturing side works." These are the questions that come up most.
What's the minimum order quantity?
A realistic startup benchmark is 50–100 pieces per style or colorway. Add custom camo prints, specialty fabrics, or custom trims, and that floor rises. Ask for pricing at both 50 and 100 pieces. The gap between those two numbers tells you a lot about a factory's flexibility.
Can I start with zero design experience?
Yes. ODM is built for this situation. The factory handles the base construction. You choose the branding, colors, labels, and packaging. Already have a complete tech pack? OEM is the better fit.
OEM or ODM first?
ODM. It's faster, cheaper, and lower risk — weeks to market instead of months. Switch to OEM once you know which silhouettes and camo patterns sell.
How do I protect my designs?
OEM gives you the strongest protection — you own the patterns, specs, and cut files. With ODM, the factory owns the base design. So register your trademarks and logos before launch.
How long does production take?
ODM runs weeks. OEM runs months. Get sample and bulk timelines confirmed in writing. Do this before you commit.
How many factories should I compare?
Contact 5–10 before deciding. That range builds a realistic price baseline. It also exposes outliers before you spend money on samples.
Conclusion
Building a hunting clothing brand with OEM/ODM manufacturers isn't just for industry insiders with big budgets. It's a structured process — and it pays off for those who put in the work upfront.
Winning brands in this space share three things:
A well-defined niche
A manufacturing partner they've checked out thoroughly
The patience to nail sampling before scaling up
Skip any one of those, and you're burning money instead of building something real.
You now have the full roadmap. It covers brand positioning, tech packs, factory evaluation, legal protection, and launch strategy. The next step is clear: reach out to hunting clothing OEM/ODM manufacturers this week. Not next month. This week.
Need a solid starting point? berunclothes focuses on custom camo clothing with low MOQs — a good fit for brands just getting started.
The hunting apparel market moves fast. Your future customers are out there. Go build the brand they've been looking for.