Already got a bag full of ice hockey gear? You might be wondering if you can just lace up differently and hit the inline rink.For teams or leagues sourcing equipment in bulk, working with trusted ice hockey gear suppliers can help ensure you get quality items that are safe for both ice and inline play.
You're not alone. The honest answer: yes — with one non-negotiable exception that could save you from a nasty fall (or a rulebook rejection).
Maybe you're an ice player who wants year-round puck time. Maybe you're a parent trying to stretch last season's equipment budget. Or you're a newcomer figuring out what you need before spending a dime. Either way, knowing how hockey gear crossover use works between ice and inline is the best place to start.
Some pieces carry over without any issues. Others will get you hurt or turned away at the door. This breakdown goes gear category by gear category — so you know what stays, what swaps, and what's worth the upgrade.
Can You Use Ice Hockey Gear for Inline Hockey? (Quick Answer + Compatibility Overview)

Here's the short version: most of your ice hockey gear works for inline hockey — helmets, gloves, shin guards, elbow pads, sticks, mouthguards. The list of gear that works is longer than most players think.
The one hard stop? Your ice skates. Blades don'T roll. That's the single swap you can't skip in your entire kit.
Everything else falls somewhere on a spectrum — from grab it and go to check your league rules first.
The Three-Tier Compatibility Breakdown
Think of your gear in three buckets:
✅ Use as-is (no changes needed)
Helmet, cage or shield, gloves, elbow pads, shin guards, stick, mouthguard, jock/jill, shoulder pads. All of these work for both ice and inline play without any changes.
⚠️ Check before you play
Helmet certification matters more than most players know. Some leagues — like the Bainbridge Roller Hockey League — require CSA and HECC certified helmets plus a full face cage or shield . Your helmet may be older or uncertified. Verify compliance before your first shift.
❌ Must replace
Ice skates → inline hockey skates. There's no workaround here. Inline skates have a wheeled chassis built for surface grip, quick acceleration, and tight turns. A blade delivers none of that on sport court or asphalt.
Pants may also need a swap, depending on your league's rulebook. Inline-specific pants give you better abrasion protection and airflow compared to ice pants.
The bottom line for budget-conscious players: your protective gear investment isn't wasted. Skates are the main new cost. Everything else depends on your league's rules.
Ice Hockey Skates vs Inline Hockey Skates: The One Gear You Cannot Skip
Blades don't roll. That's the whole story — but knowing why they don't roll protects your skates, your wallet, and your ankles.
Ice skate blades are built for a surface with a friction coefficient of 0 . 01 to 0.02. Put those same blades on sport court or asphalt — where friction hits 0.6–0.8 — and the physics break down fast. The blade edge grinds and dulls. The chassis takes forces it was never built to handle. You're not just skating badly. You're wrecking your gear and setting yourself up for a real fall.
Why the Structures Don't Work Together
The gap between ice and inline skates goes beyond blade versus wheel. Each system carries your weight and movement in a different way.
Ice skate blade contact: A standard hockey blade (263–296 mm long) touches the ice along just a 40–60 mm arc. That's the rocker curve doing its job. This short, sharp contact point lets you carve hard edges and snap into a hockey stop.
Inline chassis contact: A four-wheel inline setup touches the ground across 200–260 mm — three to five times more surface area. That wide footprint gives inline skates solid stability on hard floors. But hockey stops feel and perform very differently. Wheel grip works through friction and deformation, not blade bite.
These aren't two versions of the same tool. The physics behind each one are built from the ground up for different surfaces.
Should You Convert Your Ice Boots Instead?
High-end ice skates are worth converting. The job means pulling off the blade holder, drilling new mount points, and bolting on an inline chassis — a 4×80 mm setup or a Hi-Lo config (2×76 mm front + 2×80 mm rear) both work well here.
What it costs (North American market averages):
Component | Estimated Cost |
|---|---|
Mid-range aluminum inline chassis | $80–$150 |
Indoor wheels (4 wheels, ~76A) | $40–$70 |
Bearings (ABEC 7–9, 16-pack) | $20–$40 |
Professional installation labor | $40–$100 |
Total conversion cost | ~$180–$300 |
For comparison, purpose-built inline hockey skates run $80–$150 (entry), $150–$300 (mid), or $350–$700+ (high-end Bauer /CCM Mission).
Conversion makes sense when:
- You already own premium ice boots ($600–$1,000 originals) with solid structure left in them
- You train on both ice and inline surfaces and want the same boot feel for both
- Your blade holder is shot but the boot still fits well
Skip conversion and buy inline skates when:
- You're a beginner or on a budget under $200 — purpose-built entry skates give you better value
- You want a boot built from scratch for hard surfaces, with the right stiffness, ventilation, and sole
- You don't want to deal with an off-center chassis mount that wrecks your stride
One last thing on wheels: indoor sport court needs 74A–78A wheels ; outdoor asphalt needs 82A–86A . Get the hardness wrong and soft wheels wear out in weeks — or hard wheels won't grip at all. Match your wheel to your surface. It's the second most important skate decision you'll make, right after picking the chassis.
Helmet, Cage & Mouth Guard: Zero Differences, Full Compatibility
Your ice hockey helmet works for inline. Full stop.
This is the one gear category with a clean, simple answer — no asterisks, no "it depends." The HECC certification stamped on the back of your helmet doesn't care what surface you're playing on. It certifies impact absorption. Ice rink or sport court, that standard holds the same.
One Check, Then You're Done
Flip your helmet over and find the HECC sticker. Look for one thing: the expiration date. Most certifications run 6.5 to 8 years from manufacture. Past that date, your helmet is out of compliance. A referee can pull you off the ice — or the rink floor — before your first shift.
Still current? Run through this quick physical check:
Shell: No cracks, no visible fractures
Interior foam: No crumbling, no compression flattening
J-clips and hardware: Secure, no missing screws or bent clips
Pass all three? Your helmet crosses over with no changes needed.
Cage, Shield, or Hybrid — Know Your League First
The helmet transfers straight across. The face protection requirement is where leagues split.
Most youth inline leagues — like their ice counterparts — require a full cage or full shield . Adult recreational leagues are less consistent. Some allow a half visor. Others require full coverage. A few leave the choice to the player.
The smart move: set up once for the strictest rule on your schedule. Any league requires a full cage? Run full cage across all of them. One setup, zero compliance headaches across both sports.
On hardware — most retail cages fit multiple brands and say so on the label ("fits Bauer/CCM/Warrior, sizes S– l "). Stick with hockey gear manufacturer-listed combinations only. Drilling into or modifying cage bars kills the certification and referees will flag it.
Mouthguard: No Friction at All
Mouthguards have no mechanical connection to any other piece of HEAD gear. They don't mount to the cage. They don't interact with the helmet shell. They go in your mouth — same as always, no matter what's on your head or what surface is under your skates.
Full cage + mouthguard stays the gold standard for protection in both sports. Already running that combo on ice? Move to inline and nothing changes.
Gloves, Elbow Pads & Shin Guards: Direct Crossover with No Compromises
Three pieces of gear. Zero reasons to replace them.
Your ice hockey gloves, elbow pads, and shin guards do one job: absorb impact and protect your body. That job stays the same on any surface. Sport court hits the same as ice. A puck to the shin hurts either way.
Gloves: Same Protection, Same Feel
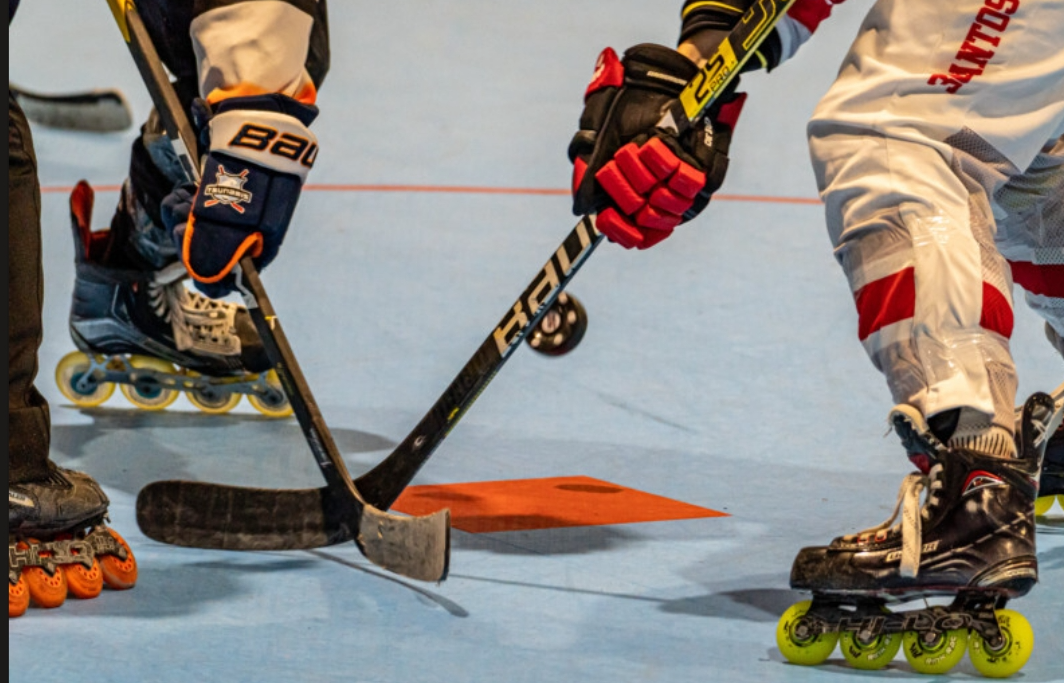
Ice hockey gloves move straight into inline play. No changes needed. The padding, wrist support, and finger protection are built for puck contact and stick-checking. None of that shifts based on what's under your skates.
The one thing worth checking: ventilation . Inline hockey runs warmer than ice. No cold air, enclosed rinks, summer games — your hands heat up faster. The gloves still protect you the same way. But long sessions can leave your hands soaked. A glove with more breathable panels is worth a look — not because your current pair breaks down, but because sweaty hands affect your grip and focus over time.
Elbow Pads: No Adjustment Needed
Same logic applies here. Hard-shell elbow caps guard the back of your elbow on ice or sport court. Sport court is harder underfoot and doesn't absorb falls the way ice does. Your pads are built for impacts heavier than either surface puts out.
Fit is the one variable to check before you play. Pads shift and loosen over a season. Tighten the straps before your first inline session. A sliding fall on hard flooring leaves less room for error than landing on ice.
Shin Guards: Ice Hockey Shin Guards for Roller Hockey Work Great
Ice hockey shin guards for roller hockey are a straight, no-trade-off transfer. The guard covers the same areas — tibia, kneecap, calf — against the same risks: stray sticks, deflected pucks, player contact.
One thing to know: inline shin guards can shift lower without a skate boot's tongue holding them in place. A shin guard sock or a strip of tape keeps everything locked before your first stride. Quick fix, big difference.
That's the full picture for this category. Keep what you have, check your fit, and get on the rink.
Ice Hockey Pants vs Inline Hockey Girdle + Pants: The Biggest Soft-Gear Gap
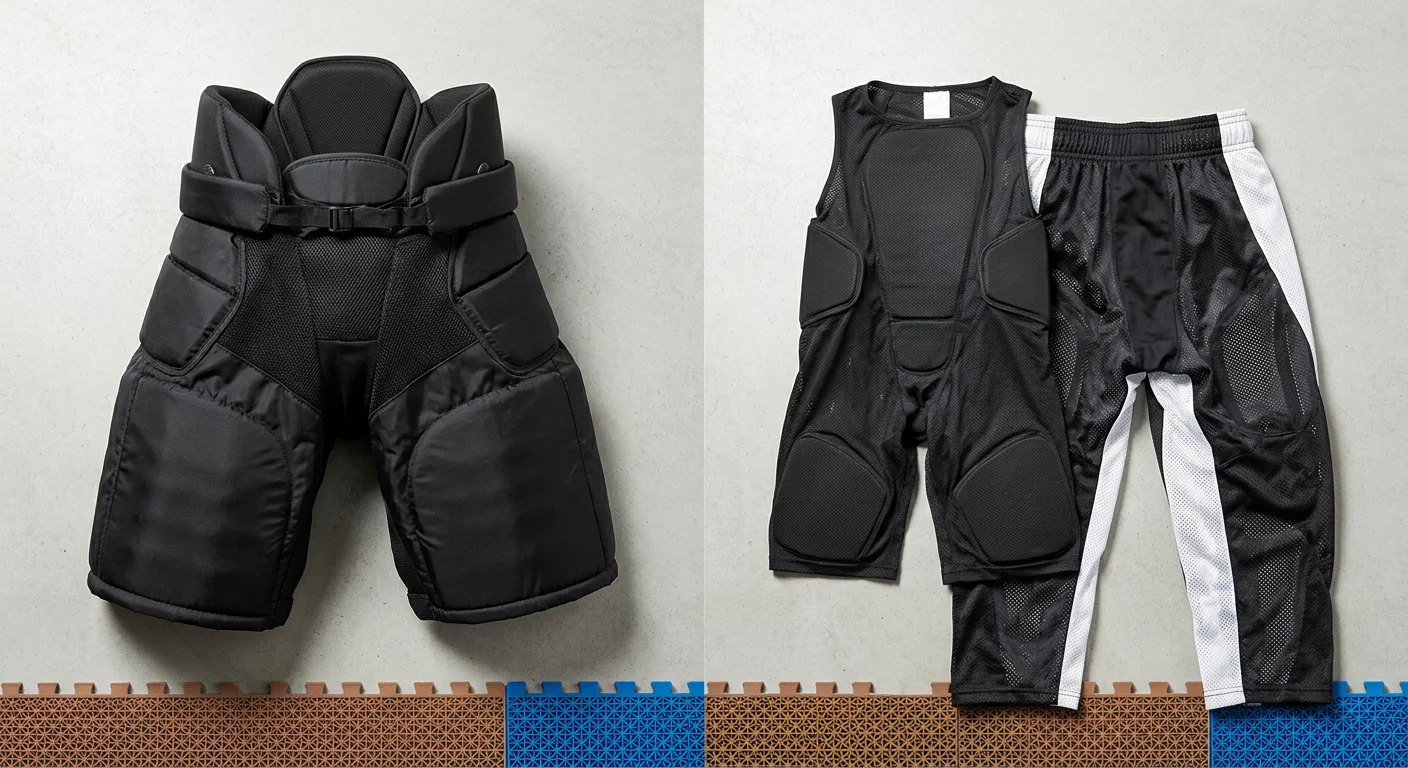
Ice hockey pants are built for cold environments. Most players don't think about this — but it's the exact reason they become a problem the moment you hit sport court.
The physics are simple. Ice rinks run at 5–10°C ambient air, with surface temps around −5°C. Ice pants are built for that cold. They use thick closed-cell EVA/EPP foam (15–25 mm deep), dense 420D–840D nylon shells, and moderate interior ventilation. On ice, that insulation does its job. In an inline rink at room temperature — or outdoors in summer — it becomes a heat trap.
Inline hockey pants handle this with a two-piece system: a compression girdle worn against the body, plus a lightweight outer roller pant layered over it.
What the Weight and Breathability Numbers Say
The gap between the two systems is real and measurable:
Gear | Typical Weight (Adult M) | Estimated Ventilated Surface Area |
|---|---|---|
Ice hockey pants | 1.2–1.6 kg | ~10–20% of total shell area |
Inline girdle | 0.8–1.0 kg | ~30–50% mesh/perforated panels |
Roller pants (outer) | 0.3–0.5 kg | Open-weave lightweight fabric throughout |
Inline combo total | ~1.1–1.5 kg | Much higher airflow overall |
The weight difference looks small on paper. The body-feel difference is not. Inline girdles sit close to the skin and move with you. Ice pants hang rectangular off the hip, adding drag on every crossover and sprint start. Players who switch to a girdle setup tend to report a 10–20% improvement in short-burst agility — a real edge in tight inline formats like 3v3.
League Compliance: Don't Assume Ice Pants Are Allowed
Some inline leagues ban ice hockey pants outright. Others strongly discourage them. The reasons are practical:
Abrasion protection: Sport court and rough outdoor surfaces need full-length pants covering waist to ankle. Ice pants worn with hockey socks leave skin exposed to concrete or rubberized flooring.
Thermal safety: Several youth inline leagues flag oversized ice pants as a heat and safety concern during summer play.
Team uniformity: Girdle + roller pants take team colors and logo customization of ice hockey gear. Ice pants usually don't.
Before your first inline session, ask your league organizer one direct question: Do you require full-length inline pants, or can I wear ice hockey pants with hockey socks? Youth leagues and outdoor venues are the most likely to turn you away at the door if you show up in ice pants.
What to Look for in an Inline Girdle
Your league may require inline-specific pants. Or you may just want to play without overheating. Either way, focus on these features:
Telescoping thigh plates adjustable 4–5 inches (10–13 cm) up or down — critical for proper coverage across different leg lengths
Integrated cup pocket with adjustable positioning to stop shifting during deep strides and crossovers
Large-panel mesh zones on the thighs and seat — visible from the outside, not buried inside the lining
Multi-density foam with hard PE inserts at the tailbone and hip points for fall protection on hard surfaces
For outdoor summer play (25–35°C), ventilation beats foam thickness as your top pick criterion. Recreational inline play carries a lower impact risk than full-contact ice. But the heat exposure is far higher. Prioritize airflow first, padding second.
Bottom line: Ice pants can work in a pinch. But heat buildup, reduced mobility, and possible league non-compliance add up fast. This is the one soft-gear category worth upgrading on purpose — not just putting up with.
Shoulder Pads: Usable but Often Overkill for Inline Hockey
Walk into any recreational inline rink and count the shoulder pads. Odds are, you won't need both hands.
That's not because players are being reckless. Inline hockey physics don't demand what ice shoulder pads are built to deliver. Mid-range ice shoulder pads absorb body checks at 20–30 km/h and slap shots at 80–160 km/h. They weigh 700–900 grams and pack hard PE shell caps 2–3 mm thick over multi-density foam. That's excellent gear for preventing broken collarbones and cracked sternums in a contact sport. In a non-contact inline league? All that engineering goes unused while you overheat through every shift.
Community feedback from inline players tells the same story: fewer than 20–30% of rec inline players bother with full ice-style shoulder pads. The two reasons that keep coming up — heat and restricted mobility.
Three Protection Tiers — Pick the One That Matches Your Game
Full ice shoulder pads (your existing gear)
They work. Nothing stops you from wearing them. But in a warm rink or outdoor summer game at 25–30°C, full chest and back coverage with low-permeability foam drains your endurance fast. Players report cutting shifts 10–30% shorter from heat buildup alone. Overhead arm motion and torso rotation tighten up too — small losses that stack up across a full game of stickhandling and shooting.
Stick with these if you play semi-contact inline, block shots on defense, or have a history of shoulder or clavicle injuries. Otherwise, you're hauling weight you won't use.
Low-profile shoulder pads (the smart middle ground)
Models like the Sherwood 5030 and Eagle Aero weigh 400–550 grams — about 35–50% lighter than armored ice shoulders. Soft caps, medium-density foam, no extra bulk. You still get sternum, rib, and clavicle coverage against pucks and incidental contact. Competitive inline players tend to land here. Real protection, no roasting inside full ice gear.
Padded shirts (inline-specific)
At 150–300 grams, padded shirts are compression base layers. They have 6–10 mm EVA foam zones built into the ribs, shoulders, and sometimes the spine. No hard caps. Full mesh or moisture-wicking fabric throughout. They breathe well and move with you — most players say they barely feel them during skating.
One honest caveat: padded shirts handle lightweight inline pucks (~90–100g) at rec speeds well enough. But they offer limited protection in a direct shoulder-to-concrete fall. Go down hard and awkward, and 6–10 mm of foam won't stop an AC joint injury. Know the tradeoff before you decide.
Which Scenario Fits You?
League Type | Recommended Option |
|---|---|
Competitive inline, semi-contact | Low-profile shoulder pads |
Non-contact only, skilled shooters | Padded shirt (shot-blockers → low-profile) |
Rec / beer-league inline | Padded shirt or nothing |
Outdoor play in heat (25°C+) | Mesh padded shirt |
Prior shoulder/rib/clavicle injury (any level) | Low-profile or full ice pads |
Bottom line: Your ice shoulder pads aren't wrong for inline hockey — they're just more than the job asks for. Playing recreational non-contact inline in a warm environment? A padded shirt covers what matters and keeps you comfortable the whole game. Save the full armor for the rink where it actually earns its weight.
Stick & Puck Compatibility: Same Stick, Different Feel
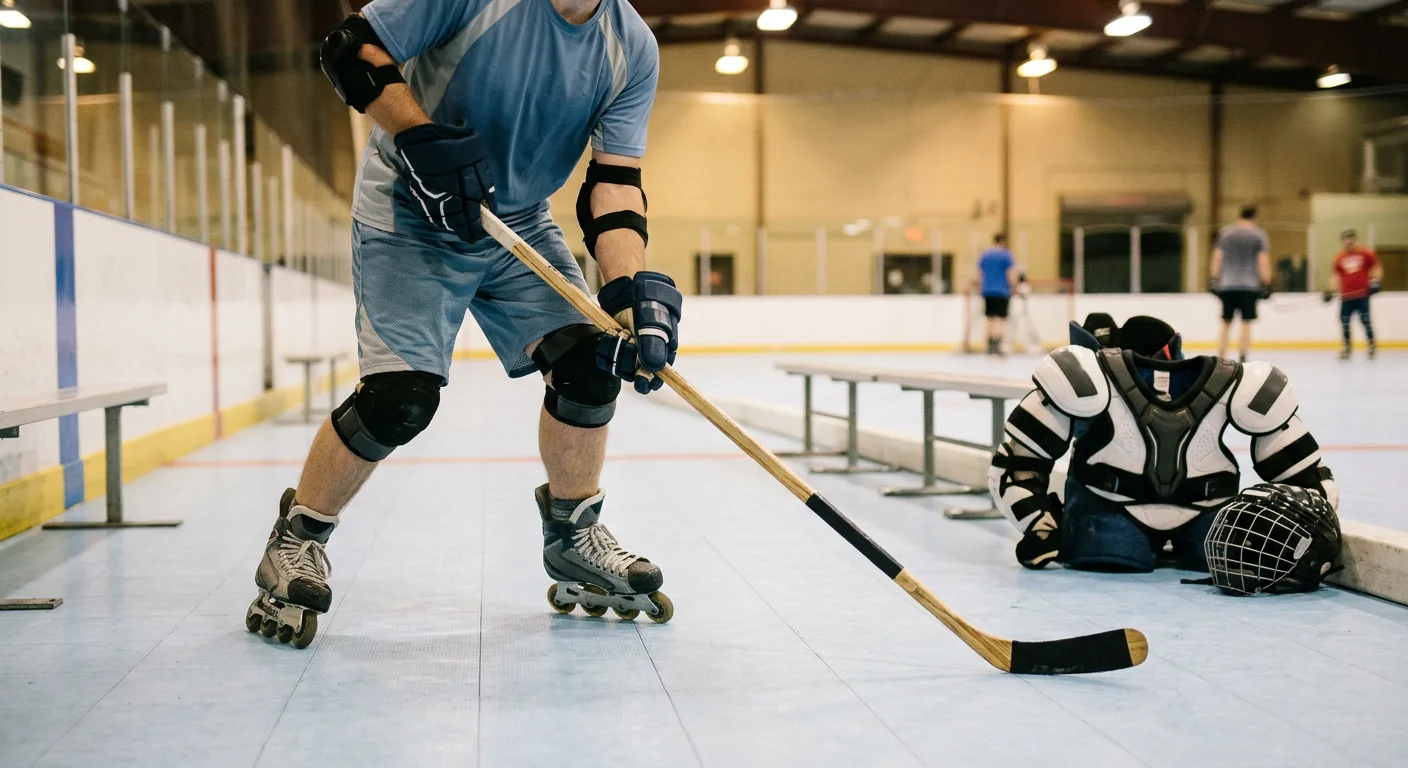
Your stick makes the trip from ice to inline without a single modification. Flex, curve, lie, length — none of those numbers change because the surface does. Every major hockey gear manufacturer's flex formula is built around one variable: body weight. A 160-pound player starts at 70–80 flex on ice. That same 160-pound player starts at 70–80 flex on sport court. The puck type doesn't enter the equation.
What does change is how that puck behaves on your blade.
The 43-Gram Gap That Rewires Your Hands
A standard NHL rubber puck weighs 5.7 oz (161g). The inline plastic puck — the kind with raised bumps for surface glide — comes in at 4.15 oz (118g). That's a 27% weight reduction on the same blade, with the same stick, on the same shot motion.
Here's what that gap does in practice:
Shots release faster and feel lighter — the inline puck jumps off the blade quicker, but that "solid thwack" feedback is gone
Passes feel easier to receive — less impact force hits the blade, so bobbled catches drop off
Hard blades make it worse — a stiff Vapor-style blade paired with a lighter plastic puck creates a bouncy, unpredictable feel that exposes sloppy hands
The fix is simple. Add tape layers to your blade for inline play. More tape = more friction and damping. That extra wrap pulls the feel of both pucks toward the same middle ground.
Recalibrating Without Changing Your Stick
Muscle memory is the real asset here. Lock in your flex, kick-point, and curve pattern — those motor patterns hold no matter which puck sits on the blade. The adjustment isn't about your stick. It's about your hands getting used to the lighter load.
Try this drill. Take 15 wrist shots with a rubber puck. Then switch to the inline puck using the exact same motion . The plastic puck releases earlier. You'll feel it right away.
Do this for two or three sessions. Each time, pull back 5–10% of your force on inline shots. Your timing resets on its own, and you stop launching shots over the net.
One note for outdoor or asphalt sessions: use a cheaper stick or a backup model built to the same specs. Rough surfaces chew through blades fast. Save your game stick for the rink.
Minimum Inline Hockey Setup Using Ice Gear (Cost-Saving Blueprint)
Here's the number that matters: $150–$200.
That's all it costs to move from ice hockey to inline — as long as you already own a full set of protective gear. One purchase. One line item. The rest of your bag comes along for free.
Most "gear guides" skip this part. They list every piece of equipment you could buy. This section tells you what you need to buy.
What Crosses Over for Free
Every piece of protective gear you own transfers over at zero cost:
Helmet + cage/shield — HECC certified on ice, HECC certified on sport court. Check the expiration sticker, check the hardware, done.
Elbow pads — same coverage, same function. A bit warmer on the rink. That's not a reason to replace them.
Shin guards — full carry-over. Tape them in place if they shift without a skate boot's tongue holding them.
Gloves — same protection. Inline runs hotter, so your hands will sweat more in long sessions. That's a comfort issue, not a safety one.
Shoulder pads — legal in most inline leagues. Warmer and bulkier than inline-specific options. Still functional.
Stick, jock/jill, mouthguard — zero changes, zero cost.
That's the full protective stack. Moving it from your ice bag to your inline bag costs nothing.
The One Purchase You Can't Skip
Inline hockey skates. Everything above crosses over. Skates don't.
Entry-level skates built for real league play run $150–$200 . Mid-range options sit at $200–$350 (Tour Code 1, Alkali Revel 1). These get closer to the feel and support of a proper ice boot.
Want to skip buying a second pair of skates? Chassis conversion kits are an option. Pull the blade holder, drill new mount points, bolt on an inline chassis and wheels. Parts plus installation run $120–$200 . This makes sense for premium ice boots ($600+) that are still solid and in good shape. For most players on a tight budget, purpose-built inline skates at $150–$200 are the smarter move.
Three Budget Tiers — Pick Your Number
Setup | What You Buy | Total New Spend |
|---|---|---|
Bare minimum | Entry inline skates only | $150–$200 |
Practical + comfortable | Mid-range skates + inline pants | $250–$330 |
Full inline experience | Mid/high skates + extra wheel set + inline pants | $350–$530 |
The bare minimum gets you on the rink. The practical tier adds inline pants ($50–$80). They're lighter, more breathable than ice pants, and some leagues require them. The full setup adds a second wheel set. That's useful for players who split time between indoor and outdoor surfaces.
For context: a complete inline setup built from scratch — skates, pads, helmet, stick — runs $200–$400 minimum. Players converting from ice spend 50–70% of that figure . Their protective gear is already paid for. That's the advantage.
One Honest Note on Pants
Ice hockey pants are legal in many inline leagues. They're also hot, stiff, and made for a cold environment. Playing one session a week at a climate-controlled rink? They're fine. Playing outdoor summer games or back-to-back shifts in a warm facility? The swap to roller pants at $50–$80 pays off fast. You'll feel the difference before the second period ends.
The bottom line is simple: your protective investment from ice hockey isn't lost money. It's your inline hockey starter kit — minus the skates.
Inline Hockey Gear Buying Guide: What to Prioritize When Upgrading
Smart upgrades beat fast upgrades. The order you buy matters more than most players think.
Break your gear decisions into three tiers:
Tier 1 — Upgrade first (biggest impact on performance and safety)
- Inline hockey skates
- Helmet + full cage, if yours is expired or uncertified
Tier 2 — Upgrade next (protection and league compliance)
- Girdle + roller hockey pants
- Shin guards, elbow pads, gloves
Tier 3 — Upgrade last (refinement, not necessity)
- Stick upgrade once your hands outgrow what you have
- Wheel and bearing fine-tuning by surface and body weight
- Accessories — socks, tape, bags
One rule applies across every tier: never put appearance before function. New jerseys and logo bags won't stop a fall. Skates and padding do. Some players buy gear for looks before sorting out protection. Those are the players who get hurt — or get turned away at the door.
Start with skates. Build everything else from there.
Conclusion
Most of your ice hockey gear is already an inline hockey gear bag — you just don't know it yet.
Helmets, gloves, shin guards, elbow pads, sticks? Keep them. That gear you already paid for works just as well on the inline rink. Protection and performance stay intact. The one swap you can't skip is your skates — ice blades don't belong on a sport court, full stop. Got traditional ice hockey pants? Try pairing them with an inline girdle. Or make the full switch for better airflow and easier movement.
That's it. Two decisions. Everything else is optional.
A seasoned ice player filling the off-season? A newcomer building a first setup on a budget? Either way, inline hockey protective gear doesn't mean starting over. You likely have more than you think.
Check out performance-ready hockey apparel and gear at berunclothes.com — made for players who play smart, on every surface.