Table of Contents
You're standing in your bedroom at 6 AM. You're staring at your bike gear with that familiar mix of excitement and confusion. Do you need padded cycling shorts for a 10-mile ride? Will your regular gym clothes work just fine? And why does everyone on the trail look like they stepped out of a Tour de France catalog while you're here in cotton sweatpants?
Here's the truth: what you wear affects your comfort, performance, and safety. But the "right" outfit looks different based on your ride. Commuting downtown needs one setup. A century ride needs another. A rainy autumn morning? That's different too.
This guide breaks down what to wear (and what you can skip) for every weather condition and riding style. We focus on a practical budget approach. You'll learn which gear makes a difference and which you can ignore. Think of it as your personal cycling wardrobe consultant. No intimidating jargon. No unnecessary upselling.
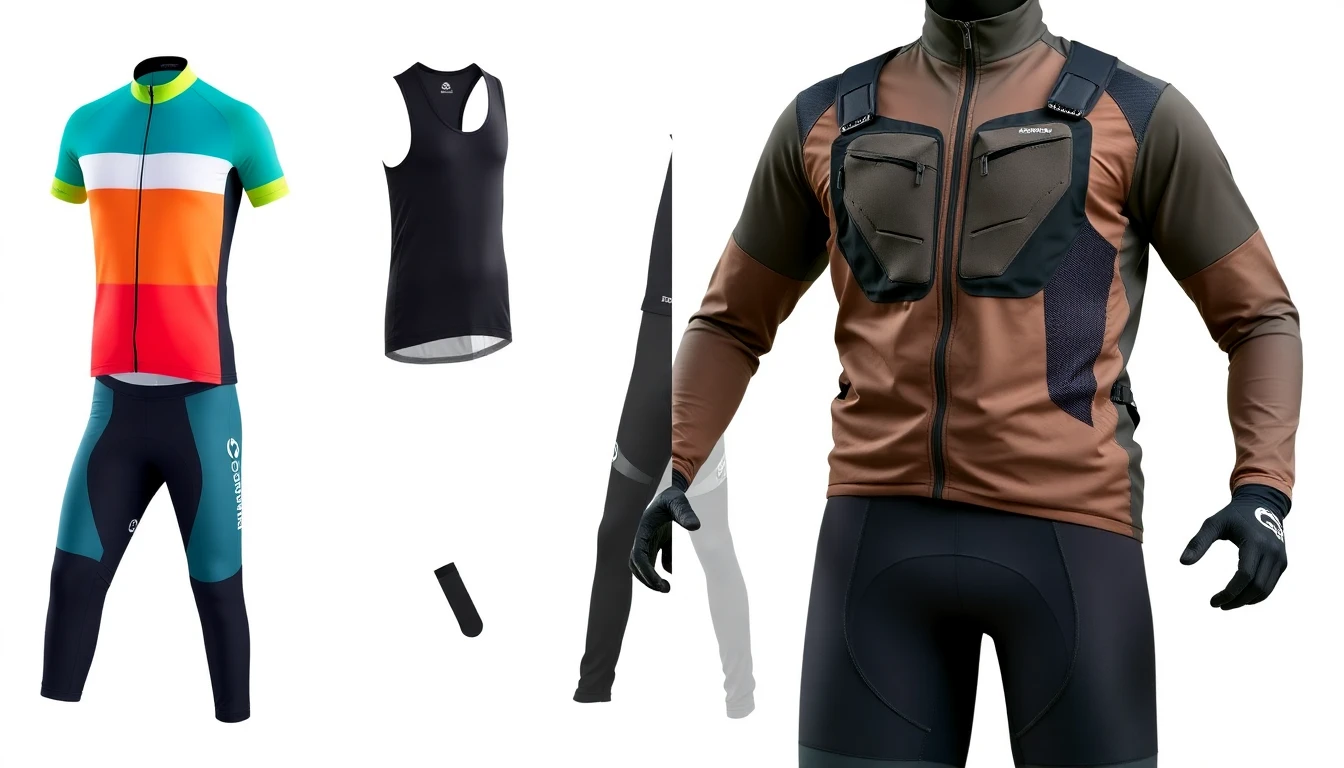
Essential Cycling Clothing: Head-to-Toe Checklist
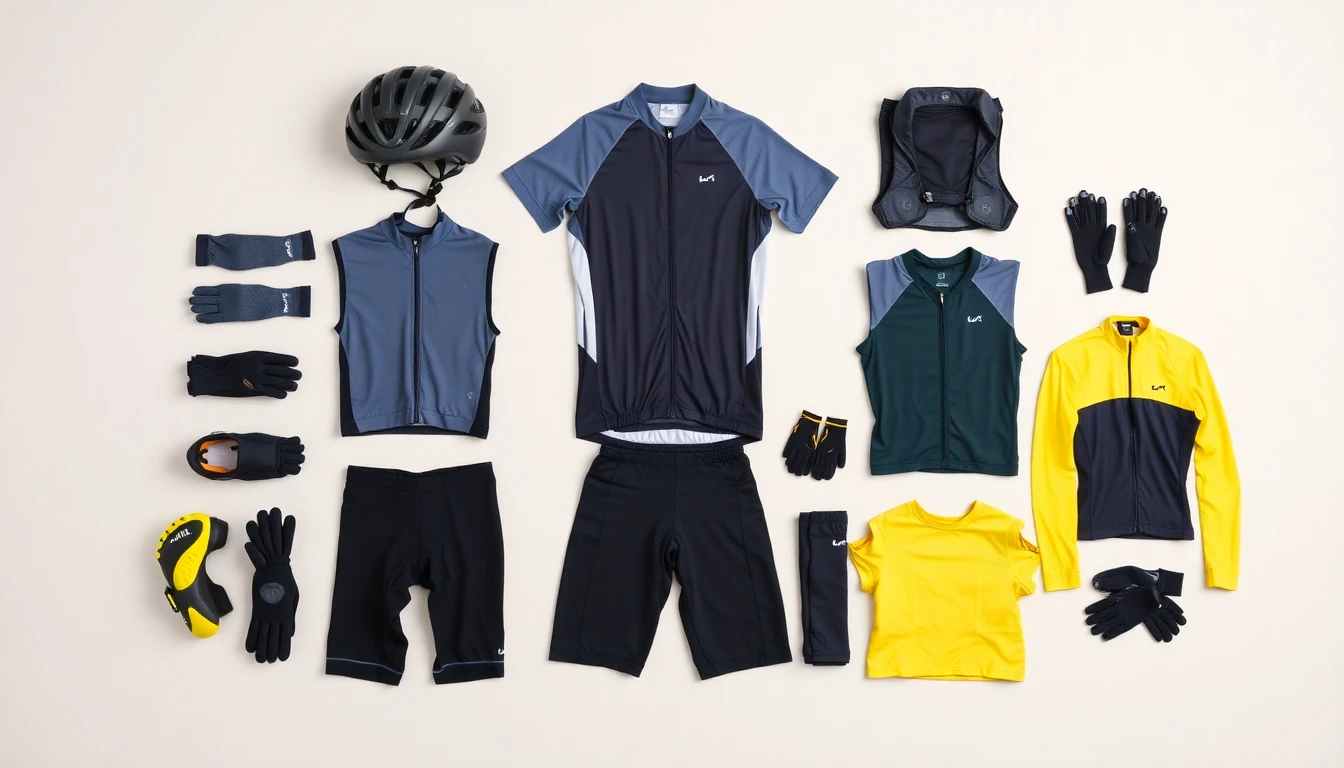
Let's build your cycling wardrobe from the ground up. Each piece serves a specific purpose. Some items you can't skip. Others can wait until your third or fourth ride.
The Must-Have Foundation (Priority 1-2)
Bike Helmet : This isn't optional. Your helmet absorbs impact in a crash. Modern designs are light and well-ventilated. You won't feel weighed down. Look for models with visors if you ride in rain. Budget $50-200 depending on features.
Padded Cycling Shorts or Cycling Bib Shorts : Here's where beginners make their biggest mistake—they skip the chamois pad. That cushioned insert reduces friction by 100%. It's the difference between enjoying a 20-mile ride and limping home after mile five. Bib shorts stay in place better than traditional shorts. No waistband means no chafing around your middle. The synthetic stretch fabric wicks sweat away from your skin. For women, look for patterns with flared hips and no bottom elastic. Drop-tail designs make bathroom breaks easy. Invest $80-150 in quality bibs. Your backside will thank you.
Cycling Jersey and Base Layer : That cotton gym shirt? It absorbs sweat and stays wet. A proper cycling jersey uses fabric that pulls sweat away from your body. The extended tail covers your lower back in the riding position. Front zippers let you adjust airflow mid-ride. Short sleeves work for summer. Long sleeves for cooler months. Add a cycling base layer underneath on cold days. Technical fibers or merino wool control your body temperature. They keep you warm without overheating.
Cycling Gloves : Your hands absorb road vibration for hours. Padded gloves cushion those three key contact points (hands, seat, feet). They protect your palms if you fall. Fingerless for summer. Full-finger for winter.
Important Additions (Priority 3-4)
Cycling Glasses : Wind dries out your eyes. Dust and bugs come at your face. Clear lenses for cloudy days. Tinted for sunshine. Double protection that costs $30-100.
Windproof Cycling Jacket or Vest : Weather changes fast. A packable jacket weighs almost nothing in your pocket. Breathable fabrics stop that clammy feeling. A vest paired with arm warmers gives you temperature control. Budget $70-200 for versatile options.
Cycling Shoes and Socks : Regular sneakers work at first. But cycling shoes boost power transfer through clipless pedals. They're your third touch point with the bike. Technical cycling socks wick moisture. No cotton here either. Cotton traps sweat and causes blisters.
Nice-to-Have Extras (Priority 5)
Reflective Cycling Gear : Bright colors and reflective strips make you visible. A must for dawn or dusk rides.
Leg Warmers and Overshoes : These extend your riding season. Leg warmers slide on during cold mornings. Overshoes keep rain out.
Cycling-specific clothing versus ordinary sportswear? Function. Every seam, fabric choice, and cut fits your position on the bike. That snug fit reduces wind resistance. Extended jersey tails stay put. Chamois padding sits right where you need it. Regular athletic wear flaps, bunches, and holds moisture.
Start with the essentials. Add pieces as your riding increases. Your body will tell you what it needs next.
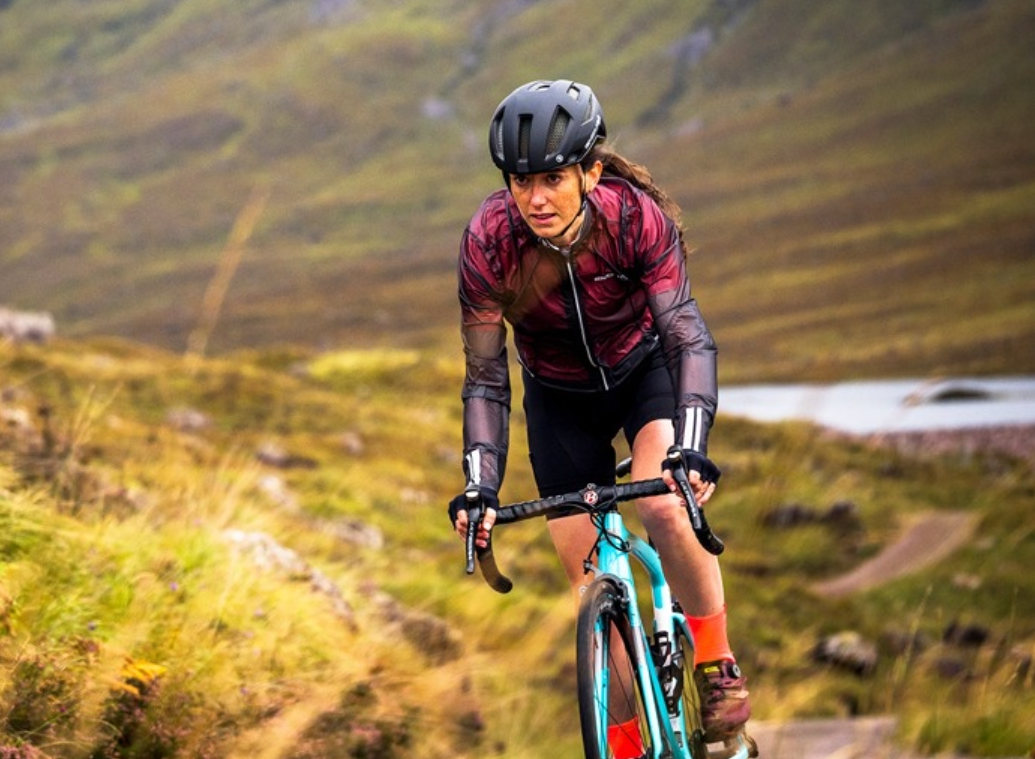
Summer Cycling Outfit (Above 65°F/18°C)
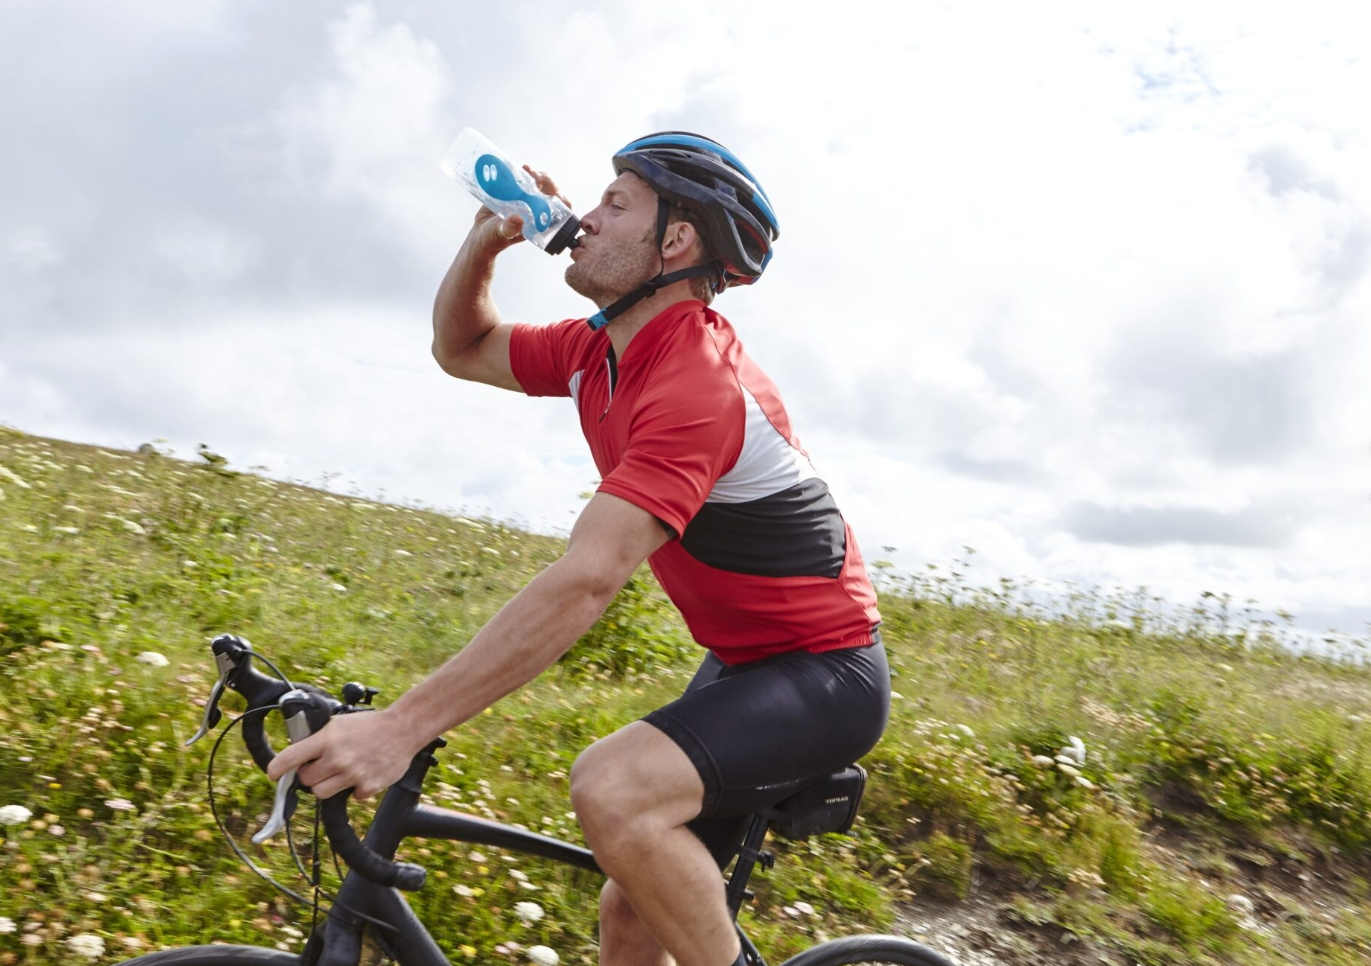
Warm weather riding is all about that sweet spot between staying cool and protecting your skin. Your core summer setup starts simple: a short-sleeve cycling jersey (look for 110-130g weight with 10-15% Lycra for stretch), paired with padded cycling shorts or cycling bib shorts . Skip heavy fabrics. Polyamide blends breathe better than polyester in heat. They pull sweat away faster too.
The Base Layer Question
Even in summer, a cycling base layer makes sense. Choose sleeveless or mesh styles in synthetic fabric. They dry faster than merino wool above 68°F. The base layer creates an air gap between your skin and jersey. This speeds up evaporation. You stay cooler, not soggier.
Sun Protection Without Overheating
Here's the tricky part: blocking UV rays while keeping airflow. Modern moisture wicking fabric jerseys have UV-protective fibers built in. Look for UPF ratings on product tags. Tall collars or flip-up designs shield your neck from sunburn. But don't sacrifice ventilation. Mesh panels in the armpits, across the back, and down the sleeves pull air through as you ride. This creates cooling airflow. Light colors reflect heat better than dark ones. White, pale blue, or silver work best.
For serious sun exposure, try long-sleeve jerseys. Laser-cut fabric to the elbows gives you both speed and protection. They're not just for pros.
Smart Accessory Choices
Cycling socks should be light and short—5-6cm height is plenty. Thin mesh synthetics with silicone grips at the ankle prevent slipping. Budget around $15 for quality pairs from Giro or Sportful.
Your bike helmet needs good ventilation. Look for models under 300g with 18-21 vents. Breathable pads with tiny holes and germ-fighting straps prevent that swampy feeling. Skip aero helmets in summer heat—they trap warmth.
Cycling gloves go fingerless for ventilation. Your hands release heat better with air exposure.
Polarized cycling glasses cut glare better than color-changing lenses in bright summer sun. They're a straight upgrade for sunny rides.
A light windproof cycling jacket vest—full zip and sleeveless—fits in your back pocket. Pull it out if morning warmth turns into cooler evening air.
Avoiding Overheating
Heat management matters more than looking fast. Front zippers on jerseys aren't just for show—unzip them to dump heat on climbs. Those three back pockets? They hold water bottles, snacks, and a packable gilet. No extra bags needed. Laser-cut sleeve and waist hems with silicone grippers keep everything in place. No added bulk or trapped heat.
The fit should feel snug but never tight. You want medium compression at most. Your jersey and bib shorts should move with you, not against you.
Temperature range for this setup? It works from 68°F up to 104°F. Just adjust how much you unzip that jersey.
Spring/Fall Cycling Outfit (50-65°F/10-18°C)
.
Spring and fall weather changes fast. That 50-degree morning? It hits 70 degrees by afternoon. You heat up on climbs. You cool down on descents. The fix? Layers you can add or remove while riding.
The Flexible Foundation
Start with a moisture wicking fabric of cycling apparel base layer and a long-sleeve cycling jersey . At 50°F, wear padded cycling shorts under tights. Or add leg warmers . Pick a heavier long-sleeve jersey with a sleeveless wicking base underneath. You can also do it the other way: lightweight long-sleeve jersey over a long-sleeve base. Both work. It depends on how you handle cold.
By 60°F, skip the tights. Shorts and your long-sleeve jersey work fine. Add a thin long-sleeve base if the morning air feels crisp.
Removable Pieces That Make Sense
Arm warmers are perfect for this temperature range. Slide them up to your elbows as you warm up. Pull them down as clouds roll in. Great for 50-55°F starts. Stuff them in your jersey pocket once you hit your rhythm.
Leg or knee warmers do the same thing. Full leg coverage works for starts below 50°F. Switch to knee warmers once your muscles heat up above 50°F. They're light enough to carry.
A packable windproof cycling jacket vest gives you protection without bulk. Throw it on if the sky looks gray. Or if moisture hangs in the air. Take it off as temperatures climb toward 65°F. It rolls small enough to forget it's there.
Cycling shoes need neoprene covers below 50°F. Skip them if you're warming up fast to 54°F or above. Spring and fall cycling socks in merino wool work across the whole range.
The Morning-to-Afternoon Temperature Shift
Here's a real example: 45°F at sunrise, 72°F by lunch. Start with leg warmers, long-sleeve base, jacket or vest, headband, and cycling gloves . Your core heats up after 10-20 minutes. Stow the jacket in your frame bag. Push arm warmers to your elbows.
Mid-ride, once you pass 55°F, strip down to shorts and jersey. Unzip that front zipper for airflow. On descents or shaded sections, pull those arm warmers back down. You're controlling your comfort as you ride.
Quick Decision Chart
Cold, windy 50°F start : Leg warmers + vest + shoe covers = four layers total
Warming to 55-60°F in sun : Drop vest and leg warmers = two to three layers
Hitting 65°F : Remove arm warmers and gloves = jersey and shorts
Your effort level matters too. Hard rides need lighter base layers. Easy pace? Add that mid-layer.
Thin full-finger gloves work from 45-50°F. Above 60°F, your hands stay comfortable bare. A headband or ear cover helps below 50°F. Add a skull cap if wind picks up.
The 50-70°F range needs that moisture wicking fabric base layer. It controls your body temperature as conditions change. Below 50°F, focus on insulation. Above 65°F, focus on airflow.
Your tolerance runs about 5°F either way from these benchmarks. The goal? Feel cool but not cold as you clip in. You'll warm up within minutes.
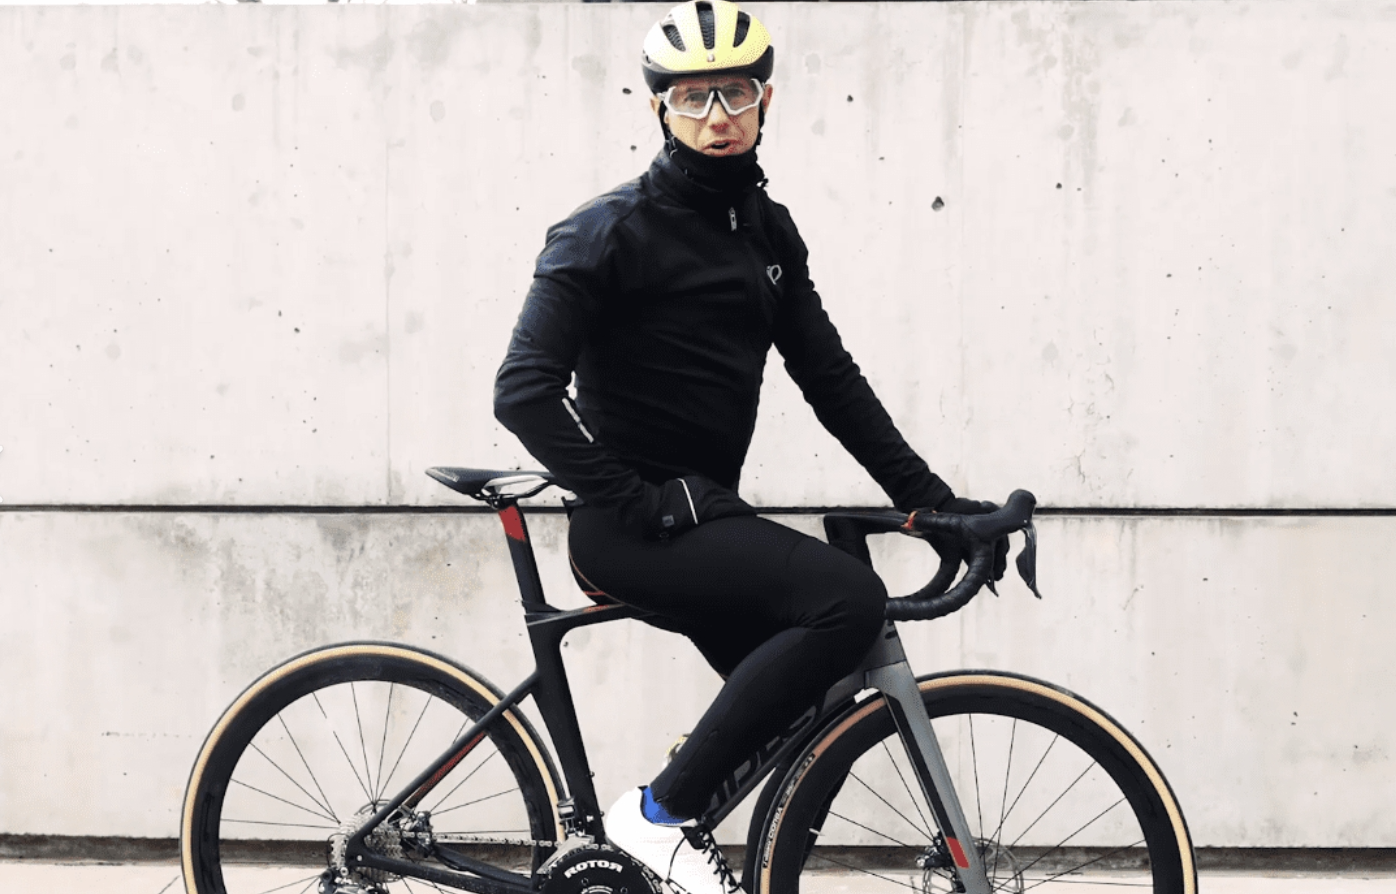
Cold Weather Cycling Outfit (30-50°F/-1-10°C)

Cold air changes everything about your ride. Your fingers go numb. Your toes lose feeling. That wind cuts through regular clothes like they're not even there. The fix isn't piling on every piece you own. It's about smart layering that keeps you warm without turning you into a sweat factory.
The Three-Layer System That Works
Your upper body needs three distinct layers. Start with a thermal cycling base layer —long-sleeve with a mock turtleneck works best. Look for heavyweight wicking fabric if you're riding below 40°F. Merino wool or synthetic blends pull moisture away from your skin. This stops that clammy feeling.
Next comes your insulated cycling jersey . Heavy long-sleeve styles in fleece or powerstretch fabric trap heat. Merino wool jerseys work great here too. They control temperature better than synthetics alone. Choose lined or fleecy options for the 32-45°F range.
Your outer shell blocks wind and light rain. A lined windproof cycling jacket or soft-shell does the job. Gore Windstopper technology stops cold air dead. Fleece-lined shells add warmth without bulk. A windproof vest over your jersey works for milder 45-50°F days. This gives you heat control while you pedal.
Legs and Lower Body Protection
Thermal tights or heavyweight bib tights replace your padded cycling shorts totally. Pearl Izumi fleece tights handle the full 30-50°F spectrum on commutes. For longer rides, wear cycling bib shorts under your tights. This gives you essential chamois padding. Add leg warmers if temperatures hover near 45-50°F and you want flexibility.
The fabric weight matters. Lightweight tights work at 45°F. Below 40°F? You need heavyweight thermal tights with brushed fleece lining.
Extremities Need Extra Attention
Your hands, feet, and head lose heat fastest. Medium-weight full-finger cycling gloves handle 40°F rides. Drop to 35-30°F? Switch to heavyweight windproof gloves. Two-layer windproof fleece gloves work at the coldest end of this range.
Feet require wool cycling socks plus neoprene shoe covers below 40°F. Gore Windstopper booties seal out wind and moisture. Winter cycling shoes with room for thick merino socks make a difference. Chemical toe warmers help if you have poor circulation.
Cover your ears with a headband from 45-30°F. A lined skull cap works at 30°F. Skip the balaclava unless you're riding below 32°F. It traps too much sweat and leaves your head soaked.
The Overdressing Trap
Here's what beginners get wrong: they layer up until they can't move. Then they sweat. That moisture freezes on descents. You end up colder than if you'd worn less.
The test? You should feel a bit cool at the start. Within five minutes of pedaling, your core warms up. Comfortable standing still? You're overdressed.
Open vents on your shell jacket during climbs. Remove your vest and stash it in your jersey pocket. Arm warmers and knee warmers give you temperature control mid-ride. You need to remove everything without stopping.
At 32-45°F, stick with base layer plus jersey plus vest. This combo breathes well. At 30-35°F, you need all three upper layers sealed. But keep those vents handy.
Quick Temperature Guide:
45-50°F : Base layer, short-sleeve jersey, windbreaker vest, thin full-finger gloves, bibs with knee warmers, headband, wool socks
40-45°F : Long-sleeve heavy jersey, lined jacket, medium gloves, tights, headband, winter shoes with covers
35-40°F : Heavy turtleneck base, heavy jacket, heavy gloves, heavyweight tights, skull cap, shoe covers with toe warmers
30-35°F : Heavy base, heavy jacket, heavy gloves, heavyweight tights, lined skull cap, booties with wool socks and toe warmers
Your effort level shifts these ranges by 5-10°F. Hard intervals? Dress for 10°F warmer. Easy recovery pace? Add an extra layer.
Below 40°F, neoprene shoe covers are essential. Pair them with wool socks—never cotton. Balaclavas work for wet 25-30°F rides but cause sweat buildup above 32°F. Stick with headbands and ear warmers in the 30-50°F sweet spot.
The goal? Finish your ride warm and dry. Not soaked and shivering.
Extreme Cold Cycling Outfit (Below 30°F/-1°C)
Sub-freezing rides aren't for everyone. But if you're committed—or winter commuting is what you do—you need a different approach. The three-layer system from the previous section? That's where you start. Below 30°F, add a fourth layer. Seal every gap where cold air sneaks through.
Building Your Four-Layer Upper Body System
Your heavyweight thermal cycling base layer stays the same. Merino wool or synthetic with flatlock seams. Form-fitting with an extended back. This pulls sweat away from your skin. Temperatures can drop to single digits.
Add a midweight synthetic base if you're riding below zero. Two base layers sound like overkill. Wait until you feel that first 5°F morning. The air gap between them traps warmth. No extra bulk.
Your mid-layer needs serious insulation. Polartec Alpha Direct fabric is the gold standard here. Velocio Alpha LS or Pearl Izumi Pro Alpha work well. They're lightweight. They breathe well too. They dry fast if you start sweating on climbs. Traditional fleece traps moisture. You end up clammy.
Your outer shell can make or break this setup. Pick a thermal softshell. Look for windproof panels, breathable vents, high collar, extended cuffs, and a dropped tail. Wet conditions below freezing? Switch to a hardshell. Get one rated 15,000mm waterproof and 15,000g/m² breathable. Polartec NeoShell or a Stow H2O Jacket with sealed seams and waterproof zippers keeps freezing rain out.
The Chrono Pro Alpha works in the 25-45°F range. Below 25°F, you need that full four-layer setup. Seal it tight.
Lower Body and Extremity Protection
Get insulated bib tights with windproof front panels. Super Roubaix fabric with thermal brushed interiors handles the worst cold. Add thermal shorts or knee warmers underneath. This gives you modular warmth control. Bontrager makes knee warmers that layer well. They don't restrict movement.
Your feet need thermal wool cycling socks plus Gore Windstopper booties. Neoprene shoe covers with thermal lining work too. Heated insoles make sense for rides longer than an hour. Frostbite hits toes first.
Hands need layered heavy thermal cycling gloves . Or neoprene with thermal lining. Look for wrist seals or built-in gaiters. Sealskinz gloves with windproof palms and good-grip fingertips handle the full sub-30°F range.
Your head loses 40% of body heat. A windproof balaclava or helmet liner covers your face. Switch to a winter hat under a less-vented bike helmet . Zero exposed skin. That's the rule below 30°F.
The Frostbite Prevention Checklist
Exposed skin gets frostbite in under 15 minutes. Wind chill below -10°F makes this happen fast. Use a full face mask, high collar, sealed cuffs where gloves meet jacket sleeves, neck gaiters. Cover everything. Check your setup before you leave. No gaps allowed.
Layering has limits. Four layers on your torso is the max. More than that restricts your pedaling motion. Your arms can't swing right. Breathability matters more than bulk. Look for vents and mesh panels. These let moisture escape. Sweat freezes against your skin if it can't evaporate.
Monitor your core temperature. Keep it above 95°F by increasing effort 10-20%. Watch your hands and feet. Check them often. Numbness in under five minutes? Turn around. Do it now.
When Not to Ride
Wind chill below -10°F/-23°C creates high frostbite risk in under 30 minutes. Don't ride. Period.
Freezing rain or sleet makes roads unsafe. You can't see well. Traction disappears. Fire up Zwift instead.
Ice on roads without studded tires? That's a crash waiting to happen. Can't see beyond 100 yards? Wind gusts over 20mph? Stay home.
Fingers or toes go numb after 10 miles or 30 minutes despite full gear? Stop riding. Sub-zero temps plus wet conditions? That's a hard no.
Studded tires become a must below 23°F if there's any road moisture. Ice forms where you can't see it. Regular tires won't save you.
The goal isn't toughness. It's finishing your ride without injury or frostbite. Know your limits. Respect the cold.
Rainy Day Cycling Outfit

Rain doesn't care about your training schedule. It shows up uninvited, turns your morning commute into a wet mess, and makes you question every gear choice you've made. The difference between a miserable slog and a manageable ride? Three layers that work together.
Upper Body: The Three-Layer Shield
Your windproof cycling jacket needs to be waterproof first, breathable second. Look for a water pressure rating of at least 5,000mm for light to moderate rain. Commuting in steady downpours or riding longer than an hour? You need 10,000-20,000mm . That number tells you how much water the fabric can handle before it soaks through.
Taped seams matter more than you think. Rain finds every unsealed stitch. Get a jacket with adjustable cuffs that seal around your wrists. The tail should be extended to cover your lower back in riding position. Reflective details help drivers see you through their windshield wipers.
Below 50°F, add a thin fleece mid-layer between your jacket and base layer. Skip cotton—it holds water like a sponge. A moisture wicking fabric of cycling wear base layer or merino wool pulls sweat away from your skin. This keeps you warm even in damp conditions.
Lower Body: Two Approaches That Work
Option A: Breathable Tights Plus Rain Pants
Start with stretchy cycling tights that wick moisture and keep you warm. Pull waterproof rain pants over them. These should be loose enough to pedal but fitted enough they don't catch your chain. The pant leg should extend 3-5cm past your shoe in standing position. Bend your knee in riding position—they should still cover the top of your foot. This stops rain from running down your pants straight into your shoes.
Look for rain pants with reflective ankle straps . They keep fabric from tangling in your drivetrain and make you visible from behind.
Option B: DWR-Treated Water-Resistant Tights
For light rain or wet roads, water-repellent tights work on their own. They have a DWR (durable water repellent) coating that beads water off the surface. They're lighter. They dry faster. They breathe better than full rain pants. The rain picks up beyond a drizzle? Throw packable rain pants over them.
Feet: The Neoprene Solution
Cold, wet feet end rides faster than anything else. Your cycling shoes might need to go up half a size to fit thick merino wool or synthetic cycling socks underneath. Even wet, these materials keep your feet warm.
Neoprene shoe covers are essential in rain. The same material that keeps surfers warm works for cyclists. Pull them up to mid-ankle height minimum. They should overlap your rain pants by 3-5cm . This creates a seal where water can't sneak through. They block spray from your front wheel and water running off your pant legs.
Waterproof socks—merino blends or synthetic—add another layer of protection. Pair them with your regular shoes. Or layer them under neoprene covers for double defense.
Hands and Extremities
Water-resistant cycling gloves keep your hands functional. You need to brake. You need to shift. Numb fingers can't do either. A two-layer system works best: thin merino or synthetic liner gloves inside waterproof shell gloves. The liner keeps you warm even through moisture. The shell blocks wind and rain.
Your jacket cuffs and glove cuffs should overlap by 2-3cm at your wrists. No gaps. Water runs down your arms in riding position. Seal that entry point.
The Waterproof-Breathable Tradeoff
Here's what the numbers mean for shopping:
Waterproof ratings (mm):
- 5,000mm : Handles moderate rain for short rides
- 10,000mm : Reliable for steady rain and commuting
- 20,000mm : Heavy downpours and long-distance riding
Breathability ratings (MVTR g/m²/24h):
- 5,000 g/m²/24h : Basic breathability
- 10,000+ g/m²/24h : Better for medium to hard efforts
That second number matters as much as the first. A jacket that's 100% waterproof but doesn't breathe? You'll be soaked from the inside out. Your sweat has nowhere to go. Hard rides need high breathability. Otherwise you're trapping moisture against your cycling base layer .
The best rain gear balances both. You stay dry from outside rain and inside sweat. That's the sweet spot that makes riding in weather feel less miserable and more like just another day on the bike.
Cycling Outfit for Different Riding Types

Your commute looks nothing like a century ride. A mountain trail needs different gear than a city bike lane. The outfit that works for one fails for another. Here's how to match your wardrobe to your wheels.
Commuter and Urban Cycling
Commute to work without looking like you survived a storm. All-weather protection transitions from bike to desk. A windproof cycling jacket in black or navy works over business casual clothes. Reflective strips on the sleeves and back keep you visible in traffic.
Moisture wicking fabric jerseys in casual cuts replace traditional cycling jerseys. They look normal. They perform like technical gear. Pair them with dark commuter pants that have stretchy panels. No one at the office knows they're cycling-specific.
High-visibility vests over your regular clothes work for short rides. Packable rain shells stash in your work bag. Waterproof panniers keep your laptop dry. The goal? Function without the full racing kit.
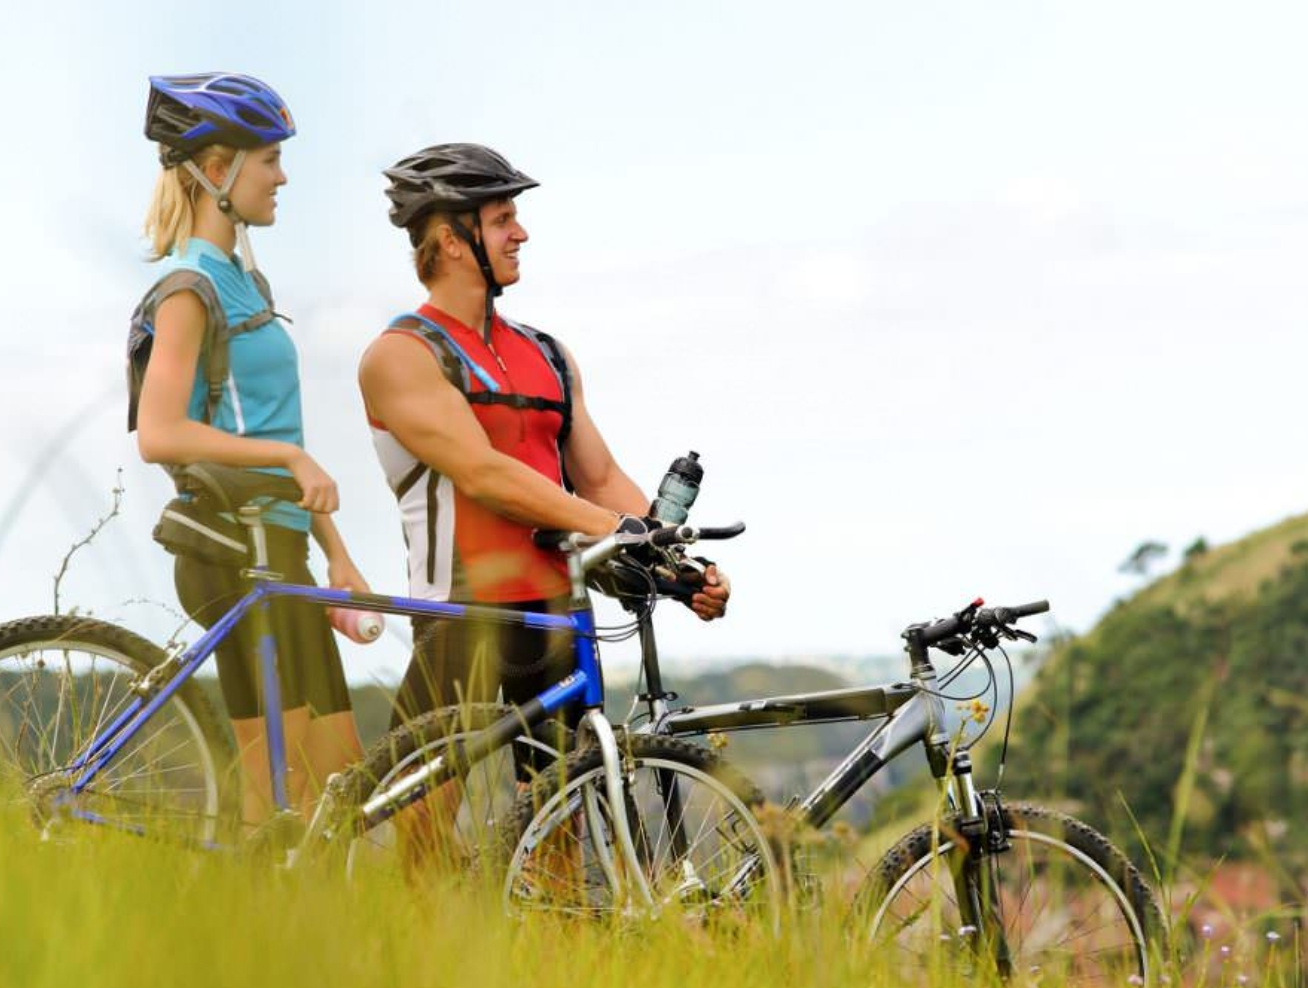
Leisure and Recreational Riding
Recreational riders report the highest discomfort rates—50% according to market research. The fix? Focus on breathability and fit over speed. A relaxed-fit synthetic cycling jersey or merino wool top keeps you comfortable on weekend rides. Padded cycling shorts prevent soreness on those 15-30 mile loops.
Matching compression kits aren't needed. Mix colors. Choose wider designs. This segment makes up 70% of cycling apparel sales. Comfort beats aerodynamics here. Your cycling base layer controls temperature on morning rides that warm up by noon. Cycling gloves reduce hand fatigue. A bike helmet with good ventilation stops overheating.
These riders switch brands often—91% change based on price and fit. Put your money into quality chamois in shorts and breathable jersey fabrics.
Road Racing and Performance
Aerodynamics matter here. Every second counts. Tight-fitting cycling bib shorts and form-fitting jerseys in Lycra or spandex cut drag. Body-mapping designs in performance jerseys boost efficiency. The fabric sits close to your skin. Movement stays free.
Lightweight polyester blends with moisture wicking fabric pull sweat away during hard efforts. Rear pockets hold gels and tools without bouncing. Chamois padding in bib shorts supports 3-6 hour rides. Cycling shoes with stiff soles transfer every watt to your pedals.
Brands like Castelli (28% preference), Vermarc (29%), and Assos (24%) lead this category. Riders here invest in quality. Fit and performance justify higher prices.
Mountain Biking
Trails need durability over sleekness. Tough synthetics handle rocks, branches, and dirt. Padding protects knees and elbows during falls. Looser fits give you full range of motion on technical sections.
Gore-Tex options work for wet trail conditions. Moisture wicking fabric manages sweat during steep climbs. Full-finger cycling gloves with grip palms improve bike control. Your bike helmet needs a visor and reinforced build. Cycling shoes with aggressive tread handle hike-a-bike sections.
The difference between road and mountain apparel? Road gear is tight and light. Mountain gear is tough and protective. Choose based on what your ride throws at you.
Beginner's First Purchase Priority
Your first cycling purchase shouldn't empty your wallet. Most beginners make the same costly mistake—they buy a $500 bike first. Then they realize they need another $300 just to ride it without pain. That's backwards.
Start with three items. Nothing more. A bike helmet , padded cycling shorts , and a basic cycling jersey . That's your $90-150 foundation. These three pieces solve the biggest problems new riders face: safety, saddle soreness, and sweat management.
The $100-200 Smart Start Kit
Here's what works on a tight budget:
Helmet ($40-60): The Bell Nomad MIPS weighs 250g and has a 5-star CPSC safety rating. MIPS technology protects against rotational impacts. You need this before your first ride. No exceptions.
Padded Shorts ($30-50): Pearl Izumi Quest shorts come with 10-12mm chamois padding. That's thick enough to prevent saddle sores on 20-mile rides. The nylon-spandex 80/20 blend wicks sweat and stretches where you need it. Skip the cheap $20 versions. Their padding flattens after three washes.
Basic Jersey ($20-40): The Sugoi Evolution jersey uses polyester mesh with UPF 30+ sun protection. Breathable panels under your arms pull heat away. Three rear pockets hold your phone, snacks, and keys. It looks normal enough for casual rides but performs like technical gear.
Total spend: $90-150. That leaves $50 in your budget for cycling gloves ($25) or a water bottle cage ($15).
Build Your Kit in Phases
Don't buy everything at once. Spread purchases across your first six months:
Phase 1 (Months 0-3, $150-250) : Helmet, padded shorts, jersey. Add flat pedals if your bike didn't include them. Research shows 80% of beginners quit within three months without proper padded shorts. Saddle pain ends rides faster than anything else.
Phase 2 (Months 3-6, $100-200) : Upgrade to clipless pedals like the Shimano PD-E1 ($80). Add a gel saddle ($40) and two bottle cages ($15 each). These comfort upgrades boost your average ride time by 25-30%. You'll notice the difference right away.
Phase 3 (Months 6+, $200+) : Consider carbon wheels ($150 entry-level), a power meter ($100 used), or an aero jersey ($60). Wait until you've logged 500+ miles before investing here. You'll know what you really need by then.
What to Skip (And Why)
Beginners waste money on gear they don't use. Here's what not to buy:
Carbon frames and wheels : 70% of new riders spend $500+ on bikes first. Then they realize they should have budgeted for clothing and accessories. Start with a used $300 frame instead. Upgrade later once you know your riding style.
Aerobars : 85% of beginners never use them. They're for time trials and triathlons, not casual weekend rides or commutes.
Full matching kits : These lose 50% of their value the moment you wear them. Mix and match affordable pieces instead. Your shorts and jersey don't need to match.
Impulse purchases in your first 90 days : 60% of new riders regret buying carbon parts before hitting 100 miles. Wait three months. You'll save 30% by knowing what you really need versus what looks cool online.
Value Brands That Deliver
Good entry-level gear beats expensive gear you can't afford to replace:
Bell Nomad helmet ($50) vs Giro Syntax ($90): Bell weighs 280g with MIPS. Giro weighs 240g with MIPS+. That 40g difference won't affect your first 1,000 miles. Save $40.
Pearl Izumi Quest shorts ($45) vs Rapha Pro ($130): Pearl has 12mm padding. Rapha has 16mm padding with antibacterial treatment. Both prevent saddle sores. Pearl gives you 80% of the comfort at 35% of the cost.
Sugoi Evolution jersey ($35) vs Castelli Free ($80): Both use moisture wicking fabric . Castelli adds UPF 50 instead of UPF 30. Unless you're riding in desert sun for hours, Sugoi works fine. Save $45.
Start simple. Buy quality basics. Upgrade based on what your body tells you after 50 miles on the road.
Conclusion
The right cycling outfit turns every ride into pure joy. No more sweaty struggles. You're commuting through city streets or tackling weekend trails? Moisture-wicking fabrics , padded cycling shorts , and weather-appropriate layers make all the difference. They separate "never again" from "when's my next ride?"
Here's the beautiful truth: you don't need everything at once. Start with the essentials—a quality bike helmet , comfortable shorts, and appropriate footwear. Build your wardrobe as you discover your riding style. That $300 windproof jacket? It can wait. You'll know what you need after logging enough miles.
The cyclists you see in full pro kit didn't start there either. They began where you are now. They figured out what works through trial, error, and yes, a few uncomfortable rides. Fair-weather cyclist versus year-round enthusiast? The difference often comes down to wearing the right thing.
So grab that helmet. Slip into something comfortable and ride. Your perfect cycling wardrobe is waiting to be discovered—one pedal stroke at a time.