You know that sinking feeling? You pull on your favorite jersey and it's lost its snap. Or worse—it smells like yesterday's climb even though it's "clean."
Your cycling kit costs serious money. But those high-tech fabrics that wick sweat and compress your muscles? They're fragile. Common laundry mistakes can ruin them fast.
Toss your bib shorts in the dryer once. The chamois padding might be damaged for good. Use the wrong detergent. You'll coat those moisture-wicking fibers in residue. This traps bacteria that cause odors.
The good news? Caring for cycling clothes is simple. You just need to know a few key do's and don'ts.
Hand-washing a $200 jersey? Machine-washing a full week of cycling gear? This guide shows you how to keep the performance, stretch, and life of your technical fabrics intact. You'll also learn how to eliminate odors that regular washing misses.
Here are the proven methods that keep your cycling clothes performing like new, ride after ride.
Post-Ride Care: Act Fast After Every Ride
The first 15 minutes after you unclip matter most. Skip this window? Sweat turns into salt deposits that destroy fabric. Bacteria grow fast in the moisture.
Rinse right away. Always. Cold water removes 60-70% of salt and bacteria before they stick to fibers. Here's the fastest post-ride routine:
The 3-Minute Quick Rinse
Step 1: Flip everything inside-out. The chamois pad and inner layers trap the most sweat and bacteria. This targets the problem spots.
Step 2: Run cold water through the fabric. Hit the chamois, armpits, and sweaty areas hard. The water turns cloudy—that's salt washing out.
Step 3: Squeeze out water (don't wring). Wringing twists the fibers. It damages the lycra stretch. Cup the fabric and press like you'd squeeze a sponge.
Can't do a full wash of cycling apparel within 4 hours? This rinse buys you time. Hang your rinsed kit to air-dry in a spot with good airflow. Never bunch it in your gear bag. A damp ball breeds bacteria. No detergent can fix that mess later.
Step-by-Step: Hand Washing Cycling Clothes (Safest Method)
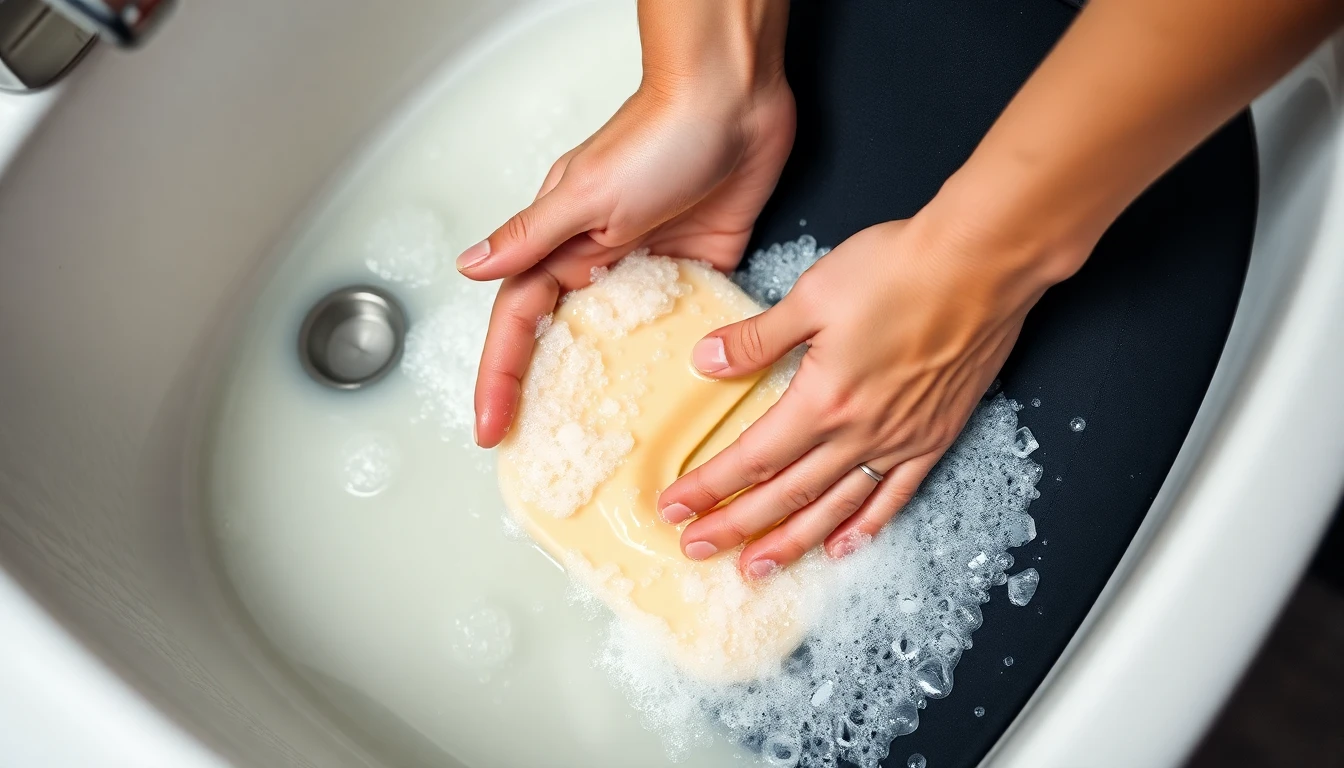
Hand washing cycling apparel gives you full control. You'll protect every seam, fiber, and that pricey chamois padding that makes long rides bearable.
Cold water is a must. Keep it at 30°C (85°F) or lower. Hot water ruins lycra's stretch. It fades printed logos for good.
Prep Your Gear First
Turn everything inside-out. The chamois and inner layers hold sweat, bacteria, and body oils. These cause damage. Flip them so water hits them first.
Close all zippers and velcro straps. Open fasteners snag delicate mesh panels. They create pulls you can't fix.
Washing multiple pieces? Separate colors first. Never soak a red chamois with light jerseys. Red dye bleeds out during long soaks. It stains everything nearby.
For Lightly Soiled Kit (Post-Training Ride)
Step 1: Run your kit under cold tap water or in the shower. This quick rinse clears surface salt and sweat.
Step 2: Squeeze a small amount of mild liquid detergent into your palm. You need about 5-10mL (1-2 teaspoons) total. Put it on the chamois, armpits, and collar areas.
Step 3: Massage with care. Work up a light lather by squeezing and pressing the fabric. Don't wring or twist. That stretches the lycra fibers out of shape.
Step 4: Rinse under running cold water. Keep squeezing (never wringing) until the water runs clear. The fabric should feel clean, not slippery.
Step 5: Press out excess water by cupping the garment. Squeeze like a sponge. One firm press removes most moisture. This won't stress the seams.
This shower method works great for regular ride cleanup. No basin needed.
For Muddy or Heavy Dirt Kit
Fill your sink or a small tub with cold water. Add that same small amount of mild detergent. More soap doesn't mean cleaner clothes. Extra soap leaves residue. This traps bacteria.
Put your turned-inside-out kit in the water. Cover it all. Use your fingertips to work out mud and road grime. Never scrub with brushes. Brushes wear down fabric fibers. They damage moisture-wicking ability.
Standard soak time: 15 minutes for most bib shorts and jerseys. Got stubborn body-oil buildup or deep stains? Let it soak 8-12 hours overnight. The gentle soap breaks down oils. No harsh chemicals needed.
Drain the dirty water. Refill with fresh cold water. Rinse and squeeze several times until no soap remains. Leftover detergent irritates skin on your next ride. It also cuts fabric breathability.
What Not To Use
Skip fabric softener. It coats moisture-wicking fibers. This kills their function. Avoid bleach and chlorine. They eat through lycra cycling shorts and padding. Don't trust "sport wash" products with enzymes made for cotton. Technical fabrics need gentler chemistry.
This hand-wash routine keeps cycling kit quality better than any machine setting. You're treating your gear right.
Step-by-Step: Machine Washing Cycling Clothes
Machine washing of cycling apparel works. But you need to control three things: temperature, agitation, and detergent residue.
Most cyclists ruin their gear by treating it like gym clothes. Technical fabrics need different care. The washing machine isn't the problem. Wrong settings are.
Here's how to wash a full week of cycling kit in one load without destroying anything.
Load Prep: 5 Minutes That Prevent Damage
Turn every piece inside-out before it touches the washer. The chamois pad, jersey armpits, and inner leg panels collect the most bacteria and body oils. Inside-out washing hits these zones first.
Close every zipper. Fasten all velcro straps tight. Open metal zippers act like tiny razors. They snag mesh panels and tear seams. Loose velcro grabs everything nearby. This creates pulls in your fabric.
Drop each piece into a mesh laundry bag. Use separate bags for bibs, jerseys, and socks. This cuts friction between garments by 80%. Skip the bag? Your chamois padding gets crushed against drum walls. This breaks down the foam structure ride by ride.
Pre-treat visible stains now. Dab mild liquid detergent on mud spots, grease marks, or the chamois area. Let it sit 2-3 minutes. Got stubborn chain grease or pad buildup? Mix cool water with detergent in a small bowl. Soak just that section for 8-12 hours before the full wash. Rinse the pre-treated area once before loading.
The Right Machine Settings
Select delicate , hand wash , or sport cycle . Never use normal or heavy-duty modes. Those cycles twist and pull technical fabrics too hard.
Set water temperature to cold or 30°C maximum (86°F). Hot water melts elastic fibers. It shrinks lycra cycling shorts for good. Cold water protects fabric stretch. Plus, it keeps colors bright for years.
Choose low spin speed: 600-800 RPM . High-speed spinning wrings moisture-wicking fabrics too hard. It damages the fiber structure that pulls sweat away from skin. Technical materials dry fast on their own. You don't need high spin.
Add one small capful of mild sport-specific detergent. That's 15-20mL total for a full load. Regular laundry soap contains brighteners and fragrances. These coat technical fibers. Sport detergents rinse clean. No residue left behind.
Skip fabric softener. It creates a waxy film on moisture-wicking surfaces. This traps sweat instead of moving it away from your body. Your kit will smell worse faster.
Turn on extra rinse if your machine has it. Leftover detergent irritates skin. It also reduces breathability. One extra rinse cycle removes all soap.
During and After the Wash
Let the machine run its full gentle cycle. Don't interrupt or add extra agitation time.
Pull your gear out right away after it finishes. Wet technical fabrics left bunched in the drum grow bacteria fast. That creates the sour smell of cycling apparel regular washing can't fix.
Shake each piece to release wrinkles. Hang or lay flat in a shaded spot with good airflow. Direct sunlight fades colors. It also weakens elastic fibers over time.
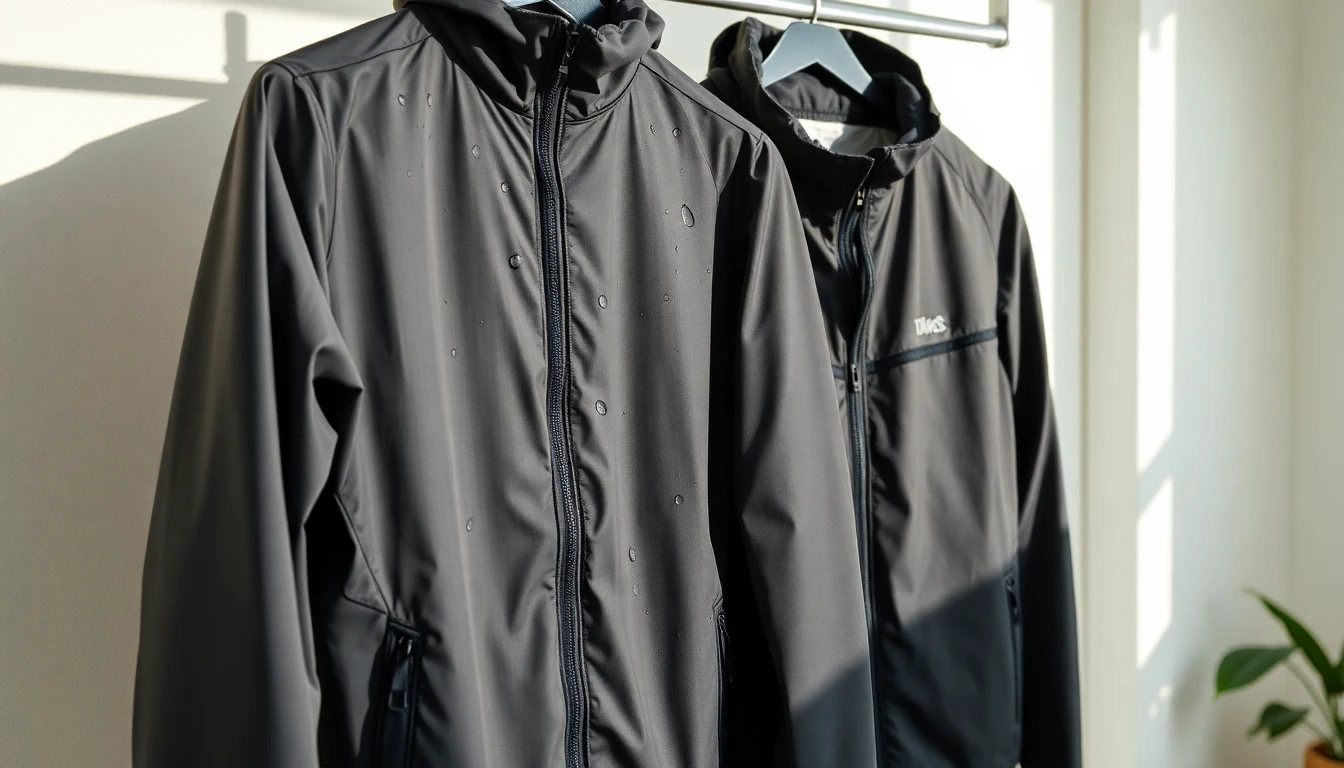
Skip the tumble dryer unless you're reactivating DWR water-repellent treatment on a rain jacket. Even then: inside-out, medium heat at 40°C (104°F) maximum, 40-50 minutes.
This machine-wash method of cycling apparel handles your kit cleaning each week without stress. Your gear stays fresh and performs like new.
Choosing the Best Detergent for Technical Cycling Fabrics
Regular laundry detergent ruins your kit over time. It leaves residue that clogs moisture-wicking fibers. It adds brighteners and fragrances that coat the fabric surface. Your $150 bib shorts stop pulling sweat away from skin. They trap odor instead.
Technical cycling fabrics need special chemistry. The detergent molecules must be small enough to get into tight synthetic weaves. They need to break down body oils and bacteria. This happens without damaging elastics or fading colors.
HEX Performance Advanced Laundry Detergent uses tiny molecules made for tight-knit activewear. These small particles get into dense polyester and lycra weaves where regular soap can't reach. Works in any water temperature. One 32-load bottle costs more upfront but protects your investment. Choose from fresh & clean, citrus wood, crisp linen, lavender fields, or fragrance-free.
WIN Sports Detergent targets the root cause of kit odor: body oils trapped in synthetic fibers. Its low pH formula keeps elastic threads intact. Hot water activates hydrogen peroxide for deep cleaning. A 2022 study confirmed hot-water washing of cycling apparel with low-pH sport detergent kills bacteria. It doesn't shrink technical fabrics. WIN has been the top fitness detergent for over 20 years. It restores stretch and brightens faded colors.
Sweat X Sport Max Odor Defense rinses clean through performance fabrics. This natural, pH-neutral formula removes odor-causing bacteria. No toxic chemicals. It restores wicking ability that regular detergents destroy. Works in standard and HE washers.
Got high-end kit with chamois padding? Assos Active Wear Cleanser protects delicate technical garments. Bicycling magazine tested it on jerseys, shorts, baselayers, and warmers. They used a 30-minute delicate cycle with cold wash and extra rinse. It handled moderate soils well with a clean medicinal scent.
Budget-conscious? Tide Free and Gentle HE delivers strong cleaning on synthetic fabrics at the lowest price point. Plant-based surfactants and enzymes cut through sweat and grime. No fragrances or dyes that irritate skin.
Sport Suds eliminates trail smell from Polartec and synthetics in cold water. Zero residue left behind. Don't use it on Gore-Tex or DWR-treated rain gear. Perfect for everything else except merino wool.
Nikwax BaseWash speeds up drying time and improves cooling. It leaves technical fabrics less greasy compared to regular detergents. Your kit breathes better after every wash.
Match Detergent to Your Washing Needs
For maximum odor and oil removal in technical cycling fabrics: Choose WIN or Sweat X. Both get into tight synthetic weaves where standard cotton-formula detergents fail.
Protecting high-end kits and chamois padding: Use Assos. Its gentle formula keeps expensive technical garments safe.
Restoring wicking without harsh chemicals: Pick HEX, Nikwax, or Sport Suds. These leave zero residue that blocks moisture movement.
Cold wash of cycling apparel for color protection: Go with Tide Coldwater Clean. It prevents fading and shrinking while cutting energy use. The 92 fl. oz. bottle handles 48 loads.
Follow dosage instructions. HEX needs small amounts because its molecules work harder. Concentrated formulas pack more cleaning power per capful. More soap doesn't mean cleaner clothes. It means residue buildup that damages fabric performance.
Pre-Treating Stains: Mud, Grease, and Stubborn Marks
Gravel roads leave evidence. Chain grease marks your calf. Mud splatter dries into your jersey before you get home. These stains don't surrender to regular washing. They need attention before they hit water.
The clock starts the second you notice the mark. Don't let pretreated fabric dry out. Put your treatment on and keep the area damp until wash time. One to two minutes of contact time is enough for most liquid pretreaters. Read the bottle. Follow those timing instructions.
Test first. Always. Dab your pretreatment product on a hidden seam or inside hem. Wait 30 seconds. Check for color bleeding or fabric damage. Technical fabrics react different than cotton gym shirts. This 30-second test saves a $200 jersey.
Aerosol Sprays Work Best on Grease
Chain oil, energy gel residue, sunscreen transfers—these oil marks need solvent power. Aerosol petroleum pretreaters cut through grease better than pump liquids. Products like Shout or Spray 'n Wash contain surfactants. These suspend oil particles. The spray format delivers concentrated solvent where you need it.
Spray the mark. Let it sit 1-2 minutes. The solvents break down the oil structure during this window. Don't rush it. Don't let it dry either.
Heavy-duty liquid detergent works too. Squeeze a small amount on the grease spot. Rub it in with your fingertip. This creates the same surfactant action as aerosol but takes more manual effort.
Mud Needs Acidic Chemistry
Clay and trail mud particles bond different than grease. They need acidic pretreatment to release from synthetic fibers. Patent research shows phosphonic-acid compounds at 0.5-5% concentration work best. The pH needs to drop below 5—but stay above 2 to protect fabric.
Professional cleaning data proves this: mud that "moves around" during water spotting contains tiny particles mixed with water-soluble soil. Simple spotters can't handle heavy mud loads. You must flush it first.
Here's the proven sequence: Put acidic pretreat to dried mud. Wait 5 minutes. The acid breaks particle bonds. Then wash with your regular sport detergent (which runs alkaline, around pH 10). This acid-then-alkali combo lifts mud that alkaline detergent alone can't touch.
Don't have specialized acidic pretreat? Rinse mud under cold running water first. Scrape off dried chunks with your fingernail before any chemical treatment. This mechanical removal cuts the soil load by 60-70%. Then use your standard sport detergent as a spot treatment.
Complex Stains Need Layered Approach
Energy gels mix carbs with oils. Roadside splashes combine mud with car fluids. These compound stains resist single-method treatment.
Start with the water-soluble part. Rinse under cold water. Flush out sugars and starches first. Pat dry with a towel. Then hit the remaining oil or grease mark with aerosol solvent spray.
For gel-like food stains with fat content, use alkaline stain remover first. Water softens the starch structure. Alkali breaks down fatty proteins. After 2 minutes, rinse and check. Treat any remaining grease with solvent spray.
Heat-set stains—marks that went through a dryer—are tougher. The heat bonded the stain molecules into the fiber structure. These need enzyme pretreaters. Enzymes break down protein marks like blood or grass over 8-12 hours. Put the enzyme solution on. Let the garment soak overnight in cold water. The enzymes work but take time.
Never use chlorine bleach on cycling kit. It eats through lycra and destroys chamois padding. Skip fabric softener in pretreatment too. It coats the fibers you're trying to clean.
Timing matters more than product choice. Fresh stains release in minutes. Day-old marks need hours. Week-old stains might be permanent. Treat every mark the day it happens. Your kit will last years longer.
Drying Cycling Clothes Without Heat Damage
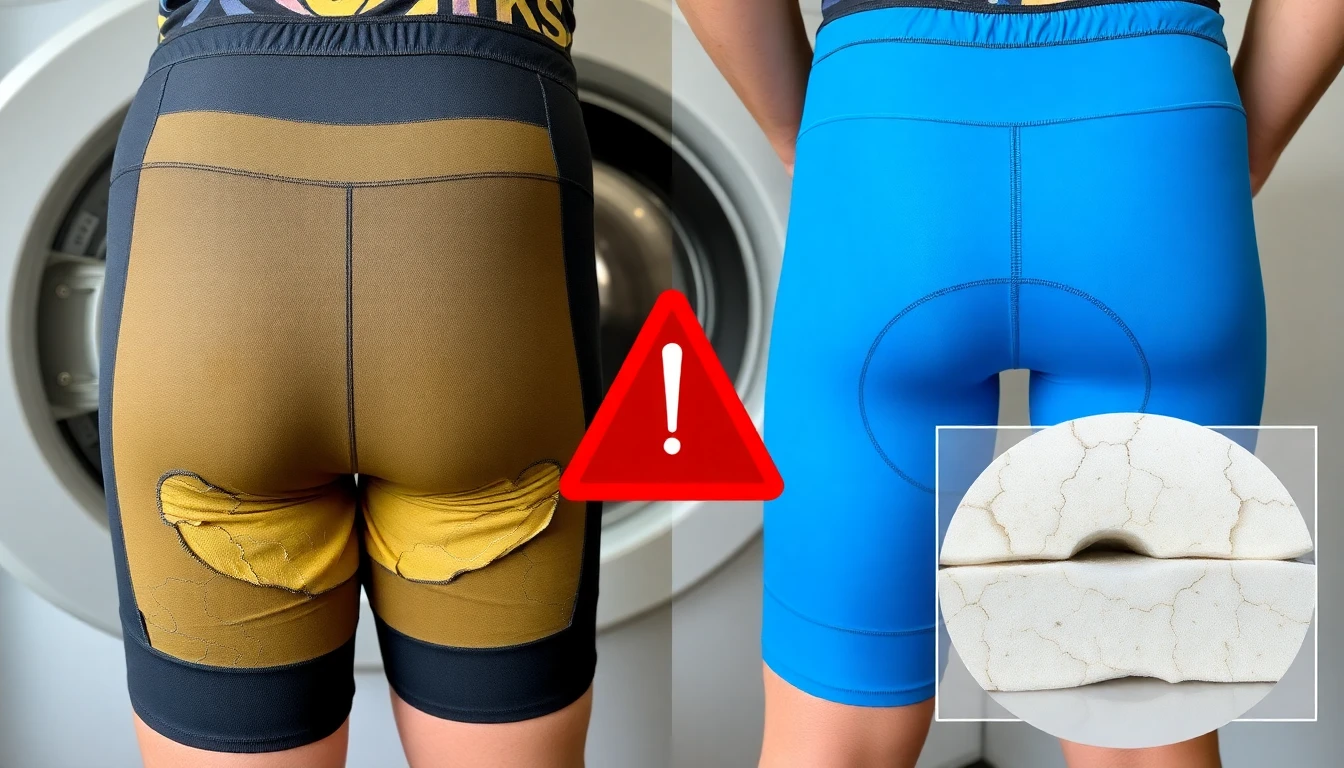
Heat kills performance fabric. One trip through a standard dryer does more damage than fifty proper washes combined. The tumbling heat cooks elastic fibers. They turn brittle. Your lycra loses its snap. Colors fade to dull versions of what you bought. The chamois padding compresses into a hard lump that won't bounce back.
Air drying protects everything you paid for. It's slower, yes. But it keeps your kit working the way designers intended.
Hang or Lay Flat—Skip the Sunlight
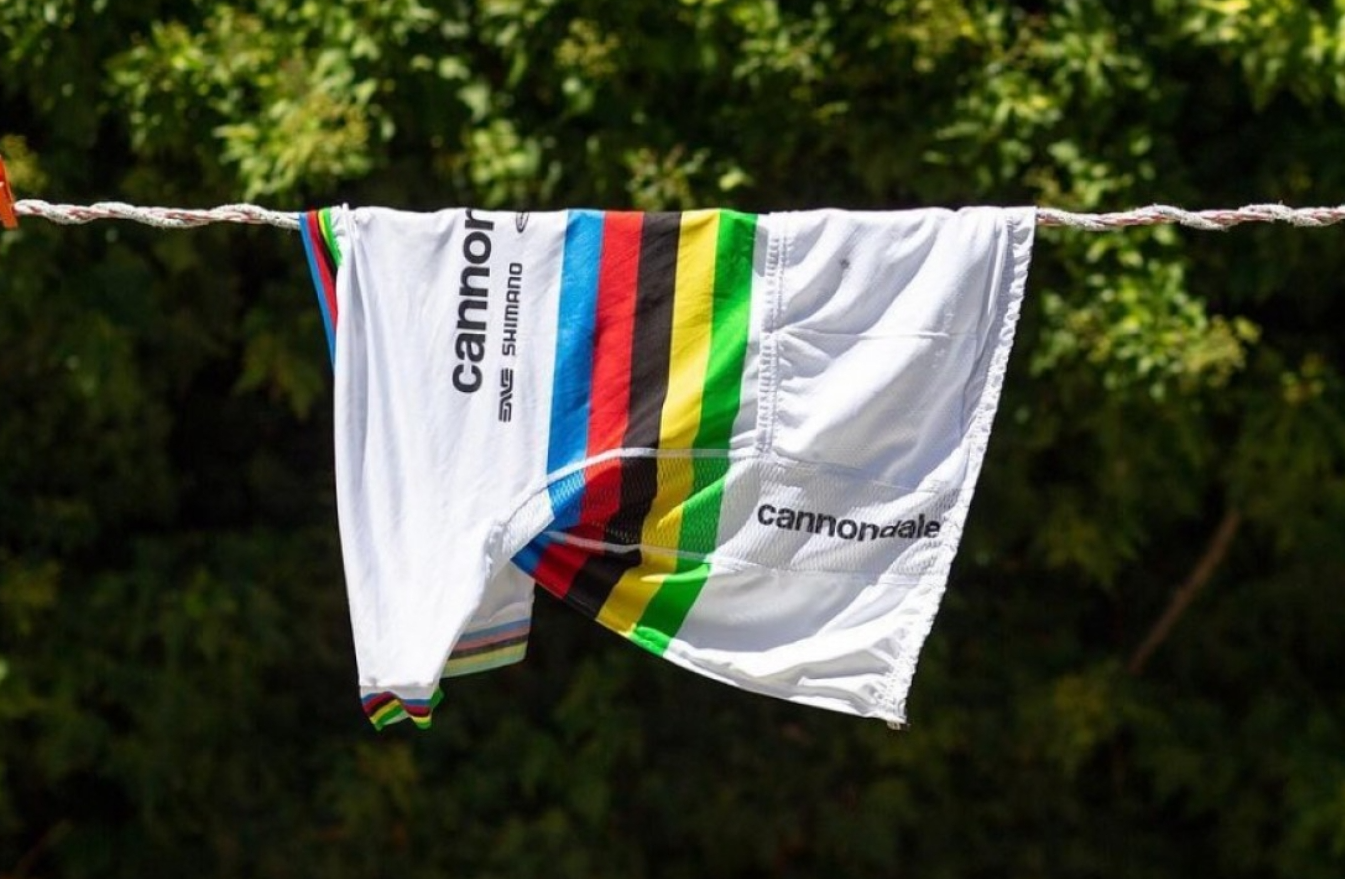
Jerseys go on hangers. Clip them at the shoulders or thread the hanger through the neck opening. Gravity pulls water down and out.
Bib shorts need different care. That wet chamois pad weighs more than the fabric around it. Hang bibs from the leg cuffs using clothespins or clips. Or drape them from the middle—fold the waistband over a drying rack so both legs hang down. Never hang wet bibs from the shoulder straps. The weight of soaked padding stretches those straps for good.
Lay flat works for everything. Spread jerseys and bibs on a clean drying rack or towel. This removes all gravity stress. No stretching. No sagging seams.
Space your pieces apart. Air needs to move between garments. Bunched fabric stays damp in hidden spots. That's where bacteria restart their growth cycle.
Pick an indoor location with good airflow. Avoid direct sunlight and UV exposure. Sunlight fades printed logos. It weakens synthetic fibers over time. A clean basement, bathroom with exhaust fan, or covered porch all work well.
Speed Up Drying Time
Point a floor fan at your drying rack. Moving air cuts drying time in half without adding heat. This works great for getting your kit ready for tomorrow's ride.
Heat is acceptable in one case: reactivating DWR water-repellent coating on rain jackets. Turn the jacket inside-out. Set your dryer to synthetics mode at 40°C (104°F) maximum. Run it 40-50 minutes. This heat resets the water-repellent chemistry without destroying the fabric. Don't try this on wool or regular cycling kit.
Dry Means Bone Dry
Check every seam. Press your fingers into the chamois padding. Feel inside doubled fabric layers. These spots hold moisture long after the surface feels dry. Storing damp gear—even a little damp—grows mildew and bacteria. That creates the sour smell no washing can fix.
Can't wash right after your ride? Hang your sweaty kit to air-dry anyway. This stops bacterial growth until you have time for proper cleaning. A rinsed-and-dried kit beats a wet ball in your gear bag every time.
Your cycling apparel drying method matters as much as your washing technique. Protect your investment. Let physics and airflow do the work.
What Never to Do: Critical Mistakes That Ruin Cycling Clothes
Most cycling kit dies from good intentions gone wrong. You're trying to get things clean. Instead, you're shortening the life of every technical fiber.
These mistakes share one thing: they feel harmless in the moment. Damage builds up ride after ride. Your $180 bibs lose their compression. Your jersey stops wicking sweat.
Here's what destroys cycling clothes—and why each habit costs you money.
Fabric Softener Kills Performance
Fabric softener creates a waxy coating on your moisture-wicking fibers. This film blocks the tiny channels that pull sweat away from your skin. Your kit traps moisture instead of moving it. You stay wet. Bacteria grow. Odors linger after washing.
The coating also breaks down elastane threads. Your bibs lose stretch. Chamois padding loses its support. Skip softener. Technical fabrics don't need it.
Hot Water Breaks Down Elastic
Water over 30°C (86°F) melts elastic fibers at the molecular level. Heat weakens seams. Colors fade for good. Your lycra cycling shorts lose their snap after just a few hot washes.
Cold water protects everything. It cleans just as well with sport-specific detergent. Set your machine to cold. Always.
The Dryer Destroys Everything Fast
Tumble-dryer heat is the fastest way to ruin high-quality gear. Heat causes shrinkage. It weakens stitching. Chamois padding compresses into a hard lump that never recovers. Grippers lose their elastic hold. Printed logos crack and peel.
Air-dry every piece. Hang jerseys. Lay bibs flat or hang them from the leg cuffs. A fan speeds drying without heat damage.
Washing Right-Side-Out Leaves Bacteria Behind
Sweat and bacteria build up on the inside of your kit. That's where fabric touches skin. Washing garments right-side-out means detergent hits the clean outer surface first. The dirty inner layers don't get soap and water contact.
This traps odor. It breaks down inner coatings faster. Turn everything inside-out before washing.
Delaying the Wash Breeds Permanent Problems
Leaving sweaty kit in your gear bag overnight lets bacteria grow unchecked. Salt crystals from dried sweat cut into synthetic fibers like tiny blades. Body oils stick to the fabric. These become odors that no amount of washing can remove.
Rinse or wash within four hours of your ride. Can't do a full wash? Rinse in cold water and hang to air-dry. This stops bacteria growth until you have time to clean it right.
Removing Odors from Cycling Clothes (Even After Multiple Wears)
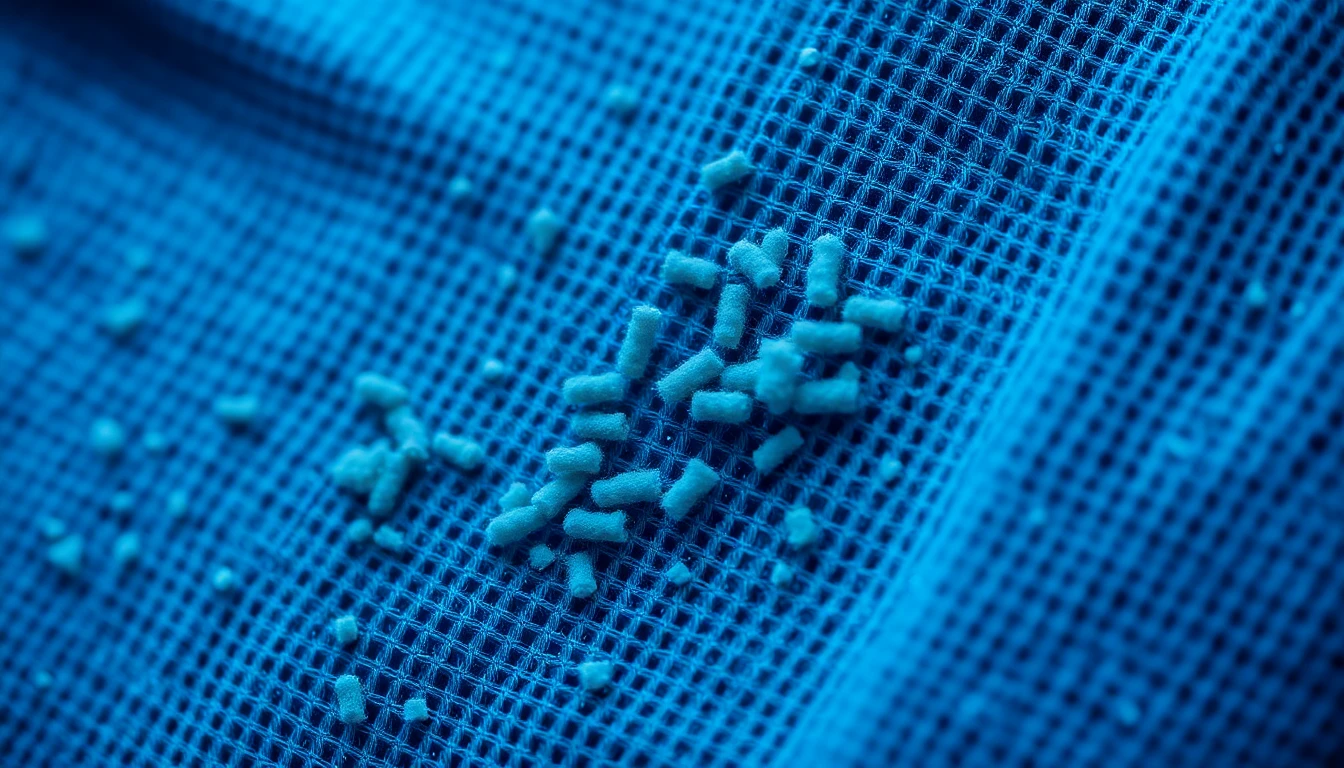
Polyester holds onto bacteria like a memory foam mattress holds onto heat. One hour of riding plus 28 hours in your hamper? Your synthetic fabrics now harbor up to 1,000,000 bacterial colonies per square centimeter. Cotton is worse—ten times that density. These numbers aren't abstract. They explain why your "clean" jersey still smells like last Tuesday's climb.
Two bacteria cause the damage: Staphylococcus epidermidis and Staphylococcus hominis . They love the tight weave of performance fabrics. Regular sport detergent rinses away sweat. But it doesn't kill the microbes living in the fiber structure. That's why your kit passes the sniff test fresh from the wash but smells rank ten minutes into your next ride.
You need chemistry that breaks the bacterial cycle—not just masks it.
White Vinegar: The Cheap Fix That Works
Add one cup of white vinegar to your wash cycle. Pour it where fabric softener would go. The acetic acid kills bacteria. It won't damage technical fabrics. Plus, it strips away detergent residue that feeds future bacterial growth.
Worried about vinegar smell? Run an extra rinse. The scent disappears. This method works great on gloves and chamois padding where odor builds up.
Cost: pennies per load. Textile labs have proven it works.
Enzyme Treatments for Stubborn Cases
Plant-based enzyme detergents like Defunkify Active Wash target the organic compounds bacteria leave behind. Add one scoop per load. The enzymes digest sweat proteins and body oils trapped in synthetic fibers. This removes the food source bacteria need to grow.
Revivex Odor Eliminator ($9 for 10 oz) handles single-treatment jobs. Got one jersey that won't quit smelling? This formula breaks down odor molecules in fabrics that have been worn and washed many times without success.
Nikwax Base Wash ($9.50 for 10 oz) beats standard detergents in lab tests on stubborn baselayer and jersey odors. It rinses clean. No residue remains to trap new bacteria.
Testing data shows Ecover Zero ($21) matches or beats Tide on both dirt and odor removal in synthetics and woolens. The Environmental Working Group gives it an A rating. Your nose will too.
Borax and Nonionic Surfactants
20-Mule Team Borax added with your regular detergent wipes out odors that survive normal washing. The alkaline chemistry raises water pH. Odor-causing bacteria can't survive in this environment.
Nonionic surfactants—found in Charlie's Soap and Kirkland unscented HE detergent—rinse clean. They leave zero film on polyester fibers. No residue means no bacterial food source. Your kit stays fresher between washes.
The Nuclear Option: Pine-Sol
Add a small amount of Pine-Sol to your regular detergent load. Too much leaves a pine scent in your kit. The right amount—about one tablespoon for a full load—kills bacteria without announcing itself. Many cyclists swear by this method for gear that's been through hell.
Sweat X liquid works the same way at lower volumes per load. It wipes out stubborn odors in both clothes and shoes. One treatment resets well-used kit.
Sunshine Kills What Washing Misses
Line-dry your washed gear in direct sunlight. UV radiation destroys bacteria that survive the wash cycle. This free step cuts recontamination before your next ride.
Indoor drying of cycling apparel in shade protects colors and elastic. Outdoor drying of cycling apparel in sun protects against bacterial regrowth. Pick your priority based on how bad the smell problem is.
Wool Blends Change the Game
Synthetic fabrics with 20% wool content release less ammonia, acetic acid, and butyric acid. These three compounds create body odor smell. The wool fibers balance out bacterial waste products. This reduces odor development even during long, sweaty rides.
You can't retrofit your current polyester kit with wool. But next time you buy, consider merino-blend options if odor control matters more than maximum wicking speed.
Compare Before You Buy
Lab testing on soiled synthetics and wool shows real performance gaps:
Ecover Zero : Excellent odor removal, $21, A-rated by Environmental Working Group
Assos Active Wear Cleanser : Excellent odor removal, $42, preserves colors
Nikwax Base Wash : Superior odor-focused performance, $9.50 for 10 oz
Tide : Weak results, $12
Expensive specialty products earn their price once regular detergent fails. Start with vinegar or borax. Move to enzyme treatments if the smell stays. Save the $40 bottles for kit you're about to throw away otherwise.
Your gear cost too much to smell like a locker room. Fix the bacteria problem. The odor disappears for good.
Special Care for Padded Shorts and Chamois
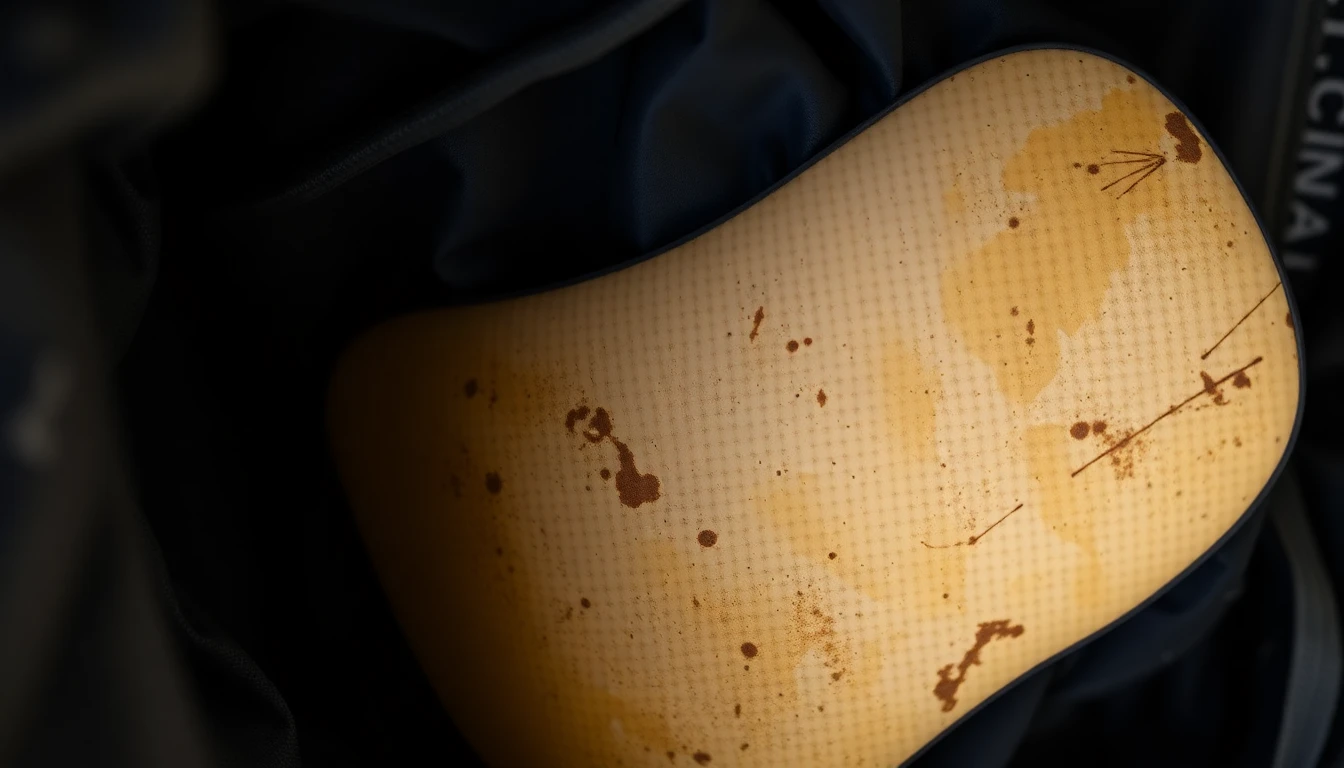
Your chamois pad takes more abuse than any other part of your cycling kit. Three hours of saddle pressure. Sweat pooling in synthetic foam. Road grime splashing up from wet pavement. This small piece of padding absorbs it all. Then you peel off your bibs and toss them in the hamper. Big mistake.
The chamois breeds bacteria faster than any fabric of cycling apparel in your wardrobe. Body heat, moisture, and friction create the perfect place for germs to grow. University of Padova researchers proved bacteria grow in unwashed chamois within hours. Damaged padding causes saddle sores, chafing, and infections that bench you for weeks.
Here's how to keep your chamois clean, functional, and skin-safe ride after ride.
Wash After Every Single Ride
No exceptions. Even short rides create sweat. Rides over three hours need washing the second you get home. Bacteria don't wait. The longer your chamois sits damp, the deeper germs embed into the foam.
Turn your bibs inside-out before they touch water. This exposes the chamois to detergent and rinse water. The padding holds the most bacteria. It needs the most contact time with cleaning solution.
Pre-Treat the Chamois Before Full Washing
Squeeze a small amount of mild liquid detergent onto the chamois pad. Work it in with your fingertips. Let it sit 5-10 minutes. This pre-soak breaks down body oils, road salt, and grime that regular washing misses.
Got mud? Rinse the chamois under cold running water first. Scrape off dried chunks. Then work in your pre-treatment. Mud particles ground into foam damage the padding. Remove them before machine washing drives them deeper.
Machine Washing Chamois the Safe Way
Put your bibs in a mesh laundry bag. Top-load washers twist and tangle shoulder straps without this protection. The bag also stops seams from catching on the agitator.
Set your machine to delicate cycle at 30°C (86°F) maximum. Use two scoops of Active Wear detergent or similar sport-specific formula. These products have no dyes, perfumes, or softeners that damage synthetic foam. They balance pH for elastic fibers and treatments built into quality chamois.
University research shows bleach-free sport detergents kill bacteria at lower temperatures. You don't need hot water. Cold protects your padding and elastic.
Deep Cleaning for Stubborn Buildup
Ride long every week? Your chamois builds up layers of dead skin cells, body oils, and bacteria. Regular washing of cycling apparel can't reach this deep grime.
Fill a sink with cold water. Add two scoops of Active Wear detergent. Submerge just the chamois section of your bibs. Let it soak 15-30 minutes. The longer contact time pulls out grime that quick cycles miss. Squeeze the padding underwater—you'll see cloudy water release. That's the buildup leaving.
Rinse under running water. Squeeze until the water runs clear. Leftover detergent irritates skin on your next ride.
Drying: Air Only, No Heat Ever
Hang your bibs from the leg cuffs using clothespins. Or drape them over a drying rack at the waistband so both legs hang down. Never hang wet bibs from shoulder straps. The weight of soaked padding stretches elastic for good.
Skip the dryer. Even low heat compresses chamois foam into hard lumps. The padding won't bounce back. Synthetic fibers melt at temperatures you'd consider "gentle." Air-drying of cycling apparel takes longer but keeps your $150 bibs working like new.
Replace Your Chamois at the Right Time
Press your dry chamois with your thumb. Quality padding springs back fast. Worn-out foam stays compressed. You'll feel it as discomfort during rides. Pressure points that weren't there before.
Gel chamois runs thinner and firmer than foam versions. It works great for short rides under two hours. Foam handles long rides better. Both types fail the same way: packing down into flat, hard sections. Replace bibs once padding loses its cushion. Careful washing can't fix broken-down foam.
Put Chamois Cream on Skin, Not Padding
Scoop a walnut-sized amount of chamois cream into your palm. Rub it on your skin—groin area, sit bones, inner thighs. Never put cream on the chamois itself. Skin cream cuts friction and stops chafing. Germ-fighting formulas add extra protection against saddle sores.
The cream should absorb into skin before you pull on your bibs. Wet chamois plus skin friction equals disaster. Let it dry for 30 seconds.
Never Wear Underwear with Your Chamois
The chamois works through direct skin contact. It pulls moisture away from your body. Underwear blocks this. It adds seams that create pressure points. It traps sweat between layers.
Going commando feels weird at first. But every serious cyclist does it. Your skin will thank you after the first long ride.
Treat your chamois right and it'll protect you for hundreds of hours in the saddle. Neglect it and you're shopping for new bibs every season. Or dealing with infections that keep you off the bike.
Washing Frequency: How Often Should You Wash Cycling Clothes
Most cyclists wash too little or way too much. The answer depends on what you're wearing and what it's made of.
Synthetic jerseys and bib shorts go straight to the wash after every single ride. No debate. A poll of 315 cyclists proves this isn't extreme: 73% wash after every ride. Your body produces sweat, oils, and bacteria during each session. Synthetic polyester traps all three in its tight fiber weave. Skip even one wash? Bacteria grow fast. This creates permanent odor you can't remove later.
The chamois padding in your bib shorts needs the same treatment. Wash it right after each ride. Never wear bibs twice between washes. The damp foam breeds bacteria that cause saddle sores and infections.
Base layers and cycling socks follow the one-ride, one-wash rule. These sit right against skin. They collect the most sweat and dead skin cells.
Wool jerseys play different. 100% merino releases less bacterial waste. The natural fibers resist odor buildup. Wash wool jerseys after every fourth or fifth ride. Rotate two or three jerseys through your rides each week. Reached your last clean jersey? Wash the whole batch together.
Wool shorts don't get this break. Wash 100% wool bib shorts after every ride. The chamois padding needs cleaning right away. The outer fabric doesn't matter.
Outer layers like rain jackets, vests, and wind shells need washing when they're dirty, road-sprayed, or smell bad. Worn over a clean base layer on a dry day? They stay clean. Splashed with mud or soaked in rain? Wash them.
Pro Tips: Maintaining Fabric Elasticity and Breathability
Technical cycling fabrics perform a balancing act every time you ride. The lycra fibers compress your muscles. They also let heat escape. The fabric stretches across your body. Moisture-wicking channels must stay open. One wrong wash destroys this balance for good.
Your bibs stretch 10-20% during every pedal stroke. This creates tiny gaps between fibers. Air circulates through these gaps. Sweat evaporates. Polyester-spandex blends breathe better under tension. The fabric works because it stretches.
Hot water kills this function. Heat over 30°C melts spandex at the tiny fiber level. The elastic fibers lose their memory. They won't snap back after stretching. Your kit gets saggy. Collapsed fibers close those air gaps. Breathability drops even though the fabric looks fine.
Cold water protects stretch recovery. Sport detergents keep it working. Test your bibs: pull the leg fabric with both hands. Quality spandex bounces back right away. Damaged elastic stays stretched out. You'll see loose, baggy sections that used to fit tight.
Fabric softener coats the fiber surface with wax. This blocks the channels that move moisture. Breathability drops by up to 40%. Skip it. Technical fabrics don't need softening. They need their engineered structure left alone.
Air-dry everything. Dryer heat squeezes the tiny spaces between yarns. Loop spacing in quality cycling knits measures around 1.58mm. Heat shrinks this to near zero. Your jersey stops breathing. It traps sweat instead of moving it away from skin.
Gentle washing keeps the tiny holes that make technical fabrics work. Each careful wash keeps those stretch-activated air channels working for hundreds more rides.
Conclusion
Your cycling kit is an investment in performance, comfort, and countless miles ahead—treat it that way. Cycling clothes can last two seasons or ten seasons. The difference often comes down to what happens after each ride, not during it. Follow the washing techniques outlined here. Start with immediate post-ride rinsing. Use gentle detergents. Air dry your gear. You're not just cleaning fabric. You're preserving the stretch, breathability, and moisture control that makes quality cycling apparel worth every dollar.
Here's what matters most: wash after every ride, skip the heat, and respect your chamois . These three habits alone will extend your gear's lifespan. Plus, you stay comfortable and odor-free on the road.
Ready to upgrade your entire cycling wardrobe with gear built to last? Explore Berun Clothes' technical cycling collection . Performance fabrics meet thoughtful design there. And now you know how to keep them performing at their peak. Your future self (and your wallet) will thank you for mastering cycling clothing maintenance today.