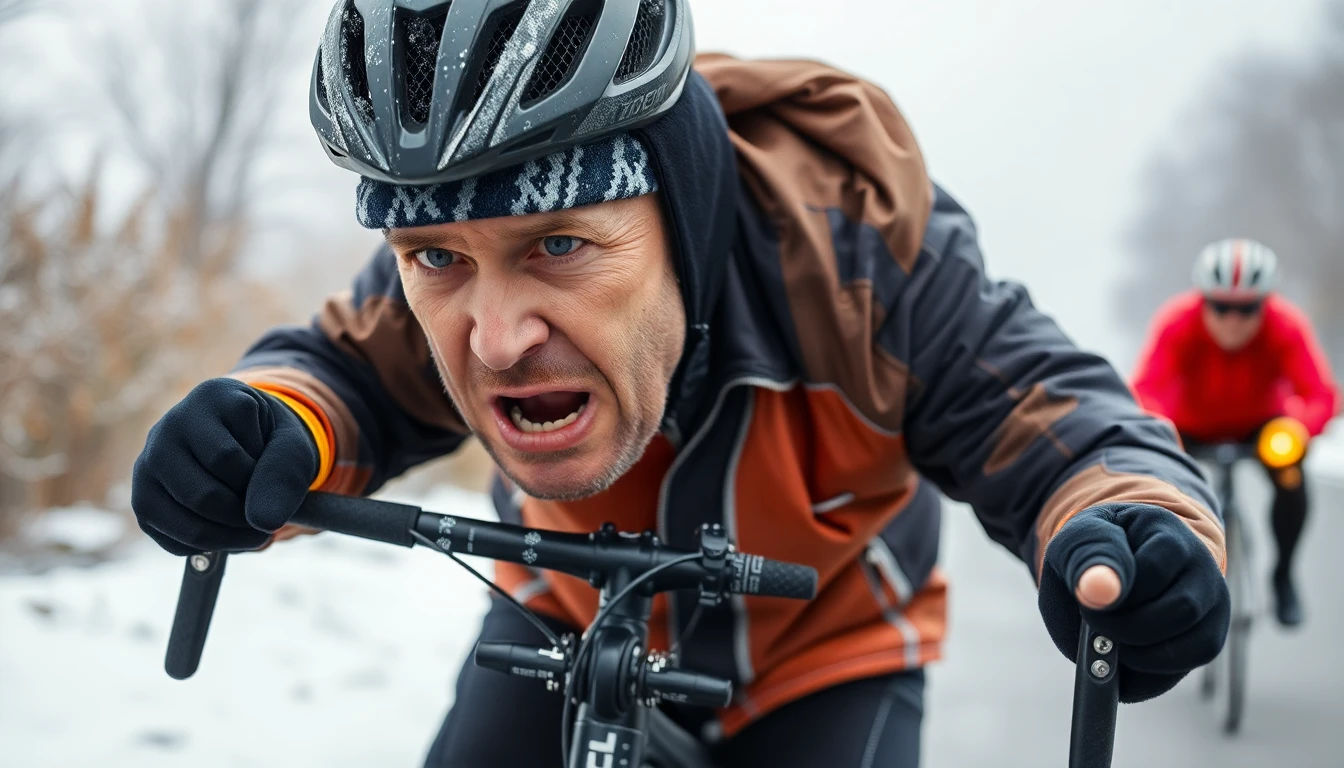
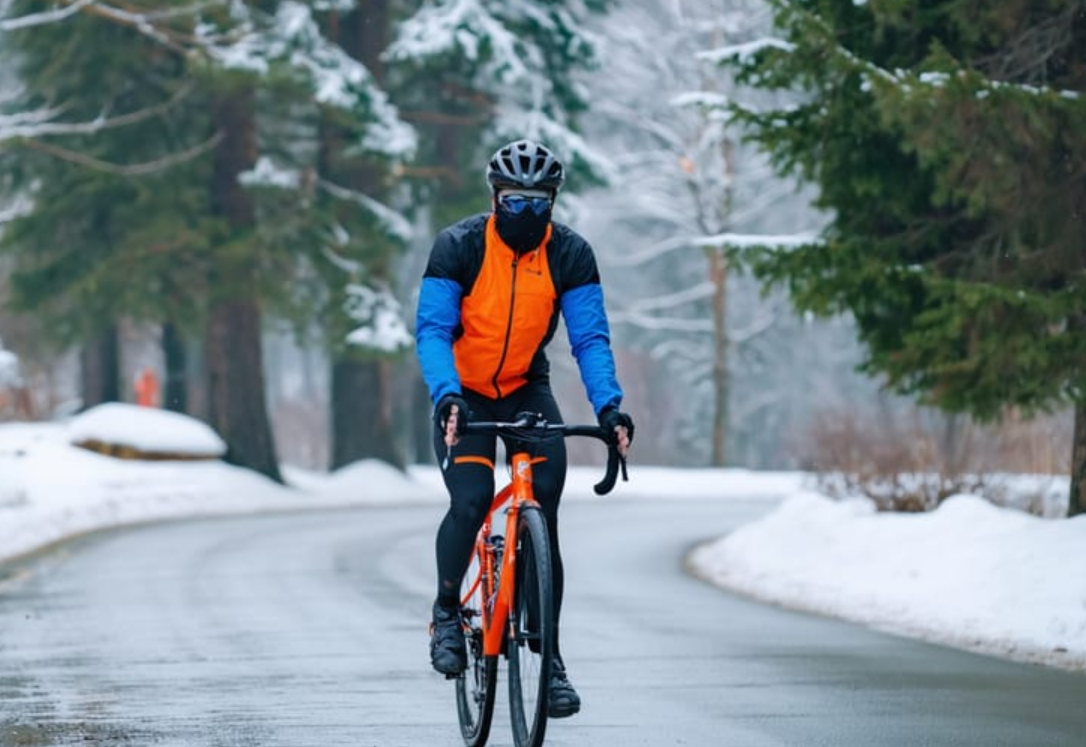
You're five miles into your morning ride. The wind cuts through your jersey like a knife. Your fingers have gone numb. You're regretting that "I'll tough it out" mindset.
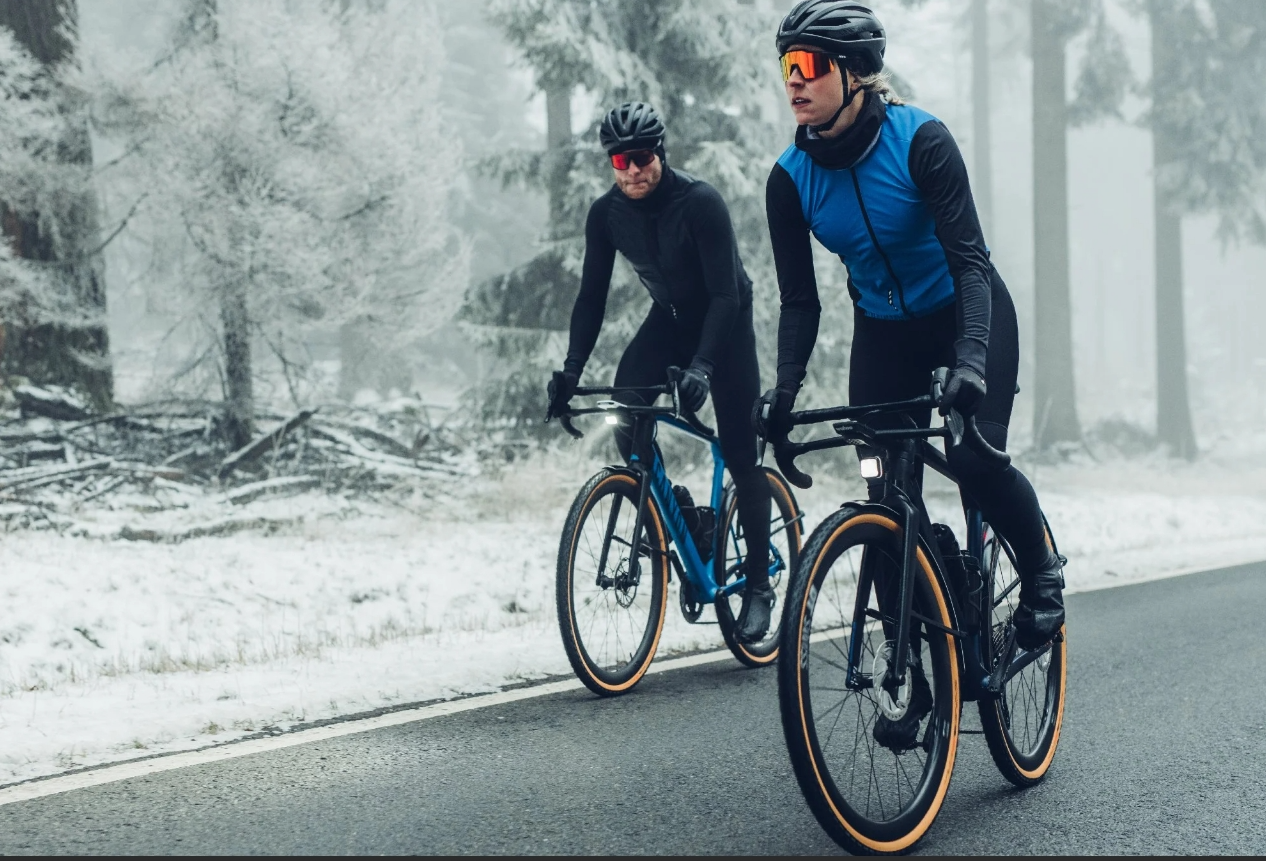
Winter cycling doesn't have to feel like an Arctic trip gone wrong. The difference between miserable cold rides and comfortable ones? It's not about being hardcore. It's about wearing the right cycling clothes in the right mix.
Commuting through freezing mornings or training through winter months? The layering system will transform your cold-weather rides.
This guide shows you what cycling clothes to wear during winter cycling. From choosing the perfect thermal cycling jersey and windproof cycling jacket to protecting your hands and legs with insulated cycling tights and winter cycling gloves.
You'll learn the three-layer system that works. Avoid the expensive mistakes most cyclists make. Discover which gear pieces deserve your money.
No fluff, no sponsored nonsense. Just practical advice that'll keep you riding in comfort as temperatures drop.
Understanding the 3-Layer Winter Cycling Clothing System
The layering system isn't rocket science, but most cyclists get it wrong. They pile on random clothes hoping thickness equals warmth. It doesn't work that way.
Think of winter cycling clothes as an engineering problem. Each layer has one job. Master this, and you'll ride in comfort at any temperature.
Layer One: The Base Layer (Your Moisture Manager)
Your skin sweats. Always. Even in freezing weather.
The cycling base layer winter pulls that sweat away from your body. It uses a clever trick: the inner surface repels water while the outer surface absorbs it. Brands like Craft and Gore nail this technology.
You've got two material choices:
Merino wool of cycling apparel fights odors without chemicals. It keeps warming you even when damp. Perfect for multi-day tours or those "forgot to do laundry" mornings.
Synthetic polyester or polypropylene blends of cycling apparel wick faster. They dry quicker. Better for high-intensity rides where you're generating serious heat.
The fit matters more than you think. Snug means efficient moisture transfer. Loose means sweat pools on your skin. Forget cotton—it absorbs moisture but never releases it.
For 32-40°F rides, grab a long-sleeve lightweight synthetic base. It's the sweet spot for most winter conditions.
Layer Two: The Mid Layer (Your Heat Trap)
This layer traps warm air against your body while staying breathable. Polyester, polyurethane, and fleece do this job well. Cotton doesn't—it becomes a wet rag.
Here's your temperature guide:
50-65°F : Short-sleeve jersey works fine
40-50°F : Switch to an insulated jersey
30-40°F : Thermal cycling jersey plus softshell
Below 30°F : Full insulated mid-layer. No compromises.
Pro tip: Layer a merino wool mid-layer over your synthetic base. The wool pulls moisture from the synthetic underneath. Everything stays dry.
Layer Three: The Outer Shell (Your Weather Shield)
Your windproof cycling jacket blocks wind and rain. Body vapor still escapes. Look for Gore-Tex®, Ceplexe®, or Windstopper® membranes. These materials have tiny pores. Rain can't get in. Sweat vapor gets out.
Two shell types solve different problems:
Softshells work above 32°F with light rain. They give you insulation and protection. Plus, they breathe well.
Hardshells handle heavy rain and snow. They're waterproof but need vents to prevent sweat buildup. Match them with waterproof cycling pants in bad conditions.
Full-length zippers are a must. You need to dump heat fast on climbs. Adjustable vents give you control over temperature.
At 40-45°F, pair a wind membrane jacket with a vest. Below 30°F, upgrade to an insulated Gore-Tex shell.
Making the System Work for You
The beauty of layering? You get flexibility.
Climbing a hill? Unzip or remove your outer layer. Descending? Seal everything up. The system adapts to your effort level and changing conditions.
Open those full-length zippers during hard efforts. Your body generates massive heat. Let the vapor escape or you'll soak your layers from the inside.
For 45-50°F dry days: base layer, thermal cycling jersey , wind vest. That's it.
For 40-45°F: Add a light thermal mid-layer under your membrane jacket.
Rain forecast? Waterproof jacket over synthetic layers. Never over cotton.
This system protects your core, but your extremities need attention too. We'll cover winter cycling gloves , thermal socks, and head protection in the next sections. Those pieces complete your winter armor.
Winter Cycling Clothing Guide by Temperature Range
Temperature dictates everything. You can't dress the same for 45°F as you do for 25°F and expect good results.
Here's your practical guide. Real combinations that work, organized by what your thermometer says.
45-50°F (7-10°C): The Goldilocks Zone
Dry conditions at this temperature feel almost pleasant. Overdressing will make you overheat.
Your complete setup:
Start with a long-sleeve lightweight synthetic base layer against your skin. Add a thermal cycling jersey on top. Finish with a lightweight wind vest or thin shell jacket that has a wind-protective membrane.
For your legs, thermal bib shorts with leg warmers work well. Or go with light winter tights if you prefer the streamlined feel.
Feet and hands need minimal protection here. Standard cycling socks plus lightweight knit shoe covers handle the job. Medium-weight full-finger gloves keep your hands working without making them sweaty.
Top it off with a lightweight cap under your helmet. Done.
Rain changes the game.
Light rain? Swap that wind vest for a jacket with a protective membrane and good ventilation. Heavy rain? You need a dedicated hardshell rain jacket.
Upgrade to waterproof cycling pants or keep your winter tights. Add neoprene cycling shoe covers winter models with thermal lining—your feet will thank you. Your hands need neoprene or insulated waterproof gloves now. Replace the lightweight cap with a thermal hat under your helmet.
40-44°F (4-6°C): Things Get Serious
This temperature range demands respect. The wind cuts deeper. Your body loses heat faster.
Dry weather requires smart layering:
Keep your lightweight synthetic base layer. Here's the twist—add a summer-weight long-sleeve jersey as a breathable spacer layer. Or jump straight to a light thermal jersey as your mid-layer.
Your outer shell must upgrade. That lightweight vest won't cut it anymore. You need a jacket with a protective wind and water membrane. The chest and abdomen sections require windproof membrane material. These areas face the wind head-on and lose heat fastest.
Pro move: Throw a windproof cycling jacket over everything for the first few miles or on descents. Remove it once you're warmed up.
Winter tights are a must below 45°F. Pair them with thermal socks and proper cycling shoe covers winter models—not the flimsy ones from the warmer temperature range.
Your hands need either layered gloves or single insulated winter cycling gloves rated for this temperature. Wind intensity helps you decide which approach works better.
Top protection: a proper winter cycling hat under your helmet. Forget the lightweight summer cap.
Wet conditions at 40-44°F test your gear choices.
Your outer layer must be a breathable waterproof hardshell or high-grade membrane jacket. No compromises. Everything underneath stays the same: lightweight synthetic base, light thermal jersey middle.
This temperature zone is where most cyclists make costly mistakes. They either freeze because they underdressed. Or they cook in their own sweat because they piled on too much insulation without breathability. The membrane jacket solves both problems. It blocks weather while releasing your body's moisture.
You should feel a bit cool for the first five minutes of your ride. Feeling comfortable standing still? You'll overheat within fifteen minutes of pedaling.
Essential Winter Cycling Gear for Each Body Part
Your core stays warm with three layers. Your hands, feet, and head? They need targeted protection or they'll fail you first.
Cold extremities end rides fast. Numb fingers can't shift gears. Frozen toes make every pedal stroke painful. A freezing head drains your willpower faster than any hill.
Here's what works for each vulnerable body part.
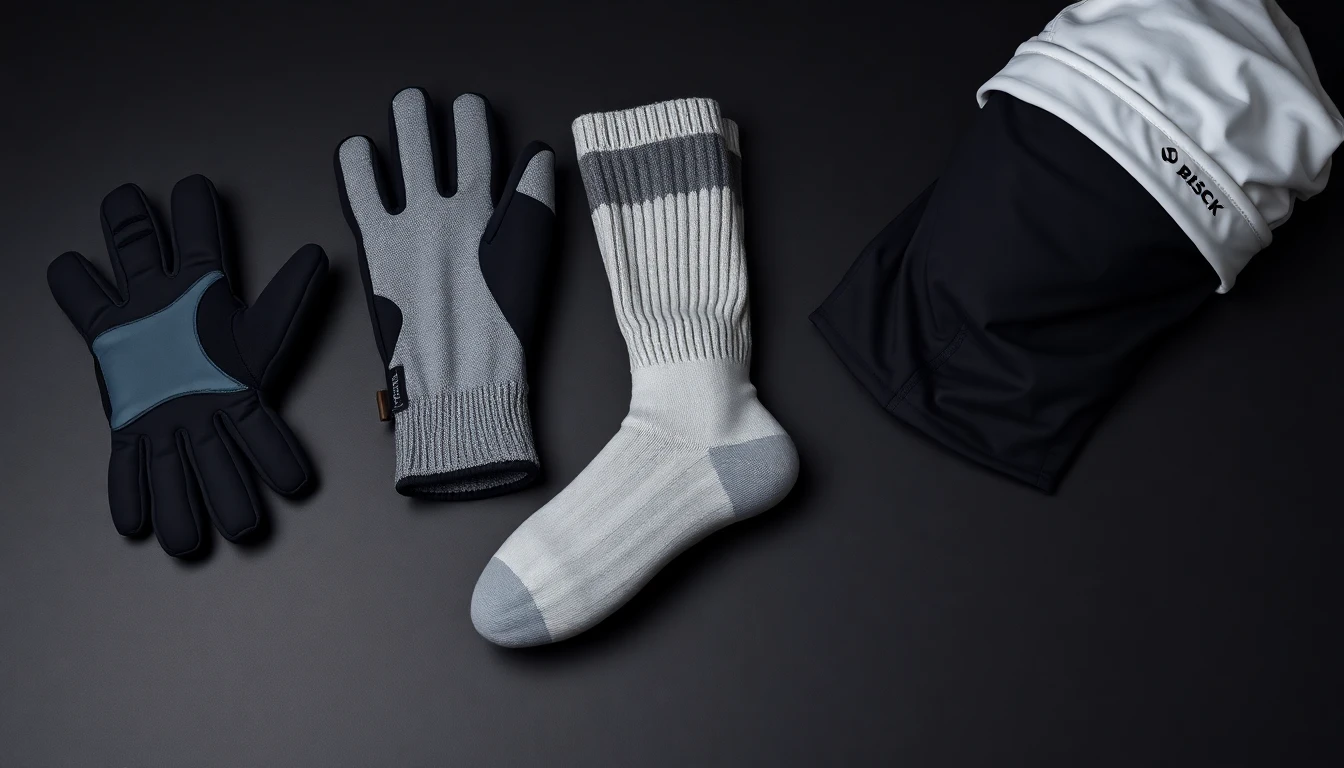
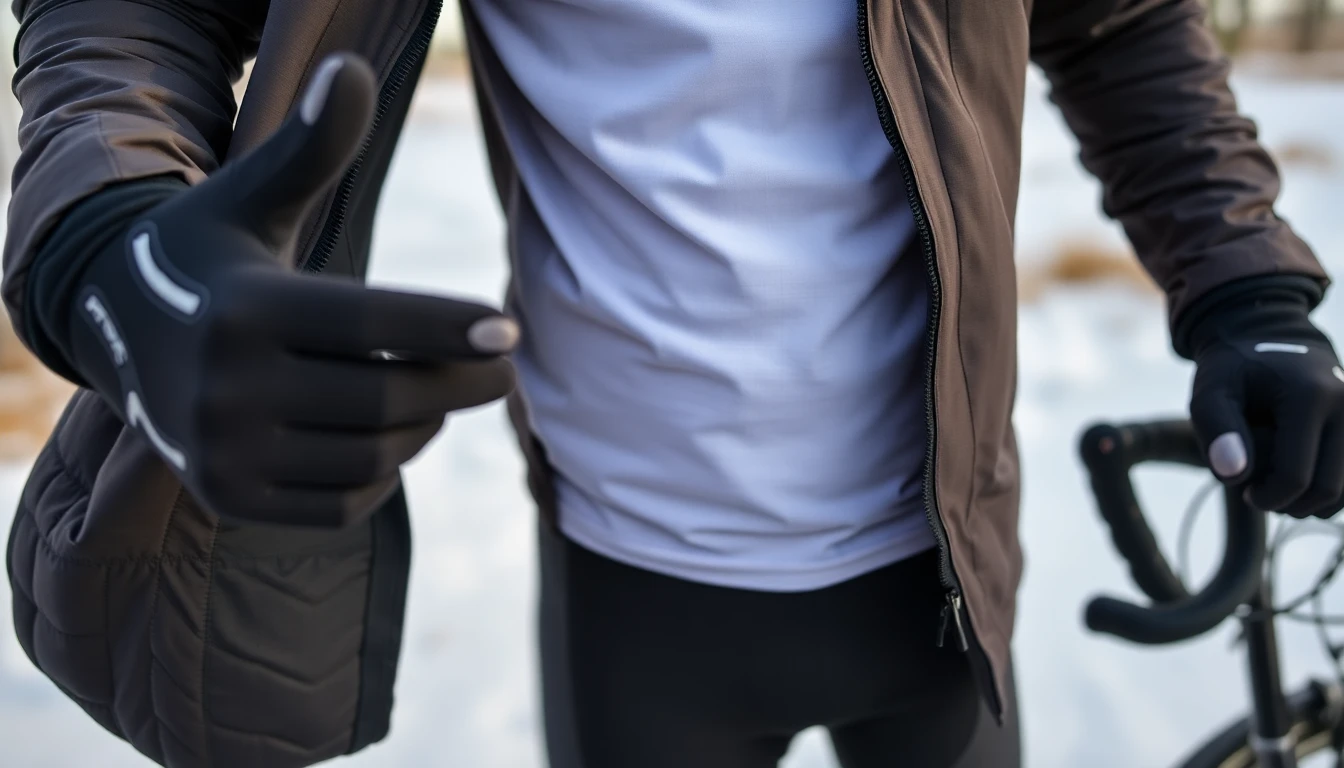
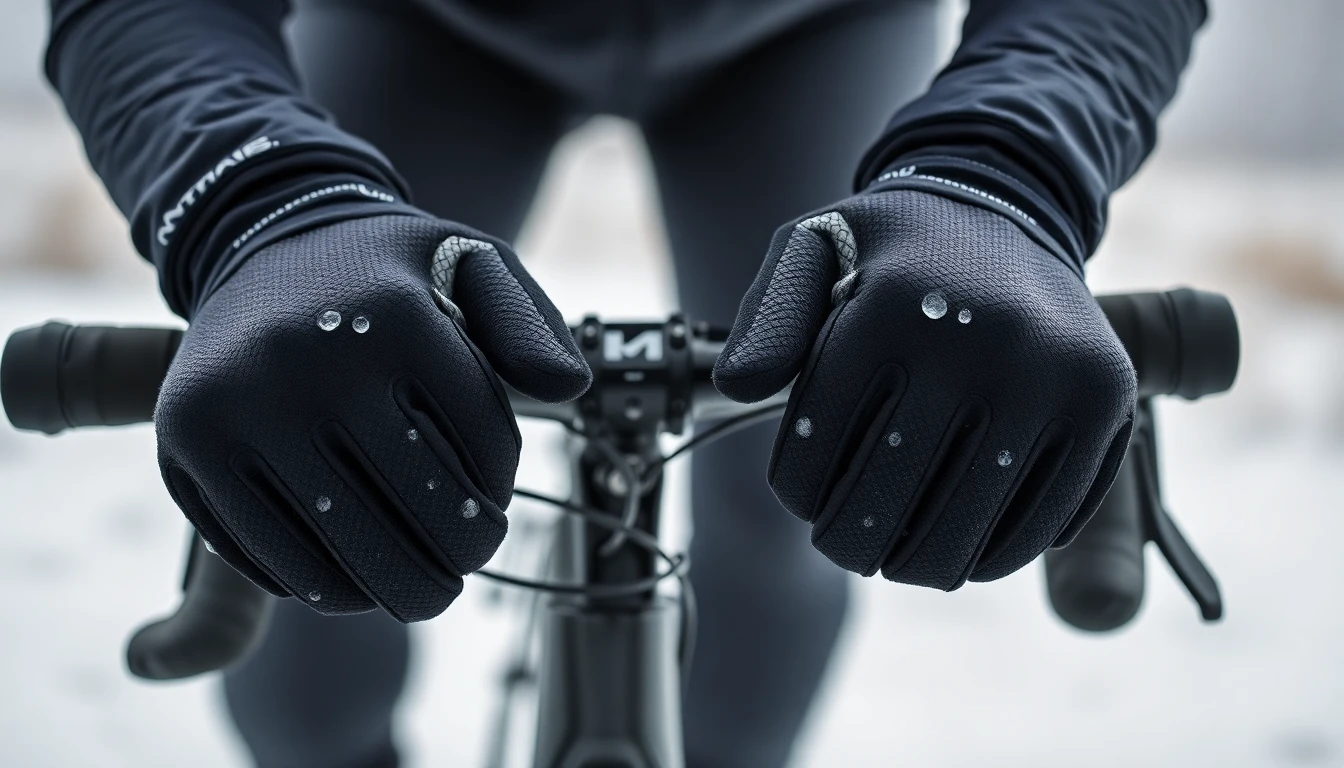
Hands: Your Control Center
Above 30°F in dry conditions, lightweight warm gloves handle the job. Simple. Cheap. They work.
Drop below 30°F and you need insulated options. The Castelli Spettacolo Ros ($90) and Craft Siberian 2.0 Split Finger ($75) both deliver serious warmth. Your hands stay functional, not trapped in useless mittens.
Freezing temperatures demand lobster gloves. The design groups your fingers in pairs. You keep dexterity for shifting and braking. Plus, they hold heat better than five-finger gloves. Winter cycling gloves in lobster style are essential for New England winters. Or anywhere the temperature drops hard.
Wet and cold together? Neoprene becomes your best friend. Thick neoprene overshoes trap warmth inside. They block rain and snow outside. Check the zipper quality before buying. It's the weak point that fails first.
Feet: The Foundation That Fails First
Cold feet ruin rides faster than anything else. Your core can be perfect, but frozen toes kill your motivation.
Start with thermal socks. Wool or synthetic blends wick moisture away from your skin. Always pair them with overshoes. Together, they work far better than either piece alone.
Cycling shoe covers winter models in waterproof neoprene do the heavy lifting. The Endura Road ($50) offers solid protection without breaking your budget. The Primal Onyx shoe covers use Traverso fabric rated for 20-75°F. Great flexibility if you ride in changing conditions.
Below 30°F, thermal shoe covers aren't optional anymore. You need them.
Fit matters more than you think. Too tight and you restrict blood flow. This makes your feet colder. Too loose and you lose the heat-trapping air pocket. Aim for snug with room to wiggle your toes. Wool socks plus covers protect your extremities better than any single solution.
Head and Neck: Small Surface, Big Heat Loss
Your head radiates heat like a chimney. Cover it right or waste all that careful body layering.
A thermal cap under your helmet solves this. The dhb Aeron Alpha (£24) uses Polartec Alpha lining with water resistance. It's thin enough to fit under your helmet without pressure points. Below 30°F, upgrade to a thicker version.
Your neck warmer cycling piece bridges the gap between your jacket collar and chin. Thick gaiters provide warmth. Bonus: COVID compliance if you need it. The Albion Merino (£190 equivalent) mixes 67% merino with nylon and elastane. It adds a microfiber insert for extra protection.
Below-freezing rides require a cycling balaclava . Full head, neck, and face coverage warms your breath before it hits your lungs. This protects your lungs from the shock of inhaling frozen air. Your body will thank you.
Legs: Your Engine Room Needs Insulation
Insulated cycling tights are a must below 30°F. Look for Roubaix fabric. That's nylon and lycra with a brushed lining. The material resists wind and water. It traps heat too.
Below zero? Upgrade to serious bib tights. The Gore C3 Thermo ($140) handles brutal temperatures. The Assos Equipe RS S9 (£190) uses two-layer insulation on knees, thighs, crotch, and hips. You get a brushed inner layer and waterproof back panel.
The Primal Onyx line works across 20-75°F using Traverso fabric. Knee warmers in the same material give you flexibility for changing temperatures. Pull them on or stuff them in a pocket as conditions shift.
Women get a practical advantage here. The Machines for Freedom Essential bib tights ($158) solve the full-undress bathroom problem. Smart design beats tradition.
Leg warmers shine on unpredictable days. Easy on, easy off, small enough to carry. They bridge the gap between shorts weather and full tights conditions.
Best Materials for Cold Weather Cycling Clothes
Fabric choice makes or breaks winter rides. Pick the wrong material and you'll either freeze or marinate in your own sweat. Neither sounds good.
Here's what works in cold weather.
Merino Wool: The Wet-Weather Champion
Merino wool pulls off a trick synthetic fibers can't match. It absorbs up to 30% of its own weight in moisture and still feels dry against your skin. That's fiber physics, not marketing talk.
The wicking happens fast too. Testing shows merino moves moisture 22% faster than standard polyester. Your sweat doesn't pool. It spreads and evaporates.
Temperature regulation is where merino wins. The effective range for cycling sits around 32–68°F (0–20°C) . Most cyclists find the sweet spot between 32–60°F (0–15°C) .
Rain or sweat soaking through? Merino retains warmth up to 5× better than cotton when damp . Cotton becomes a cold, wet blanket. Merino keeps working.
The anti-odor performance beats synthetics by about 30% . Multi-day tours or back-to-back commutes won't turn your jersey into a biohazard.
Best use: Base layers and thermal cycling jerseys . The warm-when-wet property protects your core in bad conditions.
Synthetic Polyester: The Workhorse
Polyester absorbs about 1% of its weight in moisture. Compare that to merino's 30%. It holds almost nothing. This means it dries fast.
Cost matters for most cyclists. Polyester runs cheaper than natural fibers across the board. You get solid moisture-wicking plus high durability. No need to empty your wallet.
The abrasion resistance beats wool. Winter mid-layers and outer shells use polyester. It lasts season after season.
Trade-offs exist. Polyester's odor resistance lags behind merino. The low moisture absorption means it feels drier at first. But it gives less warmth in wet conditions.
Most performance pieces blend polyester with 15–25% elastane (spandex) . The stretch improves fit and comfort. The moisture management stays solid.
Best use: Mid-layers, outer shells, and anywhere you need durability over anti-odor features.
Nylon and Protective Membranes
Nylon performs best between 40–80°F (4–27°C) . It's not ideal near freezing. But it dominates in durable winter tights and jacket shells.
Testing shows nylon-spandex kits lower skin temperature by 2.4°F compared to cotton during one-hour rides. The abrasion resistance makes it perfect for high-wear zones on winter bibs.
Windproof and waterproof membranes change the game for outer layers. Softshells use windproof front panels with breathable backs. This design blocks wind where it hits hardest. It also releases sweat vapor from your back.
Microporous membranes like Gore-Tex and eVent give you the full package. Waterproof, windproof, and breathable. Industry benchmarks show RET < 6 or MVTR > 15,000 g/m²/24h for breathability.
Hardshells with these membranes excel in steady rain. You need to manage the vents to prevent moisture buildup inside. Softshells balance warmth and breathability better for most winter rides.
Material Selection by Temperature
Below 50°F (10°C): Layering becomes a must. Use Lycra/spandex blends for stretch. Add thermal or brushed backings for insulation. The standard setup? Merino base layer, synthetic insulating mid-layer, windproof shell.
32–60°F (0–15°C): Merino base layers excel here. Temperature control and warmth in wet conditions make them hard to beat. Pair with softshell jackets. Look for windproof fronts and breathable backs.
Near freezing (0–3°C): You need thick insulation. Fleece-lined winter jackets work best. Testing confirms thick-fleece jackets stay comfortable down to about 3°C with just a base layer underneath .
High humidity and wet cold: Skip the breathability promises. Grab microporous waterproof-breathable membranes. Your waterproof cycling pants and jacket need this tech in rain and cold.
The right material of cycling apparel keeps you comfortable. The wrong one ends your ride soon. Choose based on your local conditions, not general advice.
Common Winter Cycling Clothing Mistakes to Avoid
Most cyclists learn winter clothing the hard way: through miserable rides and wasted money. Skip the painful education. Here are the mistakes that'll ruin your cold-weather cycling—and how to dodge them.
Cotton Is Your Enemy
That soft cotton base layer feels nice in the store. On the bike? It's a disaster waiting to happen.
Cotton absorbs sweat and holds it against your skin. It provides zero insulation once wet. Your body temperature drops fast. Hypothermia risk climbs with every mile.
The fix: merino wool or synthetic materials (nylon/spandex blends). They wick moisture away from your skin instead of trapping it. Your base layer should push sweat outward, not hold it in.
Same rule applies to socks. Cotton socks make cold feet worse. They trap sweat. Your feet stay wet and cold. Switch to thermal cycling socks made from wool or synthetics.
Dressing Too Warm Backfires
You step outside. It's 30°F. You pile on layers until you feel warm standing still.
Big mistake.
Your body generates massive heat while pedaling. All those layers trap that heat. You start sweating within minutes. The sweat soaks your clothes from the inside. Then you stop at a red light. The wet fabric turns cold. Now you're colder than if you'd dressed lighter.
The rule: Dress to feel a bit cold for the first 10 minutes. Aim to feel like it's 10-15°F (5-8°C) warmer than the actual temperature at the start. You'll warm up fast once you're pedaling.
Comfortable standing in the parking lot? You'll overheat on the road. Period.
Forgetting Your Extremities
Your torso might be warm. But frozen fingers can't shift gears. Numb toes make every pedal stroke agony. A freezing head saps your mental strength.
Hands, feet, and head lose heat first. Feet warm up slower than any other body part. Ignore them and they'll end your ride before you want.
You need targeted gear:
- The Winter cycling gloves rated for your temperature range
- Cycling shoe covers winter models with insulation and weatherproofing
- Never settle for toe covers alone—they block wind, not cold
- Thermal cap or cycling balaclava under your helmet
Insulated or waterproof winter cycling shoes beat regular shoes with covers. Regular shoes weren't built for freezing temperatures. They'll wear out faster. They protect less.
The Single Thick Layer Trap
One heavy jacket seems logical. More thickness equals more warmth, right?
Wrong.
A single thick layer can't adapt. Climbing a hill? You overheat. Descending? You freeze. No middle ground.
The smarter approach: layers that match your body's heat zones . Use arm warmers plus a vest instead of one heavy jersey. The vest protects your core. The sleeves come off as you heat up.
For legs in extreme cold, insulated cycling tights beat leg warmers. Leg warmers leave gaps. Tights cover everything. Add cycling over-shorts on top for extra hip warmth and useful pockets.
This system adapts. You remove or add pieces as conditions change during your ride.
Ignoring Ventilation Control
You're wearing great layers. But you can't regulate airflow? You're still in trouble.
Sealed clothing traps heat and sweat. Your comfort drops. Your body overheats. Then the trapped moisture chills you.
Double-zipper shells solve this. Zip down on climbs to dump heat. Seal up on descents to block wind. No need to stop and remove layers.
Wind chill changes everything on descents. At 50 km/h going downhill, you need about 5 times more clothing than at 10 km/h climbing. A jacket with ventilation options handles both extremes.
Running hot in a thermal jersey? Unzip it partway. Managing heat as you ride keeps you comfortable for the whole trip.
These mistakes cost you comfort, money, and motivation. Fix them and winter cycling stops being something to endure. It becomes something you enjoy.
Winter Cycling Clothing by Budget
Your wallet controls your gear choices. Smart spending beats blind spending.
Good news? You don't need $500 jackets to ride warm in winter. Better news? Know where to spend. This prevents costly mistakes.
Here's how to build a working winter cycling wardrobe at three budget levels—with real products that work.
Entry-Level Budget ($50-150): Build Your Foundation
Start here if you're new to winter cycling. Test the waters before spending serious cash.
The Van Rysel Men's Winter Road Cycling Jacket Endurance (£70/€80) gives you warmth, comfort, and multiple pockets. It won't empty your account. This jacket is a bit bulky compared to premium options. But it works. Beginners will find the price-to-performance ratio hard to beat.
The Baleaf Winter Cycling Jacket ($56) delivers surprising value. You get three-layer insulated waterproof build. Fleece lining. Three zip pockets. Reflective panels. Wind and water resistance included. One catch: sizing runs small. Order up.
For pure wind protection, the Castelli Squadra Stretch Jacket ($70) nails fit and function. This lightweight wind layer does what it promises. No frills. Just excellent basic protection.
Smart kit combination: Jacket ($50-80) + base layer ($20-40) + winter cycling gloves ($20-30) = $90-150 total. This setup puts wind resistance over premium waterproofing. It's the practical choice if you're building from zero.
The Endura Pro SL Primaloft Jacket II sits at the top of this range ($100-150). This jacket works as either a mid-layer or outer layer. Throw it over a base layer on cold days. You're set.
Mid-Range Budget ($150-300): Performance That Shows
Upgrade here if winter cycling is part of your regular routine. Better breathability and weather resistance make a real difference.
The Gore Spinshift Thermo Jacket Men's (£160/$220/€180) gives you good insulation with real breathability. The cuff and collar design works well. Water resistance runs moderate—not hardshell level, but fine for light rain.
Endura Men's Pro SL 3-Season Jacket (£210/$300/€240) includes a water-resistant outer shell plus a removable liner. This design stretches your temperature range wide. Good value for riders facing variable conditions.
Racing fit? The Rapha Men's Pro Team Winter Jacket (£230/$300/€260) uses high breathability fabric with DWR treatment. The cut runs aggressive and tight. Size up if you prefer comfort over aerodynamics.
The Castelli Perfetto RoS 2 (£245/$280) uses Gore-Tex Infinium tech. You get improved rain protection. Better cut compared to earlier versions. Built for everyday rides through mixed weather.
The upgrade gap matters. Mid-range jackets deliver 20-30% better breathability than entry-level options. The DWR coatings last 10-20 washes longer before needing retreatment. Your comfort on two-hour rides improves.
Premium Budget ($300+): Technology That Performs
Invest here if winter cycling happens year-round. Or you face brutal conditions often.
The Castelli Alpha RoS 2 Light Jacket (£250/$290/€250/AU$399) handles temperatures from -5°C to 12°C. Gore-Tex Infinium makes it wind-proof and rain-proof. One jacket covers most winter scenarios.
Need more warmth? The Castelli Alpha Doppio RoS Jacket (£350/$400/€350/AU$560) adds a Polartec Alpha Direct vest system. It's warm yet water-resistant. The fit adapts to changing weather mid-ride.
Top-tier insulation? Check the Castelli Alpha Ultimate Insulated Jacket (£380/$449.99/€349.95/AU$600). This jacket performs in all conditions. The insulation keeps you warm without overheating.
For maximum weather protection, grab the Rapha Pro Team Insulated GORE-TEX Rain Jacket ($420). GORE-TEX Paclite meets synthetic insulation. Premium waterproofing. Serious warmth.
The tech advantages justify the cost. Gore-Tex Infinium blocks 95% of wind with 10k breathability ratings. Polartec insulation retains 80% of its warmth even when wet. Rain resistance runs 30-50% better than mid-range options.
These numbers mean comfort on rides where cheaper gear fails.
Must-Buy Priority Order (Any Budget)
Don't buy gear without a plan. Follow this sequence:
1. Base layer first ($30-100). It wicks moisture and traps heat. Merino or thermal synthetics work. Nothing else matters if your foundation fails.
2. Outer jacket second . This creates your wind and water barrier. It delivers 60-70% of your total warmth gain. Core protection comes before everything else.
3. Hands, head, and feet third . These fail first in cold. Winter cycling gloves run $25-150. The Showers Pass Waterproof gloves ($80+) handle wet conditions well. For your head, the Giordana Thermal Skullcap ($25) covers your ears. Works great in sub-freezing temps. Don't forget cycling shoe covers for winter—your toes will thank you.
4. Mid-layer last ($100-200). Add insulation below -5°C temps. Primaloft insulation provides the warmth boost you need.
This priority order maximizes comfort per dollar spent. Build in sequence. Don't skip steps.
Budget Comparison at a Glance
Budget | Key Products | Price Range | Warmth Rating | Water Resistance | Breathability |
|---|---|---|---|---|---|
Entry ($50-150) | Baleaf, Van Rysel, Castelli Squadra | $56-80 | Good (fleece-lined) | Basic DWR | Moderate |
Mid ($150-300) | Gore Spinshift, Endura Pro SL, Rapha Pro Team | $160-300 | Very good (liners) | Good (Windstopper) | High |
Premium ($300+) | Castelli Alpha series, Rapha GORE-TEX | $290-600 | Excellent (Polartec/Gore-Tex) | Superior (Infinium) | Excellent |
The pattern holds: more money buys better breathability. Longer-lasting water resistance. Superior insulation tech. But entry-level gear still gets you riding warm. Premium gear extends your comfort range. Performs better in extreme conditions.
Choose based on your riding frequency and local weather. A $400 jacket makes sense for winter commuters in harsh climates. It's overkill for occasional fair-weather riders.
Buy what you'll use. Then ride through winter instead of parking your bike until spring.
How to Adjust Layers During Your Winter Ride
Your layering system works if you can adapt it on the move. Static clothing choices don't match changing riding conditions.
Think of your layers as controls for your body's furnace. You tweak the settings based on effort level, weather shifts, and terrain changes.
Start Cool, Finish Comfortable
Dress to feel a bit chilled for the first 10-15 minutes. Your body will heat up fast once you start pedaling.
This isn't toughness. It's physics. Your muscles create massive heat during cycling. That "perfect warmth" standing in your driveway turns into overheating within a mile.
Use a lightweight synthetic base layer paired with a summer-weight long-sleeve jersey as your breathable spacer. This combo lets you dump heat without stopping to strip off bulky layers.
Climbing and High-Intensity Adjustments
Hills make you a heat factory. Your core temperature spikes. Sweat production doubles.
Unzip those full-length zippers on your mid-layer and jacket right away. Let the heat escape before it soaks your base layer from the inside.
Better yet? Remove your vest or gilet. They pack down to fist-size. Stuff them in your jersey pocket. This single move can drop your core temperature by several degrees.
For serious climbs, legwarmers over bib shorts beat full tights. The extra airflow matters during hard efforts. Your legs need it. Sealed tights trap too much heat.
Pro tip: Layer merino wool over your synthetic base. The merino pulls moisture away from the synthetic underneath. Everything stays drier. You regulate temperature better.
Descent and Rest Period Protection
That thrilling descent? It's a heat-theft machine.
Re-zip your jacket before you start downhill. Add that vest you removed earlier. The temperature gap between climbing and descending can hit 20°F or more from wind chill.
Pull your multitube up over your neck, chin, and ears. This blocks 20-30% of heat loss through your collar gap. Small adjustment. Big comfort gain.
Switch to your insulated winter cycling gloves if you packed them. Add your winter hat under your helmet. These moves prevent the numbing cold that ruins descents.
Quick Weather Response Guide
Conditions change mid-ride. Your layers need to flex.
Dry 40-45°F rides: Start with lightweight base plus summer jersey plus wind jacket. Open all vents. Add vest for descents. Keep winter tights on throughout.
Dry 32-40°F rides: Long-sleeve base plus thermal cycling jersey plus insulated jacket. Add thermal socks and cycling shoe covers winter models. Consider a thin latex barrier layer under your shoe covers for extreme cold—but use it with care. It can make your feet clammy.
Wet 32-40°F rides: Long-sleeve base plus fleece jersey plus hard-shell jacket. Upgrade to neoprene shoe covers and gloves right away. Swap to thermal tights if you started in leg warmers.
Rainy cold below 32°F: Waterproof cycling jacket over thermal jersey is a must. Vent often to prevent internal sweat buildup. The hardshell traps moisture if you don't manage airflow.
Pack Smart, Adjust Often
Your jersey pockets are your layer-management system.
Pack a vest or gilet in pocket one. They compress to almost nothing. The Endura Pro SL Primaloft gilet works as either mid-layer or outer layer across 0-15°C. That's huge range from one piece.
Pocket two holds your multitube or extra hat. Pocket three carries spare gloves.
Limit yourself to 2-3 packable layers maximum. Focus on windproof pieces that compress well. Legwarmers roll up tight. A lightweight shell stuffs into a tiny space.
The riders who stay comfortable all winter? They're not wearing better gear. They're adjusting their gear all the time. Zip. Unzip. Add. Remove. It's active management, not passive suffering.
Your winter cycling comfort lives in those small adjustments every few miles.
Winter Cycling Safety and Visibility
Winter darkness and slippery roads change the safety game. Falls spike. Visibility drops. Driver reaction times slow. Your winter gear needs to protect you from more than just cold.
The numbers tell a harsh story. Snow and ice raise fall risk by 20-38 times compared to dry conditions. Studies show 9.5 to 76.5 falls per 10,000 km cycled on winter roads. In Oulu, Finland, recent data confirms what most winter riders already know: bicycle accidents rise during winter months.
US fatality data from 2020 reveals 17% of annual cyclist deaths happen during winter months (January, February, December). Peak danger times? 29% of fatalities occur between 6-8:59 p.m. Another 18% happen from 3-5:59 p.m. These hours match shortened winter daylight. You're riding in darkness more often. Drivers see you less.
Helmet use matters even more in winter. Just 14% of fatal crash cyclists wore helmets in 2023. 62% wore none . Half of all severe head injuries link to missing helmets. Ice falls happen fast. Your head hits hard.
Make Yourself Impossible to Miss
Short winter days demand strong visibility tactics. Your reflective cycling clothing isn't optional anymore—it's survival gear.
Neon yellow performs best in fog and rain. Lab tests show detection up to 1,000 feet in overcast conditions. Switch to neon orange for snow. It cuts through glare better. You stay visible up to 800 feet in bright snow conditions.
Your visibility checklist:
- Reflective ankle and wrist bands plus full vest (3M Scotchlite rated 1,000 cd/lx/m² retroreflectivity )
- Neon yellow jacket and waterproof cycling pants for rain rides
- Orange accents for snow days
- Test your visibility at 500+ feet from a driver's perspective
Light Up From Every Angle
Clothing alone won't save you. You need active lighting for 360° visibility.
Mount helmet lights delivering 100-500 lumens front and rear. Auto-flash modes run 4-8 hours in cold temperatures. They fit with vented winter helmets without adding bulk.
Add vest-mounted LED panels (150 lumens minimum) to your jacket. These clip-on units provide 270° visibility and run 6-10 hours on USB-rechargeable batteries. Layer them under or over your shell to prevent snags.
The proven combo setup:
- Front white light: 300 lumens steady
- Rear red light: 100 lumens flashing
- Side amber strips for cross-traffic
- Minimum two lights front, two rear
This setup gives 0.5-mile detection in sleet. Always run lights in both steady and flash modes. Redundancy matters as batteries fail in cold.
Protect Yourself From Fall Impact
Ice falls happen without warning. Protective gear limits the damage.
Knee and elbow pads rated CE Level 1 combine 10-15mm foam with hard plastic caps. They fit over insulated cycling tights and provide 14-inch calf coverage . This protection handles falls at 10-15 km/h speeds—typical for icy patches.
Extra impact protection worth considering:
- Slide-resistant overshoes ( 0.4-0.6 friction coefficient on ice)
- Armored winter cycling gloves with gel palms and knuckle guards
- Hip protectors with D3O inserts ( 20% fall injury reduction )
Layer protection right: thermal base layer first, then pads, then your windproof cycling jacket on top. Test your mobility at slow speeds (5-10 km/h) before hitting the road. Stiff protection that limits your movement creates new dangers.
Winter cycling demands respect. The cold won't kill you. But invisible clothing, poor lighting, and unprotected falls will. Gear up like you're planning to survive the worst conditions—because sooner or later, you'll face them.
Conclusion
Winter cycling doesn't mean frozen fingers and chattering teeth. Master the three-layer system: a base layer that wicks moisture, a mid-layer for warmth, and an outer shell that blocks wind. Your thermal cycling jersey and insulated cycling tights keep you riding all year. They're not just for one season.
Use the temperature guides we covered. Then adjust based on how you feel. Your body tells you what works. Feel cool for the first 10 minutes? You've got it right. Too many layers make you sweat. That sweat turns dangerous once you stop.
Don't let winter stop you. Check out our winter cycling gloves , base layers, and weatherproof gear at berunclothes.com. Riders test every piece. They train year-round, no matter what the calendar says. Layer smart and ride with confidence. Winter miles build strong legs and a tough mindset.
The road is waiting. Your layered kit is ready.