Nothing ruins a hard-earned hunting trip faster than stiff, unforgiving boots. Every mile becomes a slow-motion misery — blisters by noon, aching feet by mid-afternoon, and your focus drifting from the hunt to pure survival.
The brutal truth? Most hunters know they should break in their boots before opening day. Few do it right.
Conditioning your hunting boots goes beyond comfort. It protects your investment, keeps you mobile on rough terrain, and gives you every possible edge on opening day.Experienced hunting boot suppliers often recommend starting the break-in process several weeks before the season opens, especially for stiff leather models.
What follows is a no-nonsense, week-by-week system for breaking in your boots the right way. It covers everything from initial fit checks to simulating real pack weight. By opening day, your boots will feel like they were built for your feet.
Step 1: Check the Fit Before You Even Start Breaking Them In
A bad fit isn' t a break-in problem. It's a buying problem — and no amount of conditioning will fix it.Most reputable hunting boot manufacturers provide detailed sizing guidelines, but verifying fit in person remains essential before beginning any break-in routine.
Before you spend a single hour breaking in your hunting boots, confirm one thing: the fit is correct. Skipping this check is the most common mistake hunters make. They spend weeks conditioning boots that were never going to work for their feet.
Timing and sock choice matter more than most people think. Always wear your actual hunting socks — not thin dress socks, not athletic ankle socks. Whatever thickness you plan to hunt in, wear that exact sock. Try the boots on in the afternoon or evening. Your feet are fuller then from a full day of movement. That's closer to the size your feet will reach after miles on the trail.
Three things to evaluate:
Toe room. Stand up, shift your weight forward, and press your toes toward the front. You want about one thumb's width of space between your longest toe and the boot tip. Toes already touching? The boot is too small. Breaking them in won't add length.
Heel lock. Walk around, simulate climbing a slope, then going back down. Your heel should stay planted — no lift, no slide. Heel slippage doesn't improve with break-in. It gets worse, and it causes blisters.
Instep fit. The upper should wrap your foot with even pressure all around. Feel numbness, heat, or pressure across the top of your foot within minutes? The volume is too narrow. That's a last shape problem, not a stiffness problem.
Stand for two to three minutes under full weight. Then walk. Flex your knees forward. Step across uneven ground if you can. Check whether your toes can spread out, whether your heel feels anchored, and whether anything is pinching or digging in.
Feeling toe compression, heel slip, or instep pressure at this stage? Swap sizes or try a different last. A boot that fits poorly will break down faster — not better.
Step 2: Start With Indoor Wear — The Overlooked First Phase
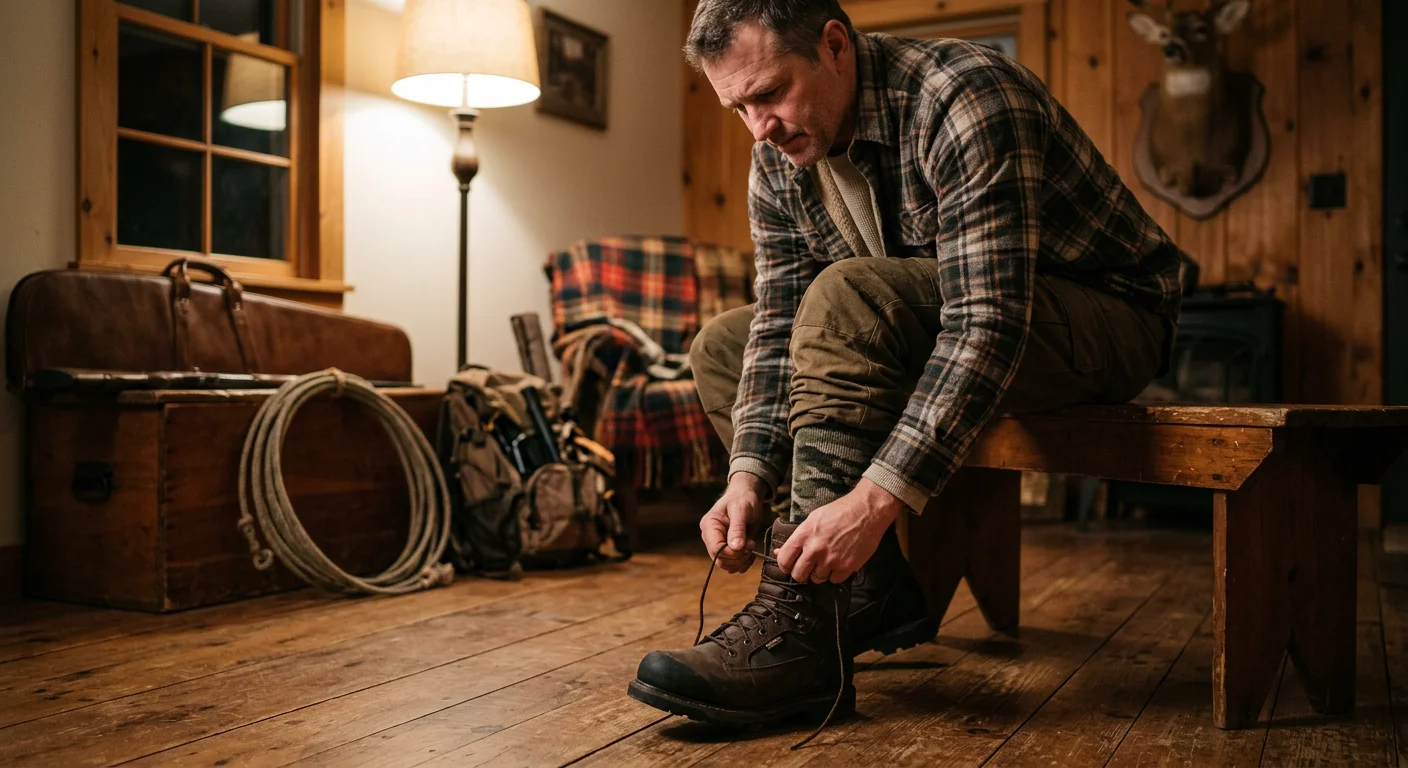
Most hunters lace up their new boots, HEAD straight outside, and wonder why their feet are wrecked by mile three. The fix is simpler than they think — and it starts in the living room.
Indoor wear is the foundation of a proper boot break-in. It's unglamorous. It feels unnecessary. It works.
The Schedule That Works
Don' t just wear your boots around the house at random. Follow a structured progression:
Days 1–3: 1–2 hours per day. Walk around the house, stand in the kitchen, pace the hallway. No hills, no stairs — just basic movement on flat ground.
Days 4–7: Bump up to 2–4 hours each day. Add stairs, squats, and lunges. These movements push the boot to flex at the exact points where stiffness causes blisters.
For stiff full-grain leather hunting boots, plan to log 10–20 total hours of break-in time. At least half of that should happen indoors before you ever hit a trail.Many OEM/ODM hunting boot programs use similar leather constructions, making early indoor conditioning especially important regardless of branding.
Wear the Right Socks from Day One
This matters more than most hunters realize. Wear your actual hunting socks — mid-weight or heavyweight wool or synthetic blends with cushioning at the heel and forefoot. Not cotton ankle socks. Not gym socks.
Plan to double-layer? That means a thin liner sock plus a thick hunting sock. Do that same combination indoors too. Even 1–2 hours per day in your exact field setup will expose fit problems before they turn into blister problems.
Map Your Pressure Points — Step by Step
Indoor wear isn't passive. Use this time to diagnose how the boot behaves against your specific foot.
Before you put the boots on , stand barefoot for one minute. Notice where your foot loads — heel, ball, outer edge, toe tips.
Stand still in your boots for 5 minutes. Note any single-point pressure — a tongue edge digging into one spot on your ankle, a seam pressing against your little toe. Spread pressure across the whole foot is normal. Concentrated pressure at one small point is a warning sign.
Walk for 10–15 minutes across different surfaces — hard floor and carpet both. Every 3–5 minutes, pause and rate any discomfort on a 0–10 scale. Anything at 3 or below is manageable. At 5, your gait is already shifting to compensate. At 7 or above, stop right away.
Run functional movements for 5–10 minutes. Climb stairs, do 10–20 lunges or squats. Watch the crease forming across the top of your foot and around the ankle. That's where leather boots build pressure lines as they begin to mold.
Inspect your skin within 5 minutes of taking the boots off. Red marks smaller than a coin that fade within 30 minutes? That's normal break-in friction. Redness larger than a thumbnail still visible after 60 minutes? That's a real hot spot. It will become a blister under field conditions.
Leather vs. Synthetic: They Don't Break In the Same Way
Full-grain leather boots soften slowly. The payoff is that they conform to your foot's exact shape over time — that's their real advantage. They develop crease memory , meaning the boot molds to your gait with use. But that process takes patience. Rush it and you get hard pressure lines at the wrong flex points.
Synthetic boots feel more forgiving right away. But their hot spots don't come from overall stiffness — they come from stitching, thermoplastic support panels, and hard edge seams. Those problem points tend to show up within the first 1–2 hours of indoor wear. Catch them at that stage, not on the trail.
A Word on Leather Conditioning at This Stage
Don't saturate a new leather boot with mink oil or neatsfoot oil straight out of the box. Dry-wear your boots for at least 3–5 hours first , spread across several days. The leather needs time to start shaping to your foot before any softening agent changes its structure.
Reach for conditioning products only if a specific crease point hits 4/10 or higher on discomfort, or if the boot collar is digging into your ankle bone. Use a thin coat of oil — absorbed fully, no visible shine left on the surface. Focus on crease zones and hot spot areas. Over-oiling the whole boot too soon weakens arch support and can press new pressure wrinkles into the instep.
Synthetic boots? Skip the oil. They don't need it, and most won't benefit from it.
Step 3: Progress to Short Outdoor Walks on Mixed Terrain
Your boots have logged their indoor hours. The leather has started to yield. Now it's time to take things outside — but not to the mountain yet.
This is where hunters jump the gun. They feel the boots softening up, get impatient, and head straight for a five-mile trail with elevation. Three miles in, they've got a blister the size of a quarter on each heel. The boot-to-foot relationship is falling apart fast. Don't be that guy.
The goal of Step 3 is simple. Get your boots onto mixed terrain in short, controlled sessions — 30 to 60 minutes. This phase also helps identify whether custom hunting insoles or fit adjustments are needed before longer backcountry hikes.Do that before you think about serious distance.
Why Mixed Terrain Matters
Flat pavement tells you almost nothing useful about how a boot will perform in the field. Add gravel, grass, and uneven ground to the same walk, and everything changes.
Each surface tests a different part of the system:
Gravel and crushed stone stress the midsole's ability to spread point pressure. Small rocks push against the outsole and create micro-torque. That tests lateral edge support. Gravel will expose any arch issues fast.
Grass and soft ground force your ankle to work harder with every step. This is where the boot's collar height and ankle structure prove their worth — or don't.
Pavement cuts through the noise and isolates cushioning fit. Hard surface, no forgiveness. A tight toe box or the wrong insole volume? A hard sidewalk makes it obvious inside twenty minutes.
A Sample 40-Minute Walk That Works
Don't just wander. Structure your sessions:
Minutes 0–10: Pavement warm-up, steady pace
Minutes 10–20: Gravel path or unpaved parking lot
Minutes 20–30: Park grass, slight incline if available
Minutes 30–40: Return on pavement
Walk at a pace where you can hold a conversation but wouldn't want to. That puts you at about 60–70% of max heart rate. That's enough effort to load the boot the way real hunting terrain will.
Check In Three Times Per Walk
At the 10-minute mark, check that your toes aren't jamming the toe box on any downhill pitch. Also confirm the laces aren't cutting across the top of your foot. At 30 minutes, focus on your heels. Any burning sensation there means a blister is forming — that's not a break-in phase to push through. After you finish, pull the boots off and inspect your skin within five minutes. Redness that fades inside thirty minutes is normal friction. Anything still visible after an hour needs attention before your next session.
The Threshold for Moving Forward
Don't move into longer distance or steeper terrain yet. First, hit this benchmark: three separate 45-to-60-minute mixed-terrain walks spread across at least seven to ten days. No blisters. No significant ankle soreness the next morning. No single pressure point that keeps coming back across all three surface types.
Hit that mark, and your boots are ready to take on more.
Step 4: Add Pack Weight and Simulate Real Hunting Movement
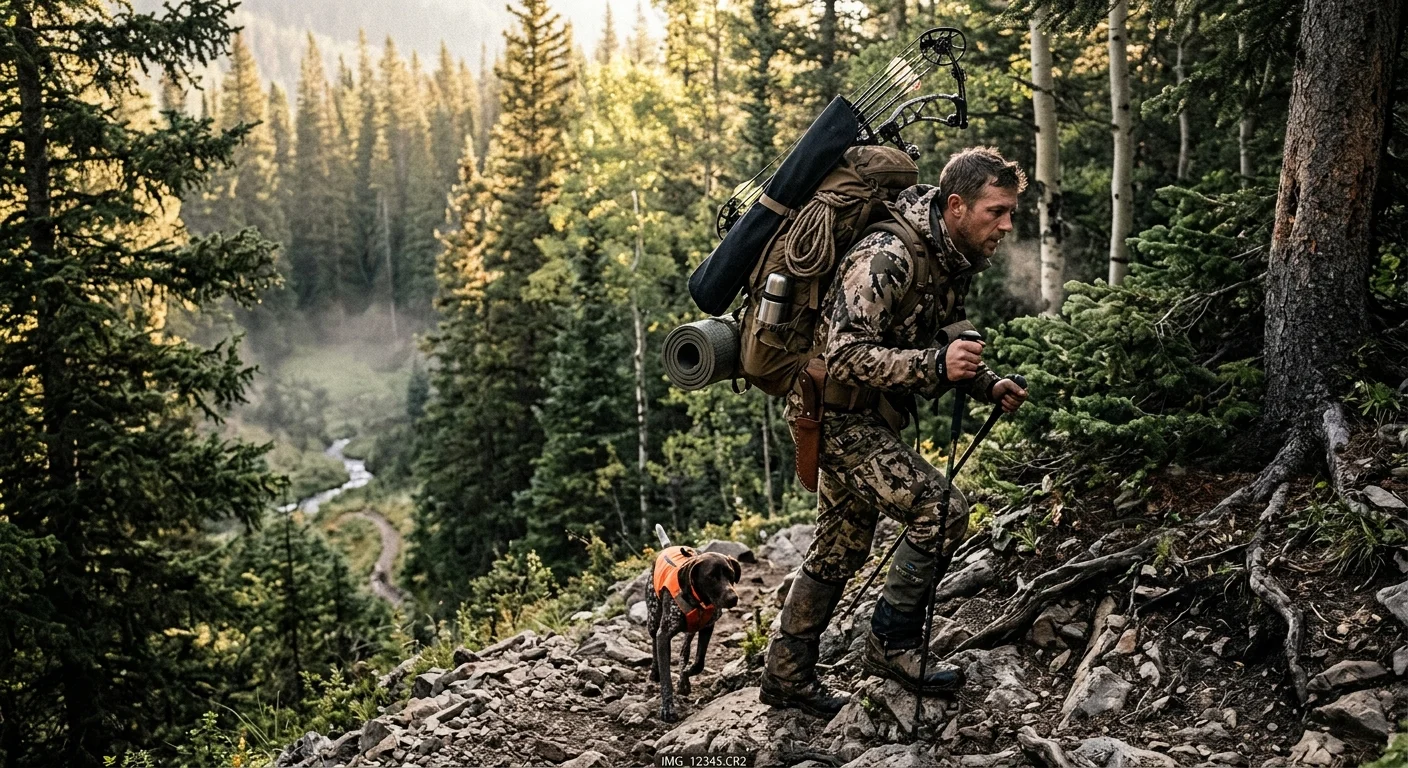
Here's what separates hunters who finish the day strong from those who limp back to camp: pack weight.
Your boots may feel broken in on flat ground with nothing on your back. Add 40 pounds of gear and a three-mile climb — those same boots will find pressure points you never knew existed. The heel lifts. The toe box compresses in new ways. A seam that felt fine at zero load starts grinding into your little toe by mile two. Adding realistic pack weight isn't optional. It's the final stress test before opening day.Even boots that feel comfortable during hunting gear factory testing can reveal entirely different pressure points once real hunting loads are added.
Start at 40–50% of Your Real Hunting Load
Don't strap on full weight from day one. Your actual hunting pack runs around 30 lbs? Start your weighted sessions at 12–15 lbs. Your boots — and your feet — need time to adapt to the combined system before you push further.
A four-week progression that works:
Week 1: 40–50% of target load. Moderate incline, 30–40 minutes per session.
Week 2: 50–60%. Add short steep-grade intervals — 2 to 3 minutes at 8–10% incline.
Week 3–4: Push to 60–80%. Extend sessions to 45–60 minutes across mixed terrain.
Simulate the Actual Movements
Weight alone isn't enough. Your body moves in specific ways out in the field. Each movement loads your boot in a different spot.
Uphill: Work 8–15% incline in intervals. Four to six rounds of two minutes up, two minutes recovery. Your boot collar will dig into the ankle here. Pay close attention to that.
Downhill: Add loaded descents after Week 2 only. Descending puts hard pressure on your toe box and forefoot. That's the exact condition that creates black toenails and hot spots under real hunting weight.
Sidehill traverses: Walk across slopes left and right. Alternate which foot sits higher. Five to ten minutes each direction. This exposes lateral edge pressure and ankle roll tendencies your boots have been hiding.
Crouching and stepping over obstacles: Pack on, practice deep squats, kneeling, and step-overs using a 12–14 inch box. These movements hit flex points in the boot that flat walking never reaches.
Track Every Hot Spot
Take your boots off after each weighted session. Check your feet within five minutes. Write down what you find:
Where — left or right, heel or ball, inner or outer edge
When it started — minute 20 on the uphill, or after the step-over drills
What you adjusted — lacing tension, sock combo, heel padding
Say your right heel starts burning at minute 35 during uphill work. That tells you something clear: that's the load condition where your hunting boot fit breaks down. Fix it now with a heel-grip insert or adjusted lacing. Don't find out at mile four on opening morning.
This phase doesn't just break in your boots — it shows you the truth about them.
Step 5: Test in Wet and Muddy Conditions Before Opening Day
Wet leather is a different animal.
Natural leather absorbs water at a rate of 20–30% of its own dry weight. As it dries, it contracts and stiffens — and those flex points you spent four weeks breaking in? They shift. The crease that formed across your instep now sits a millimeter or two off from where your foot bends. That's all it takes to turn a broken-in boot back into a blister machine.
Here's the core problem: after just 5–10 wet-dry cycles, stiffness at leather's main flex points increases by 10–25% . Your foot's walking pattern shifts by 1–3 mm per stride. Doesn't sound like much. But that gap is the difference between "just fine" and "quarter-sized blister by mile three."
Synthetic boots have their own version of this. The fabric absorbs water and swells. Large outdoor gear wholesalers often see higher return rates from hunters who skip wet-condition testing before the season starts.The thermoplastic support panels hold firm. That combination causes localized tightening across the forefoot — the equivalent of dropping half a shoe width. Wide feet get squeezed. Narrow feet float. New pressure points appear that dry-ground testing never caught.
Here's what most hunters miss: wet skin blisters faster than dry skin. Friction between your sock and boot lining climbs from 0 . 3–0.4 dry to 0.5–0.6 wet. Your skin's outer layer also loses strength once it's saturated. Sports medicine research shows blister rates jump 30–50% under wet conditions. That's not a small difference. That's the gap between finishing the day and limping back to camp at noon.
What the Terrain Does to Your Movement
Mud and wet grass don't just soak your boots — they change how you walk. To keep traction, most people shorten their stride by 5–15% , drop their heel strike angle, and push more weight onto the forefoot and ball of the foot. That shift puts pressure right where dry-ground testing never reached.
On uphill mud, your toes dig in for grip. A toe box that's even a little undersized — or an upper that collapses inward under load — can spike pressure on the first and second toes by 20–40% above dry-trail levels. New hot spots show up at the big toe knuckle and across the second toe's top joint. These are spots that felt fine through four weeks of structured training.
That's why wet-condition testing isn't optional. It's mandatory.
How to Run the Wet-Condition Test
The Environment
Find a route with wet grass, light mud, and some shallow standing water. You need at least 90–120 minutes of continuous walking — not three separate 30-minute loops. Short sessions miss the "late-onset" friction points that only surface after the boot has been soaked for an hour or more. Build in at least 5–10 minutes of continuous uphill and downhill per loop, repeated two to three times. That's where forefoot pressure, toe strike, and Achilles tension all peak at once.
The Load
Carry your actual hunting pack weight — or a bit more. Target 15–25% of your body weight for most hunting setups. A 180-pound hunter should walk with 27–45 pounds on his back. This isn't the place to go light. Catch the boot that fails at mile four under load now — not on opening morning.
Check-In Schedule
Track your body across the session in stages:
0–20 minutes: Watch for pinching at the outer ankle bone, instep lacing, or inner arch. Wet conditions expose fit problems fast.
20–45 minutes: Shift focus to the heel cup and arch support zone. A burning or warm feeling here is the first sign of wet-friction damage — the most common early failure point.
45–90 minutes: Every 10–15 minutes, push to a fast walk or light jog for 3–5 minutes. Check whether your forefoot slides forward more than 5 mm inside the boot. That much movement is enough to create serious blisters. Also check heel lift — a heel that rises before your foot leaves the ground means the heel cup isn't locking down when socks are wet.
Every 30 minutes: Stop, pull your boots off, and look at your skin. Any red patch larger than 1 cm in diameter that's tender when pressed needs fixing before opening day — through padding, anti-friction balm, or an insole adjustment.
Gore-Tex vs. Non-Waterproof Boots: Different Problems, Different Tests
Waterproof boots keep your feet dry longer but trap internal moisture from sweat. In high-humidity, low-wind conditions, Gore-Tex breathability drops well below its lab-rated level. After 3–4 hours of hard use, the inside of the boot turns into a sealed, humid chamber. Blisters from that trapped moisture tend to show up late in the day — and in spots you wouldn't expect, like the top of the foot where lacing presses hardest. For waterproof boots, run one extended test of 3–4 continuous hours. Pay close attention to that final hour. That's where the difference between a well-fitted and a poorly-fitted waterproof boot becomes clear.
Non-waterproof boots soak through fast — sometimes within 30–60 minutes of wet grass walking — pushing blister risk 30–50% above dry conditions . The fabric outer softens and sags against your toe joints and instep bones. That concentrates abrasion on the second and third metatarsal tops — spots that felt fine when the boot was stiff. Walk through one full wet-through scenario on purpose. Keep moving for 30–60 minutes after the boots are soaked . Your heels, bunion area, and little toe all need to survive that stretch without serious damage. If they do, your setup is field-ready.
Sock choice matters more here than anywhere else. Wet wool or synthetic blends hold their cushioning structure. Wet cotton collapses and dries 2–3 times slower than synthetic fiber. It turns your boot into a friction chamber. Skip wool or synthetic hunting socks during break-in sessions, and this test will make that mistake obvious fast.
After the Test: Dry Your Boots Without Destroying Them
Get the drying process right. Leather fibers harden beyond repair above 60–70°C . The adhesive bonding most outsoles fails near 70–80°C . Gore-Tex membranes handle higher heat, but the polyurethane layers bonded to them start breaking down above 60°C . So no heat vents, no radiators, no placing them near a fire.
The right method: remove insoles, loosen laces all the way, pack the interior with dry newspaper or cedar boot trees, and let them dry at room temperature in a ventilated space. Swap the newspaper after the first two hours. A soaked leather boot needs 24–48 hours to dry fully. After that, rub a thin coat of leather conditioner into any areas that feel stiffer than before the test.
That final conditioning pass closes the loop — and your boots are ready for opening day.
Your 3-Week Break-In Timeline: A Week-by-Week Action Plan
Twenty to thirty miles. That's the number. Log that distance across three weeks in a structured, progressive way. You'll arrive at your hunting ground with boots that already know your feet. Skip the process, and those same boots will teach you a painful lesson at mile four.
Here's how to do it right.
Week 1: Build the Foundation (Target: 6–8 Miles)
The first week is quiet work. No trails. No pack weight. Just steady, purposeful wear that gets boot and foot talking to each other.
Days 1–2: Wear your boots indoors for 2–3 hours each day. Don't stand in one place for more than 30 minutes at a stretch. Add a short flat walk — half a mile to a mile each day.
Days 3–4: Extend indoor wear to 4–6 hours. Get outside for 1–1.5 miles, split into two shorter segments. Morning and evening works well.
Days 5–7: You can wear the boots most of the day now. Every other day, walk 1.5–2 miles straight on flat ground.
Your week-one checkpoint: By Sunday, the forefoot of a stiff leather boot should flex with less resistance than it did on Monday. That's not subjective — you'll feel it. Blisters showing up on walks of 2 miles or less? Stop adding mileage. Fix the sock choice or lacing tension first.
Week 2: Add Load and Terrain (Target: 10–15 Miles)
This is where real conditioning begins. Flat ground is done. Now you need hills and a pack.
Start with 30–40% of your actual hunting load. Carrying 30 lbs in the field? Put 10–12 lbs on your back this week. Find a park or trail with 5–10% grades and 150–300 feet of elevation gain per outing.
A sample week:
- Monday: Easy 1-mile recovery walk, light load
- Wednesday: 3 miles, 30–40% load, rolling terrain
- Friday: 4 miles, 40–50% load, include sustained uphill
- Sunday: 4 miles, 40–50% load, same structure
Your week-two checkpoint: After a 3–5 mile loaded hike, you should feel mild fatigue — not sharp pain, not new blisters. Downhill sections shouldn't cause knee buckle or real ankle soreness the next morning. They do? Drop back 20% on both load and mileage.
Week 3: Full Simulation (Target: 7–12 Additional Miles, 20–30 Total)
By the final week, the easy work is behind you. This week pushes the full system hard — wet ground, full weight, technical terrain — before opening day does it for you.
The structure:
- Tuesday: 70% target load, mixed incline, 3 miles
- Thursday: Full hunting load, wet or muddy surface, 3 miles
- Saturday: Full load, rough terrain with roots, rocks, and sidehill traverses, 4 miles — split into two 2-mile blocks if needed
By the end of Week 3, your boots will have taken somewhere between 40,000 and 60,000 individual steps. The midsole cushioning will have compressed enough to match your gait. The heel and collar will have softened right at the points where your ankle flexes. That's not theory. That's what 20–30 miles of real conditioning does to a boot.
Running Short on Time? The Compressed 5-Day Plan
Trip leaves in less than a week. You can still do useful work — just set realistic expectations and rely more on protective measures to fill the gap.
Days 1–2: 6–8 hours of indoor wear each day. Add a short flat walk of half to one mile. Check your feet every evening and mark any hot spots.
Days 3–4: One 2–3 mile walk per day on light terrain, 30–40% of your hunting load.
Days 5–6: One harder day — 4–5 miles, 50–70% load, with some incline and a wet stretch if you can manage it. Follow it with a short 1–2 mile recovery walk the next day.
You won't reach 20 miles. Accept that. Make up for it with a thin liner sock under your hunting sock to cut friction. Pre-tape the heel and little toe before any serious day. Keep your first day in the field shorter than planned. Give the boots one final day to finish what you started.
Essential Gear to Have During the Break-In Process
The right gear won't replace the miles — but the wrong gear will waste every one of them.
Stock these four categories before your first indoor hour. Get them right and your break-in process moves forward. Get them wrong and you'll still be guessing on opening morning.
Socks: The Most Underestimated Variable
Wear your actual hunting socks from day one. Not gym socks. Not whatever's clean.
Your baseline is mid-weight to heavyweight merino wool or synthetic crew-height socks. They need to be tall enough to cover the boot collar. Merino handles temperature swings well and resists odor over long sessions. Synthetics dry faster and hold up better in wet conditions. Either way, pick a pair with reinforced heel and toe cushioning.
Plan to double-layer in the field? Run that same liner-sock-plus-hunting-sock combo indoors first. Test it there — not on the trail.
Blister Prevention Kit
Three items belong in your kit before the first session:
Moleskin — put it on before a hot spot turns into a blister, not after. Target the heel, little toe, and ankle inner wall.
Anti-friction balm — run it along any seam line that shows redness after indoor wear.
Foot powder — useful for high-sweat sessions and long mileage. Dry skin blisters slower.
Leather Conditioner (Leather Boots Only)
Don't reach for the oil on day one. Dry-wear the boot for at least three to five hours first. Then put on a thin coat — let it absorb fully with no shine left — and focus on crease zones and collar edges. Too much conditioner too soon softens the arch support. The boot needs time to shape itself to your foot before you do that.
Synthetic boots? Skip this section.
Upgraded Insoles
Factory insoles are a starting point, not a solution. Notice forefoot slide, arch fatigue, or heel lift in your first few sessions? Swap them out before you add more mileage — not after. Aftermarket insoles with solid arch support and a deep heel cup fix the structural gaps that extra break-in time can't solve.
Conclusion
Your boots won't break themselves in. Your feet will remember every shortcut you took come opening day.
A miserable hunt or a great one — the gap between them comes down to what you do weeks before you ever chamber a round. Follow the three-week break-in timeline. Work through the progression, from living room floors to loaded-pack hill climbs. Give hunting boot comfort the same attention you give your shot placement. Condition the leather. Test wet conditions. Trust the process.
Get this right, and your boots become an extension of you — invisible, reliable, and ready for whatever terrain you throw at them.Whether you paid premium retail or secured a better wholesale price of hunting boots through a hunting club or group purchase, proper break-in determines how well that investment performs in the field.
Close this tab. Lace up those new boots. Go take a walk. Start tonight. Your feet — and your hunt — are counting on the work you put in before opening day.
The wilderness doesn't give second chances. Neither do untested boots.