Your body flips upside down. Arms shake. Breath catches somewhere between focus and fear. That's the moment yoga stops being a stretch routine and becomes something else.
Advanced yoga has a way of humbling even the most dedicated practitioners. The poses at the top of the difficulty curve demand more than flexibility or strength. They ask for both — at the same time — plus a nervous system willing to trust what your body is still learning. For brands working with OEM/ODM yoga apparel suppliers, these movements demand precision-fit and unrestricted stretch.
Eyeing your first handstand? Chasing the Scorpion pose? This guide breaks down the top 10 most difficult yoga poses. Not just to admire, but to build toward — step by step, with care and real purpose.
#1 Scorpion Handstand (Vrschikasana) — The Ultimate Full-Body Challenge
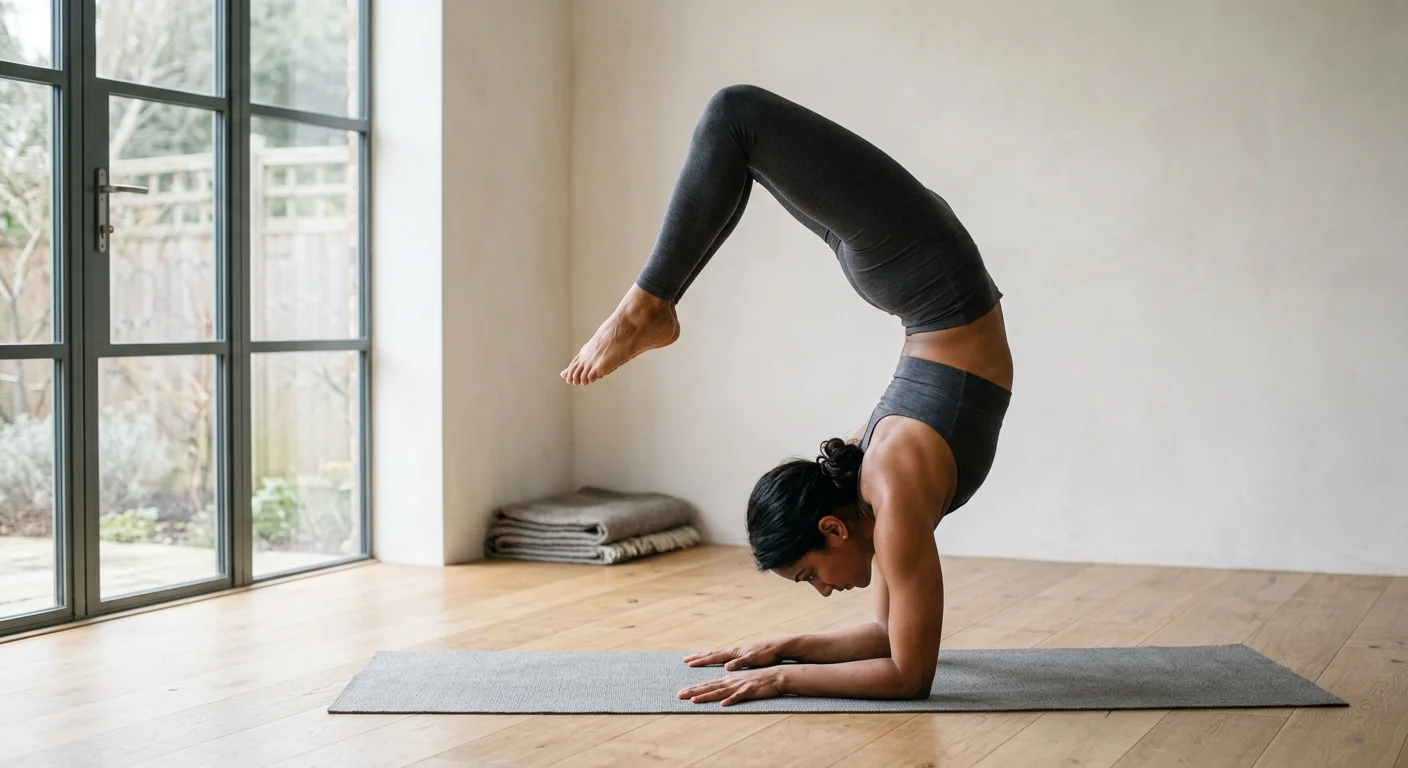
Few poses in advanced yoga push your body this hard. Vrschikasana — the Scorpion Handstand — stacks a full backbend on top of an inverted balance. Your arms, spine, core, and nervous system all have to work together, calm and steady.
Start with a solid forearm stand. Press your elbows down. Stack your hips over your shoulders. Open your chest forward over your forearms. From there, the backbend begins — not by collapsing your lower back. Instead, lengthen through each vertebra , lift the pelvis from the hips, and let your feet drift forward and away from your center.
A few things to keep in mind:
Keep knees hip-width apart — never wider, or it compresses the low back
Let the chest melt through the arms, not pull the shoulders backward
Engage the core and low belly throughout — the backbend comes from spine length, not waist crunch
The most common mistake is rushing. Squeezing the hamstrings or glutes to force the feet toward the head causes cramping and kills real progress. Let the back muscles engage with control. Lift your gaze forward. Let the body settle into the shape on its own terms.
Build toward it with these drills:
- Dolphin Pose — trains the forearm base and opens the chest
- Wall forearm stand — slide your heels up, then lower your toes to the wall, knees hip-width, chest melting forward
Patience is not just part of the process here. It is the practice.
#2 Handstand (Adho Mukha Vrksasana) — Building Inversion Confidence
The fear is real — and it's normal. You kick up, hips rise, the world flips, and your brain screams this is wrong . That instinct doesn't mean you're not ready. It means you're human.
Most people aren't blocked by strength. They're blocked by trust. Your arms and shoulders need to be solid — weak shoulder girdles are the top reason kick-ups stall. But mental hesitation does just as much damage. Both have to be trained.
Build the foundation first:
- Forearm Plank — builds the shoulder and core endurance that inversions demand
- Dolphin Pose — gets your shoulders stacked and ready
- Chest-to-wall holds — train shoulder external rotation and alignment before going freestanding
High-frequency training like this is why many studios source from yoga clothing wholesalers focused on durability and stretch recovery.
The 2-week wall protocol:
- Days 1–6: Wall-facing holds, basic drills, getting comfortable upside down
- Days 7–11: Kick-ups, one-leg lifts, wall walks
- Days 12–14: Lift one foot — then both — off the wall for 1–2 seconds maximum
Progress takes 8–12 weeks of steady practice.Behind the scenes, a specialized yoga clothing factory ensures fabric stability and seam strength under extreme movement. The real mastery benchmark? A freestanding hold of 30 seconds. That's the target — patient, honest, consistent work.
#3 Eight-Angle Pose (Astavakrasana) — Arm Balance Meets Hip Flexibility
Astavakrasana is named after a sage born with eight curves across his body — and the pose lives up to that story. Your hips need to open wide. Your arms carry real weight. Your core holds everything together, all at the same time.
Before you attempt it, build these foundations:
- Plank Pose — fires up shoulders and core (repeat 3–5 times with slow, controlled lowering)
- Downward Dog — lengthens hamstrings, which need to be long and open in the final shape
- Lizard Pose — opens hip flexors and external rotators
- Compass Pose — warms the hip for that deep external rotation the pose demands
Work through it in four stages:
Rock the Baby — sit tall, draw your shin parallel to the floor, hug it close to your upper arm, sway side to side for 5 breaths
Elephant Trunk — thread your arm under the leg, press up from the floor, spread shoulder blades wide, hold 3–5 breaths
Hook and Lift — hook one ankle over the other, tip forward, bend elbows, extend legs sideways
Full Expression — squeeze legs together, press through your heels, lengthen away
The details that make a real difference:
- Press the base of your index fingers into the mat. This wakes up the forearm muscles that keep everything stable.
- Hug your ribs in. Keep the space between your shoulder blades lifted and broad.
- Knee not reaching your shoulder yet? Hold the leg as high as you can with both hands. That's a solid, real starting point.
Leg sliding down your arm mid-pose is the most common frustration. Fix it by squeezing your thighs toward your upper arm with clear intention. Don't just let them rest there — that grip is what holds the pose together.For brands and studios building performance-focused collections, working with a top Yoga Clothing Supplier can make a noticeable difference in how garments support these high-friction arm balances.
CTA 1#4 Firefly Pose (Tittibhasana) — Wrist Strength and Core Mastery
Tittibhasana exposes everything your core has been avoiding.
Your legs extend out parallel to the floor. Your wrists carry the full weight between gravity and effort. Nothing hides here — not a weak belly, not tight hips, not palms that haven't learned to feel the floor beneath them.
Prepare your body before you attempt it:
- Plank holds — 3 sets of 30–60 seconds, building the wrist tolerance this pose demands
- Crow Pose — trains the arm balance pattern and core compression Tittibhasana relies on
- Pigeon Pose — opens the hips and groins enough for your legs to thread into position
Work through it step by step:
Wide squat — feet wider than hips, heels pressing down, legs pulling inward with steady muscle tension for 5–10 breaths
Thread your arms — fold forward, hook shoulders under knees, hands flat on the floor ahead of you, thighs pressing into upper arms
Lift your hips — engage your core full, round your back a touch, push the floor away for 3–5 breaths
Extend the legs — straighten your knees, clamp thighs to upper arms, lift your feet and hold
Two things that make or break this pose:
Wrist loading matters. Press through your entire palm — about 60–70% of your weight sits in the shoulders and upper arms. Your thighs do real work here too. Squeeze them into your arms to take 20–30% of the load off your wrists.
Hips sagging is the most common collapse point. Draw your navel in toward your spine. Engage your low belly with intention — bandhas aren't decoration here, they're the whole structure holding you up.
Build toward a 30–60 second hold. The strength arrives gradually, then all at once.As demand grows for technical, movement-tested gear, many emerging brands are turning to top custom Yoga Apparel Manufacturers and exploring custom yoga clothing services to create pieces that actually hold up under advanced poses like this.
#5 Crow Pose (Bakasana) — The Gateway to Arm Balance Poses
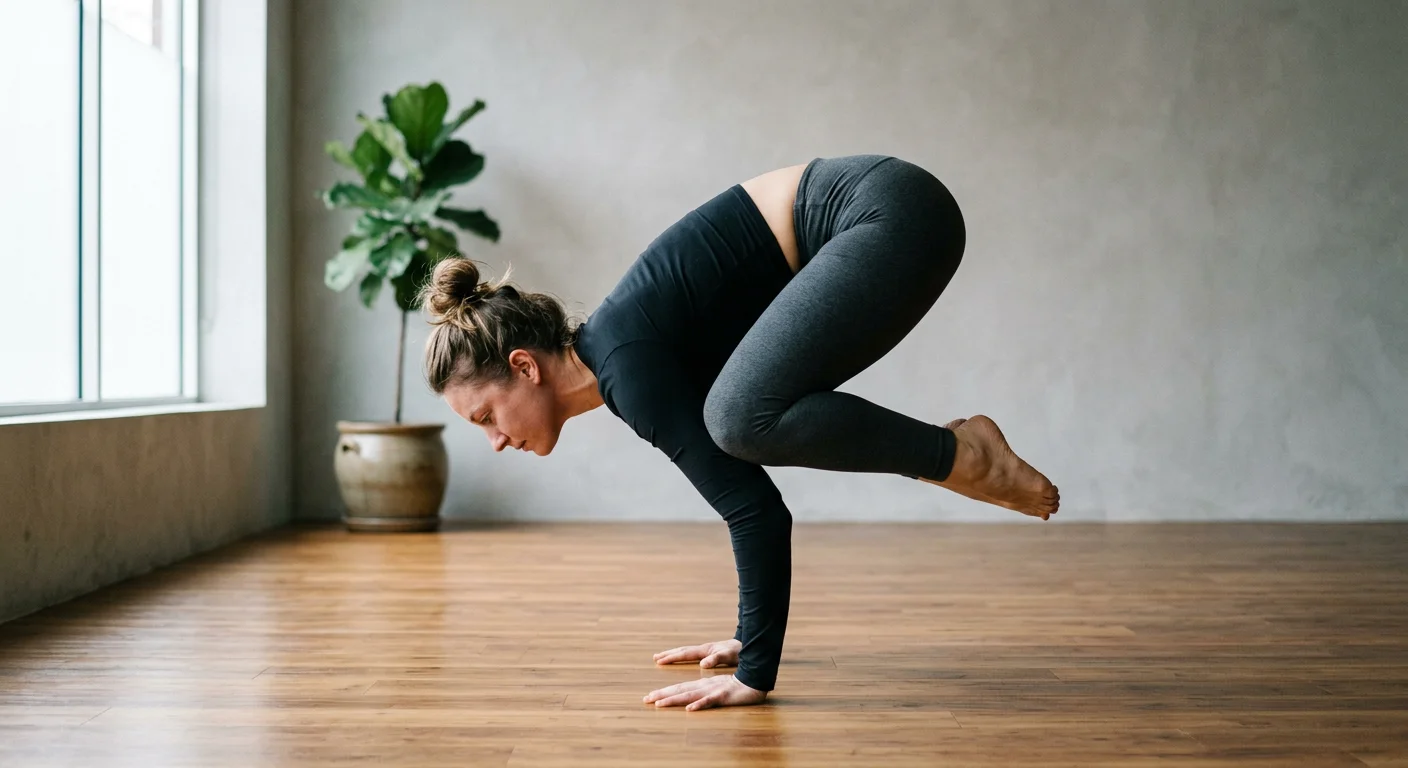
Every arm balance in yoga starts here. Crow Pose is where your hands and the floor stop feeling like a gamble — and start feeling like solid ground you can trust.
Squat down. Place your hands shoulder-width apart, fingers spread wide. Bend your elbows to about 90 degrees. Your triceps form a natural shelf — that's where your knees will rest. Engage your core, lean forward with intention, and lift your feet off the floor. Gaze straight ahead, not down. Hold for 30–60 seconds.
A few things that change everything:
Press through your entire palm to anchor your center of gravity downward
Squeeze your inner thighs into your upper arms — that grip is your stability
Keep your ankles everted and feet drawn up for a clean forward weight shift
Afraid of face-planting? Place a folded blanket in front of you. Practice the fall before it happens. Fear goes away faster than you'd expect.
One distinction worth knowing: Crow (Kakasana) uses bent elbows with knees resting on the tricep shelf. Crane (Bakasana) straightens the arms all the way, knees tucked toward the underarms. Same entry point, bigger demand on your body.
Nail this pose, and One-Legged Crow and Firefly Pose move from "someday" to "soon."
#6 King Pigeon Pose (Kapotasana) — The Deep Backbend Test
Kapotasana doesn't ask nicely. It goes straight into the deepest parts of your front body — ankles, thighs, groins, abdomen, chest, throat — and pulls on all of them at once. This is a full-spectrum backbend. Your thoracic spine does the heavy lifting here.
Build toward it this way:
Start in Pigeon Pose. Front leg bent to 90 degrees, back leg long behind you. Inhale and let your chest open — truly open, not just rise. Then reach back and grip your back foot at the ankle. Each exhale, soften your belly and press your shins and forearms flat into the floor. Lengthen your tailbone toward your knees. Lift your sternum up and forward.
The mistake almost everyone makes: arching hard through the lumbar instead of opening through the thoracic. That compression in your lower back is a warning signal, not a target. Focus on chest expansion first.
Prep your hips and quads before attempting:
- Lizard Pose — deep hip flexor release
- Low Lunge with quad grab — warms the psoas and front thigh together
- Pigeon Pose — the direct path into the full expression
Hold the peak shape for at least 30 seconds. Inhale into the chest. Let each exhale soften the belly. The science backs this up — a 2018 study by Sathiyamoorthy and Karthikeyan found Kapotasana produces clear gains in muscle flexibility. Iyer's research also links regular practice to lower back pain relief.
The benchmark for real mastery: hands reaching feet, shins and forearms grounded, chest lifted — all without pinching the lumbar.
#7 Split Pose (Hanumanasana) — Flexibility Milestone for Every Yogi
Hanumanasana tells you the truth about your body — no shortcuts, no compensation tricks. Your front hamstrings and back hip flexors both need to let go. They have to release at the same level before your hips touch the floor.
What gets stretched:
- Front leg : hamstrings, inner thigh adductors
- Back leg : hip flexors, psoas, quadriceps
- Both sides work at the same time — uneven flexibility will stop your progress cold
Build toward it step by step:
Start with Half Splits (Ardha Hanumanasana) — this preps your hamstrings without the full load
Add Standing Splits at the Wall to build balance and hip alignment awareness
From a low lunge, slide your back foot back with control. Lower your hips with care. Never force the descent.
The entry that keeps you safe:
Inhale to lengthen your spine and lift your chest. Exhale to drop your hips a little lower. Let your breath drive the movement — not ambition.
Props aren't optional here — they're smart:
- Blocks under your hands for stability
- A cushion under your hips to protect against hamstring microtears
The golden rule: stretch to sensation, not pain. Forced stretching fires up your muscle spindles. That causes the muscle to contract — the exact opposite of what you want.
Mastery benchmark: hips flat on the floor, both legs straight, chest lifted, core and pelvic floor lightly engaged. That balance between front and back — that's the real milestone.
CTA 2#8 King Dancer Pose (Natarajasana) — Balance, Backbend, and Grace Combined
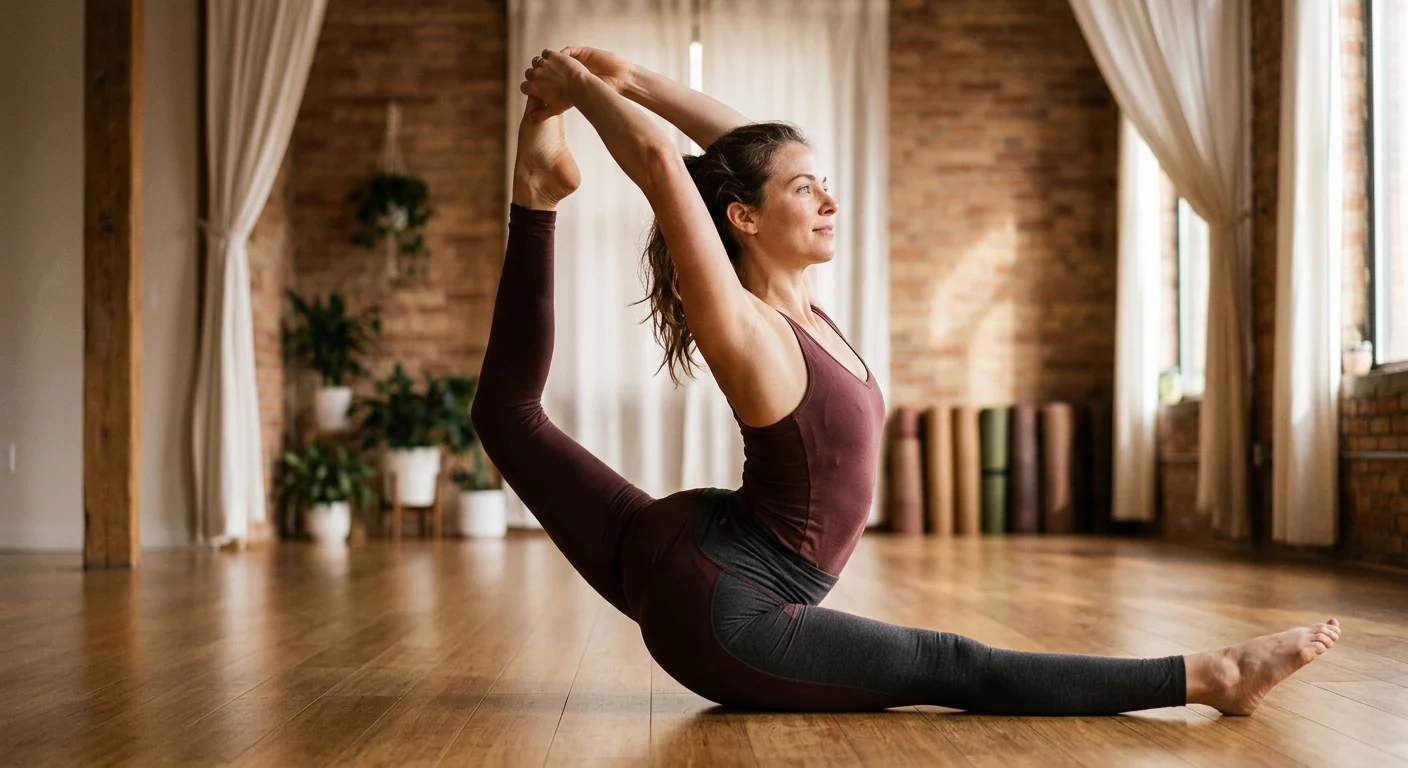
Natarajasana is named after Nataraja — the dancing form of Shiva — and that mythology feels earned. This pose is beautiful to watch and demanding to hold.
The full bind variation is where it gets serious. Both hands reach overhead to grip the lifted foot. Elbows point skyward. The chest arches back. Your standing ankle works constantly, making small corrections to stay upright. Your core holds the whole thing together.
What your body needs:
- Open shoulders, lats, and triceps
- Strong quads and hamstrings in the lifted leg
- Flexible hip flexors — similar demands to King Pigeon
- Active core for spinal support throughout
Build toward it step by step:
Mountain Pose — press all four corners of your standing foot into the ground
Ankle grasp with bent knee — activates the hip flexors and stretches the quad
Forward lean with leg extension — brings in the balance challenge
High leg lift, torso upright — pushes the difficulty further
Full overhead bind — the complete expression
A strap looped around your foot is not a shortcut. It's a smart bridge while your shoulder flexibility catches up.
Hold targets: 20–60 seconds for beginners, up to 3 minutes for advanced practitioners. Alignment matters more than duration — full stop.
Your gaze — your drishti — anchors everything. Focus drifts, the pose dissolves. That's not a metaphor. It's physics.
#9 One-Legged Crow Pose (Eka Pada Bakasana) — Advanced Arm Balance Progression
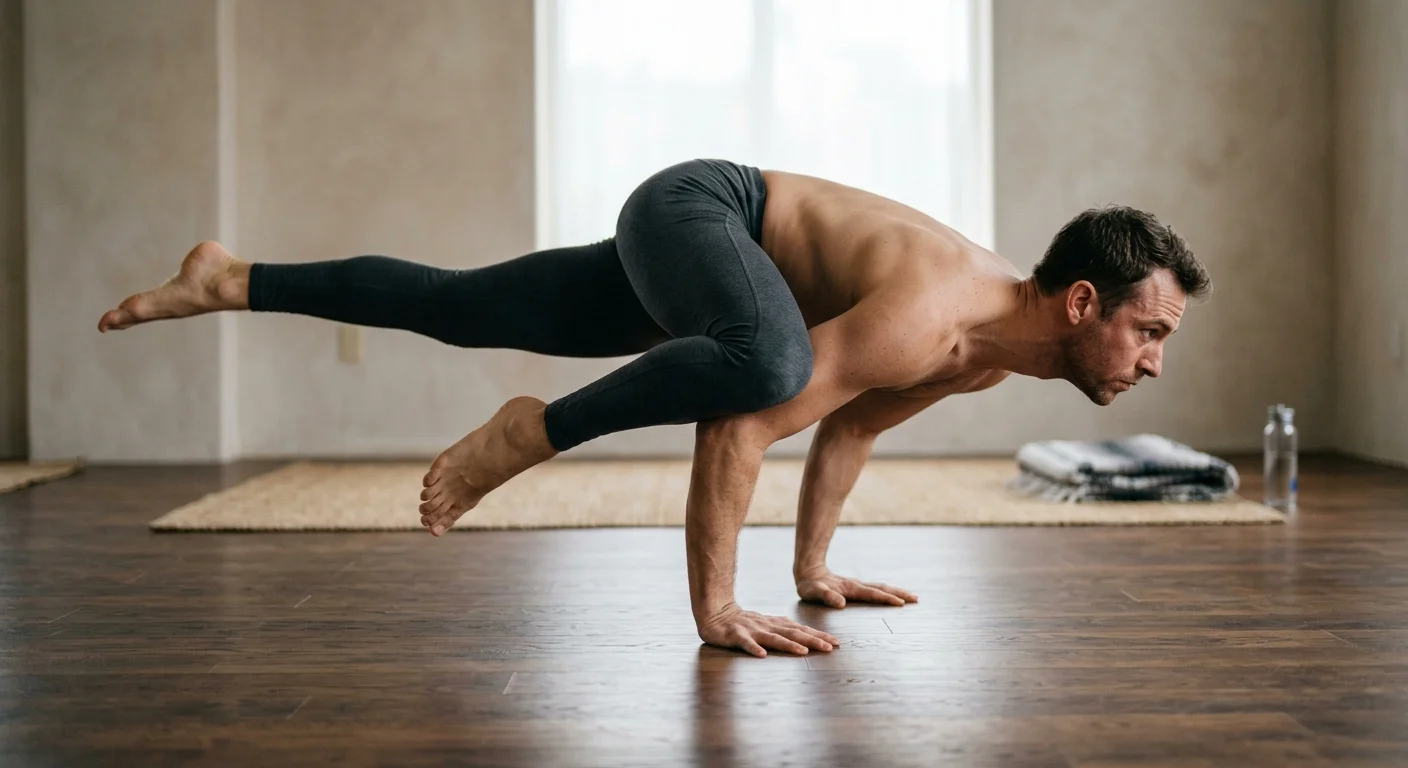
Crow Pose earns your trust. Eka Pada Bakasana tests it.
Stretching one leg straight back while balancing on bent arms is more than a strength boost from standard Bakasana. Your center of gravity shifts backward. Your core has to adjust fast. The transverse abdominis, rectus abdominis, and pelvic floor all fire at once — not one after another.
Build toward it with three key drills:
- Knee Hovers from Crow — lift one knee, hold 30 seconds or 10 slow reps per side. This trains the core-pelvic lift your extended leg will demand
- Forearm Planks — 30–60 second holds build the upper body foundation
- Locust Pose — fires up your hamstrings and glutes, which drive the extending leg
The step-by-step entry that works:
From Crow, straighten one leg back low — keep arms bent, 5 reps per side
From Downward Dog, draw your knee to your chest, then extend the leg back with elbows bent (this reduces wrist load)
Try the knee-slide: hug your inner thigh to your upper arm, drop your hips, extend the leg for 5–8 breaths
Straight arms come last — master bent-elbow balance first
One technical detail most people skip: keep the extending leg low at first. Height is not the goal yet — hamstring-core synchronization is. Once that connection feels natural, the leg rises on its own.
Target 30–60 second holds before adding reps.
#10 Two-Legged Inverted Staff Pose (Dwi Pada Viparita Dandasana) — Strength Meets Extreme Flexibility
On the Iyengar difficulty scale, this pose sits at 24 out of 60 — more than three times harder than Wheel Pose. That number alone tells you what you're dealing with.
Dwi Pada Viparita Dandasana is Wheel Pose pushed to its next extreme. Your forearms replace your hands. Your crown rests on the floor. Fingers interlace behind your head. From there, press through your heels. Lift your hips. Straighten your legs. Your spine arches deep, your chest drives outward, and every muscle fires at once.
Work into it from Wheel Pose:
1. From full Wheel, bend your elbows and lower your arms until they wrap around your head
2. Rest your crown between hands and feet, fingers interlaced behind
3. Inhale to settle — exhale to press heels down and straighten your legs
4. Keep weight on your forearms, never your neck
Shoulder stability is non-negotiable here. Engage your rotator cuff first — before your legs straighten. Ground your forearms into the floor. Get your shoulder muscles set and braced before anything else moves.
Not quite there yet? Straighten one leg at a time. That one small change shifts this from impossible to possible — just not today .
Hold for 30–60 seconds as a beginner. Build toward 1–3 minutes with steady, consistent practice.
Progressive Training Plan: How to Build Up to These Poses Safely
Consistency, not intensity, is what gets you there.
Research backs this up with real numbers. Practitioners who trained at least three times per week — around 130 to 180 minutes total — saw measurable gains within six weeks. Lung capacity went up 24%. Resting heart rate dropped from 85 bpm to 76. These aren't outliers. Steady, structured practice produces these results.
The table below maps your progression across eight weeks, organized by pose category:
Weeks | Inversions | Arm Balances | Backbends | Splits |
|---|---|---|---|---|
1–2 | Wall support 3×30s | Plank 3×20s | Locust 3×15s | Lizard 3×30s/leg |
3–4 | Dolphin 3×10 | Crow prep 3×15s | Bridge 3×20s | Half split 3×45s |
5–6 | Headstand prep 3×20s | Crow 3×10s | Wheel prep 3×15s | Full split hold 20s |
7–8 | Full hold 30s | Side crow 15s | Full wheel 20s | Full split hold 30s |
A few principles worth holding onto:
Rest is not optional. Leave one to two full recovery days between sessions. 77% of practitioners reported strength gains. 82% saw chronic inflammation drop by close to half. Every single one of them trained with rest built into the plan — not added on at the last minute.
Watch your warning signs. Your resting heart rate spiking more than 5–10 bpm above baseline is a signal. So is any noticeable breath restriction. Your body is telling you to slow down. Listen to it.
Check in with yourself. At weeks three, five, and seven, stop and take an honest look. Are transitions feeling smoother? Is your breath staying calm in harder shapes? Progress in advanced yoga practice is almost never a straight line — but you can track it.
Start with 45-minute sessions in the first few weeks. Add time and challenge as your yoga core strength and body control grow. The poses at the top of this list took most teachers years — not months — to reach with real control and integrity.
What you build over time, you keep.
What to Wear for Advanced Yoga Practice (Gear That Moves With You)
The right clothing doesn't just look good — it decides whether you hold a pose or lose it.
Fabric matters in advanced practice. A loose T-shirt drapes over your eyes mid-handstand. Low-rise leggings slide 4–6 inches down during wheel pose. Your flow breaks. These aren't small problems. They're the difference between a 30-second hold and a collapsed attempt.
Match your gear to the pose:
Inversions — fitted crop tops and high-waisted 7/8 leggings. No riding up, full coverage, clear sightlines.
Backbends — wide 3–4 inch waistbands that stay anchored. Open-back tanks give you ventilation without limiting movement.
Arm balances — second-skin leggings with quick-dry fabric. Cotton holds 27x its weight in sweat. That creates real slip risk. Polyester blends keep your skin dry and your grip stable.
A solid starter kit is two leggings, three tops, and two supportive bras. That covers 90% of advanced poses. It also extends your uninterrupted practice time by 15–20%.
Gear that moves with you lets you focus on what counts: the breath, the balance, the work.
Conclusion
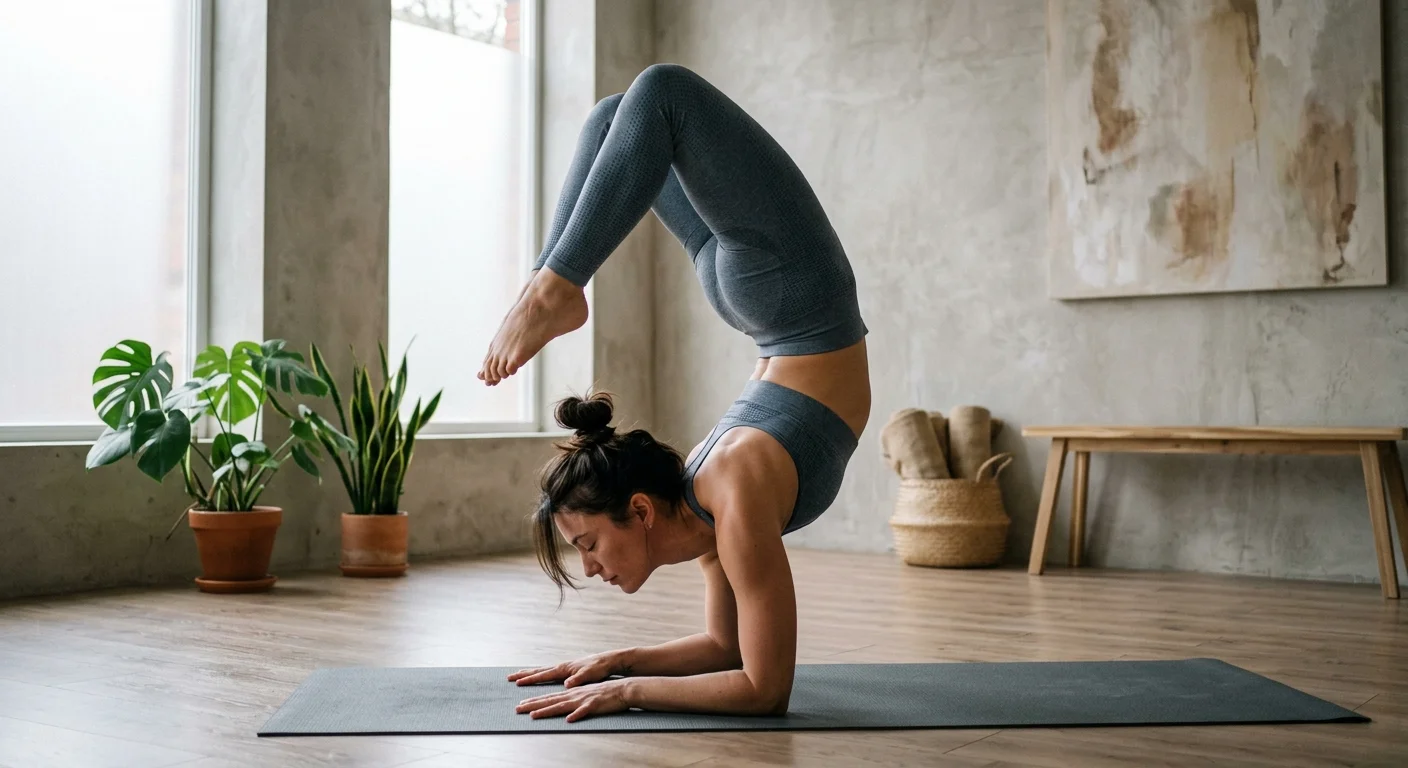
Every pose on this list — from the grounded intensity of Crow to the breathtaking arc of Scorpion Handstand — is proof that yoga isn't just movement. It's a conversation between your mind, your strength, and the edge of what you believe is possible.
Nobody nails these overnight. Advanced yoga practice grows in the quiet, unglamorous moments: the wobbles, the falls, the slow and patient repetition. What matters most is that you show up, keep moving forward with purpose, and protect your body along the way.
So pick one pose that scares you just a little. Start your yoga pose progression there. Build the foundation. Trust the process.
Full freedom of movement is the goal — no seams digging in, no fabric holding you back. Your gear should keep up with you. Check out Berun's high-performance yoga collections, built for every stage of your practice.
Your next breakthrough is closer than you think.
CTA 3