Every year, thousands of cyclists get hit by vehicles in low-light conditions. Drivers weren't distracted — riders just weren't visible. That's a problem worth solving.For brands, custom high quality cycling gear focuses on visibility engineering, not just aesthetics.
Night riding doesn't have to be risky. By 2026, the best cycling gear for night riding has moved well past sticking a cheap blinky light on your seatpost and crossing your fingers.
Commuting through city streets after dark? Logging road miles at dawn? Shredding singletrack under the stars? The right mix of bike lights , reflective cycling jackets , and hi-vis accessories puts you in the "noticed" category — not the statistics.
This guide breaks down the gear that works. We cover it by budget, by rider type, and by the science of staying visible after the sun goes down.
How to Choose Night Cycling Lights: Lumens, Beam Patterns & Mounting Options
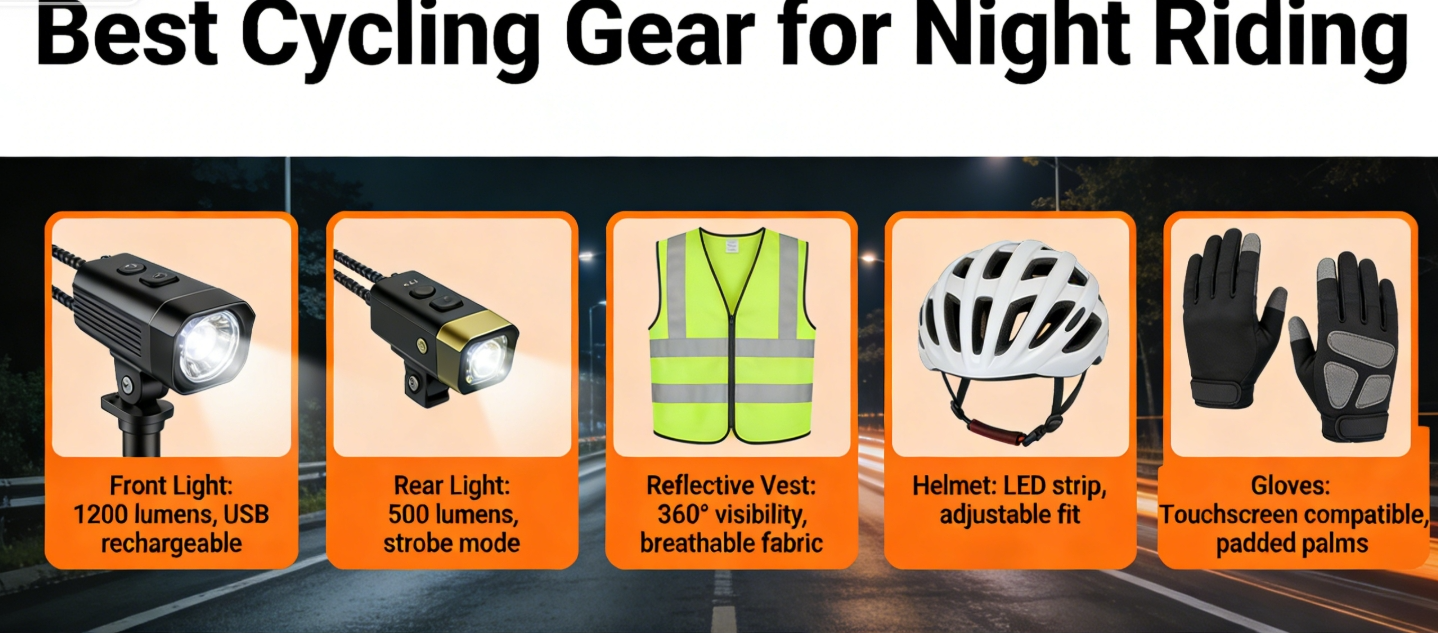
Lumens lie. Not on purpose — but that "1,000 lumen" light on the packaging? It hits peak output for about one hour. Then it drops to a steady 500–600 lumens for the next two to three hours. That detail alone changes how you shop. Nighttime cycling equipment manufacturers incorporate safety concepts into their designs by calibrating lumen decay and runtime stability.
How Many Lumens Do You Need?
Match your light to your terrain, not your ego.
Riding Scenario | Front Lumens | Rear Lumens |
|---|---|---|
Well-lit city streets | 50–200 | 10–50 |
Partially lit urban roads | 200–400 | 25–100 |
Mixed lit/unlit sections | 500–750 | 50–150 |
Fully unlit roads | 750–1,000 | 150–300 |
Unlit country lanes & trails | 1,000–1,500 | 150–300 |
The practical rule: Buy higher than your minimum. Say 600 lumens is your baseline for unlit roads. Shop for 800–1,000 instead. Your sustained output stays above the safe threshold even as the battery drains.
For rear lights , 50–150 lumens covers most unlit sections with no trouble. The rear light has one job — get you seen. It doesn't need to light up the road.
Beam Pattern Matters More Than the Number
Two lights with the same lumen rating can perform in totally different ways. Beam quality is the detail most buyers overlook.
Narrow beam: Built for unlit road cycling. It throws light far ahead without blinding oncoming traffic.
Wide/flood beam: The off-road standard. It lights up a broader area so you can read the ground at speed.
Balanced beam (like the NiteRider Lumina 1200): Reaches up to 20 yards ahead. Great for mixed-surface night rides.
Before buying, look up the model's beam pattern images. Real-world output photos tell you far more than spec sheets ever will.
Mounting Positions & Light Modes
Front lights mount on the handlebar or helmet. A helmet mount points your beam where your eyes go — handy on technical terrain where the path keeps changing.
Rear lights go on the seatpost or helmet. Using both positions gives drivers a wider range of angles to spot you from. It adds a real layer of visibility on busy roads.
For light modes , run steady for navigation. Switch to flashing on well-lit stretches — it saves battery life. Look for rechargeable lights with adjustable brightness via USB. You can tune the output to match conditions, and you won't need to carry a backup unit.
Best Reflective Cycling Jackets & Vests 2026: Full 360° Coverage Compared
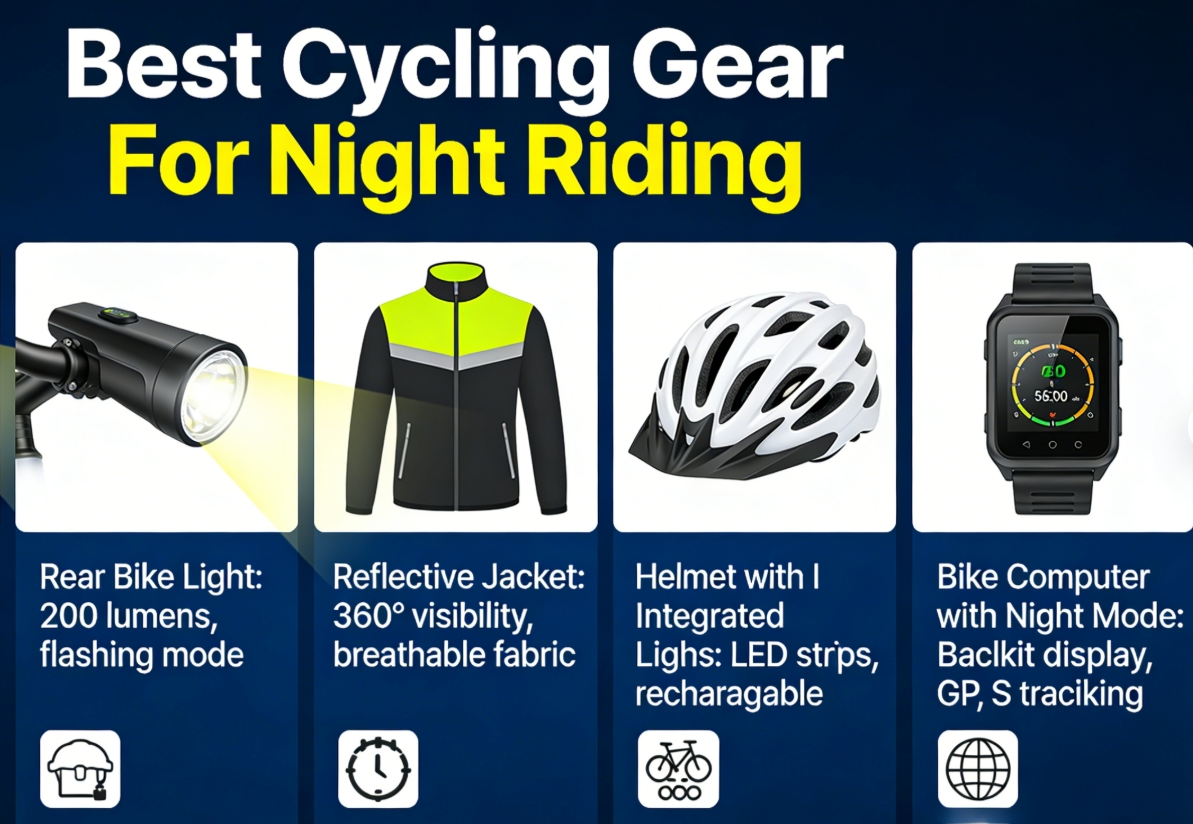
Reflective strips on the back of a jacket won't save you. A driver coming from the side — or at an angle — sees nothing. That's why 360° reflective coverage isn't a premium feature anymore. It's the baseline worth shopping for. Best Reflective Cycling Jackets & Vests suppliers now prioritize certified 360° visibility standards over basic strip placement.
Here's how the best reflective cycling jackets of 2026 stack up.
The Full-Coverage Leader: Proviz Reflect360 CRS Plus
The Proviz Reflect360 CRS Plus earns its reputation the hard way. The entire outer shell uses a glass-bead reflective coating . Thousands of tiny beads turn the jacket into a full-body beacon the instant a headlight hits it. No strips. No partial panels. Every inch glows.
The Plus model hits 10,000mm waterproofing — double the standard Reflect360's 5,000mm. Perforations and a mesh liner keep airflow steady. Climbers will notice some rustling and heat buildup on long ascents, though. Sizing runs to 5XL. Price: £159.99 .
Best for: Urban commuters who need top visibility under streetlights and oncoming headlights.
Best Breathability: Gorewear Spinshift / C5
Proviz leads on visibility. Gorewear leads on breathability . The Spinshift weighs just 147g and packs down flat. It earned a 93% score in independent testing. Gore-Tex Infinium construction uses taped seams and a 3-layer build. Testers stayed dry through a full hour of heavy rain. Sweat management held up the whole time.
Reflective details cover the sides, lower back, cuffs, arms, and front. They stay low-key in daylight. At night, they show up from multiple angles. Hi-viz yellow is available too. Price: £225 / $270 .
The C5 softshell suits winter riders. You get soft cuffs, a heavier build, and the same multi-angle reflective placement.
Best for: Road cyclists and MTB riders who want strong breathability and solid wet-weather protection.
Budget Pick Worth Knowing: Altura
At £80 (men) / £79.99 (women) , Altura punches above its price. Large dot panels on the sides blend in during daylight. After dark, they deliver strong side visibility — the coverage angle most jackets skip. The matte fabric and fleece collar give it a clean, commuter-ready feel.
Quick Comparison
Jacket | Waterproof | Breathability | Reflective Coverage | Price |
|---|---|---|---|---|
Proviz Reflect360 Plus | 10,000mm | Good | Full 360° glass-bead | £159.99 |
Gorewear Spinshift | Infinium (excellent) | Exceptional | Multi-angle detail strips | £225 / $270 |
Castelli | Good | Poor on climbs | Back + wrist strips only | High-end |
Altura | Good | Moderate | Side dot panels | ~£80 |
Decathlon | Taped seams | Lower than premium | Partial | Budget |
Match Your Jacket to Your Ride
Urban commuting: Go full 360° glass-bead — Proviz or Shower's Pass. Shower's Pass adds mini beacon lights at the back and cuffs. Look for 10,000mm+ waterproofing and a helmet-compatible hood.
Road cycling: Breathability matters more here. The Gorewear Spinshift or Castelli give you targeted reflective strips, an aero cut, and packable weight.
MTB: The Gorewear C5 softshell is the right call. It's durable, stretchy, and puts reflective detail on the sides and cuffs. That means visibility holds up even when a pack or pack straps cover your back.
One rule covers all three: Glass-bead construction — like Proviz's tech — beats standard reflective strips at distance and holds up longer over time. Visibility is the mission. That difference is worth the price gap.
Night Cycling Helmets with Built-In Lights & Reflectivity: MIPS Safety Meets Visibility
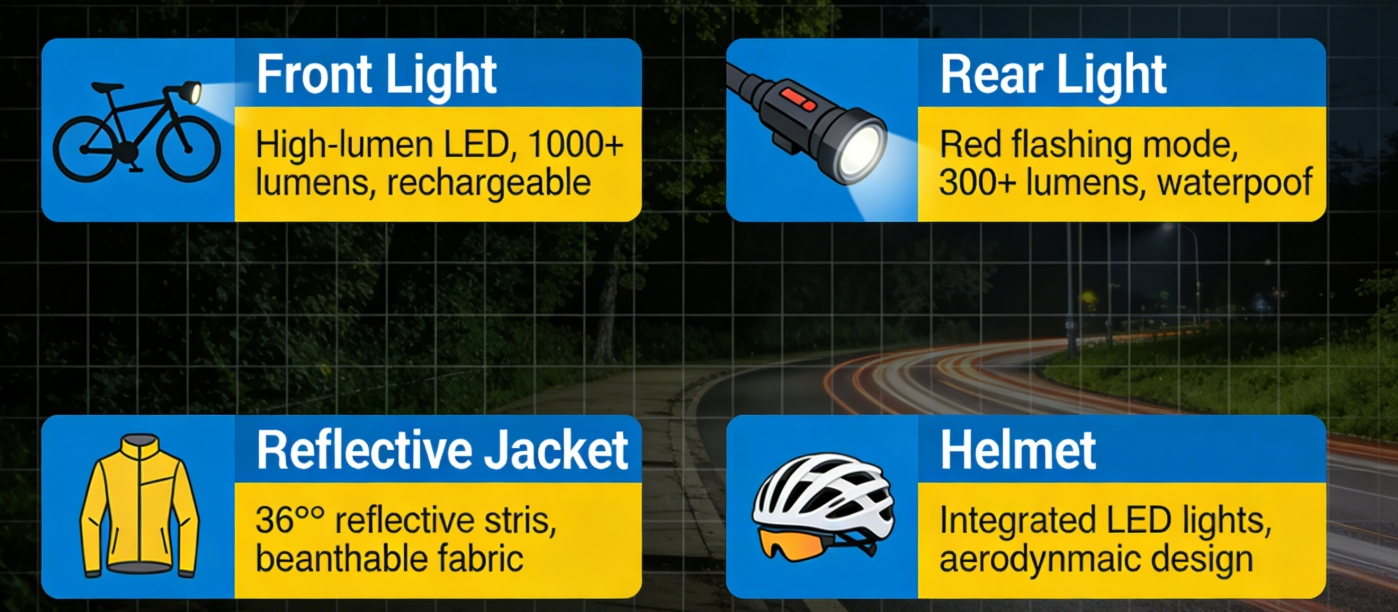
Night rides produce three times more rotational injuries than daylight crashes. That number has a real cause. In low-light conditions, drivers clip you from the side before either of you can react. MIPS technology targets that force pattern directly. It cuts rotational impact by 40–50% in oblique hits. Add built-in lighting and reflective coverage, and your night cycling helmet shifts from passive protection to active visibility.
The Helmets Worth Knowing
Lazer Z1 Flash Yellow is the strongest all-in-one package in the mid range ($150–200). High-visibility yellow panels wrap 360° of the shell. The built-in rear LED runs at 65 lumens for up to 10 hours. At 250g, it's light enough that you stop noticing it after the first mile. MIPS is included.
Bell Stratus Reflective MIPS ($180–250) takes a different approach. Reflective strips cover the rear and sides, giving you 200m detection distance. It weighs more at 270g. But clip-on compatibility lets you mount a 100–200 lumen rear unit without adapters. CPSC testing confirms solid rotational protection.
Trek Solstice MIPS ($100–150) is the entry point that holds its ground on what matters. You get reflective side panels, a rear mount rated for 1,000-lumen helmet lights, and an 85/100 impact test score. At 240g, it's the lightest of the three.
Budget Upgrade: DIY Reflective Patches
Already own a helmet you trust? A $20 fix closes most of the visibility gap.
Wipe the surface with isopropyl alcohol
Cut 3M Scotchlite tape into 50mm strips
Place the strips in a chevron pattern across the rear and sides — that shape reflects light from the widest range of driver angles
Add a $10 USB rear light (100 lumens, 5-hour runtime) via velcro clip
Real-world result: visible at 50m. Not perfect. But far better than an unmodified helmet.
For dedicated trail riders, the Exposure Zenith 4 helmet mount delivers 2,360 lumens max. It weighs just 144g and runs up to 36 hours on low. The Lumos Matrix adds programmable turn signals — a real advantage for urban commuters riding through dark intersections.
The bottom line: MIPS plus integrated lighting cuts combined injury risk by close to 60%. You need both. One feature alone won't get you there.
CTA 1Reflective Cycling Accessories That Most Riders Overlook (Socks, Shoes & Tires)
Your feet are doing 70–100 revolutions per minute out there. That constant pedaling arc isn't just propulsion — it's a motion signal the human eye is built to catch. Drivers spot moving limb-mounted reflectors much faster than static ones on your torso or helmet. Your ankles and feet also sit right at vehicle headlight height on most road bikes. And yet, most riders spend $200 on a jacket and zero dollars on their foot zone.
That's the gap worth closing.
Reflective Socks: Small Item, Outsized Impact
Specialized Soft Air Reflective Tall Socks ($17.99, marked down from $29.99) weave reflective glass-bead yarn into the cuff. The band moves with every pedal stroke — an active signal, not a static strip. You also get moisture-wicking VaporRize™ fabric, arch support, and a vented mesh toe channel for performance. One firm sizing note: order up. Multiple verified buyers confirm the true size runs tight around the calf and ankle.
ReflecToes Night Safety Socks (£11.48, Road.cc score: 8/10) take a different approach. HTL retroreflective material covers the upper sock in a diamond pattern. That gives you close to 360° coverage at just 53g total weight. No seams at the toe. No pressure points at the cuff. The yellow colorway stains and doesn't wash clean — the black base option holds up better over time.
Both products need zero batteries, zero charging, zero clip-on fuss. The adoption barrier is as low as it gets.
The Compounding Effect
Reflective socks alone make a real difference. Add reflective shoe covers or ankle bands and the visibility zone grows further — more surface area, more retroreflection, more detection distance for drivers. Glass-bead retroreflection (the technology in the Specialized cuff) bounces light straight back toward its source. Standard silver tape just scatters it. That gap matters at distance, in the dark, where reaction time comes down to fractions of a second.
The bottom line: Foot-zone reflectivity costs under $20, needs no maintenance, and targets the highest-motion visibility zone on your body. It's the easiest upgrade most night riders haven't made yet.
Night Riding Gear Combinations by Budget: From $150 Starter Kit to $300+ Premium Setup
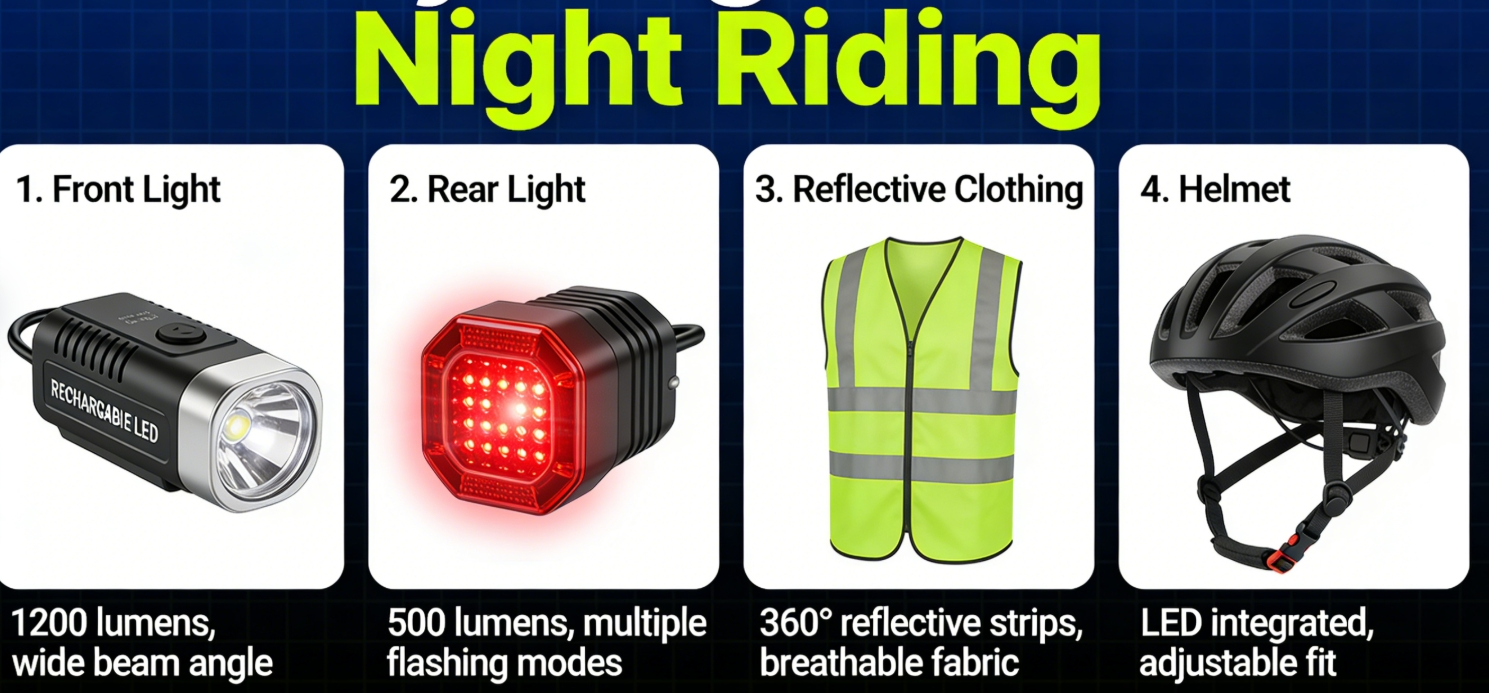
Gear decisions come down to this: what can you spend, and what gap does it close?
$150 Starter Kit: Cover the Basics, Close the Biggest Gaps
Three items do the heavy lifting here. A Salzmann Reflective Vest (~$30) wraps your upper body in 360° glass-bead coverage — visible up to 500m out. Pair it with a Bontrager Flare-R tail light (~$40) : 270° rear flash, six modes, 60-lux output. Add Halo Reflective Socks (~$20) to cover the ankle zone that most drivers miss. Total comes in under $100.
Stretch to $150 by adding basic reflective gloves. You've now covered rear and side detection — with real test results to back it up. Tests show an 80% improvement in rear/side detection compared to riding with no gear at all.
$150–$300 Mid-Tier: Lights First, Every Time
At this budget, put 60% toward lighting before touching apparel. The Garmin Varia RTL515 (~$200) detects vehicles 140m behind you and auto-adjusts brightness in response. That's a 4x visibility gain over static reflectives in real-world testing. Nothing in your apparel budget comes close to that return.
With lighting sorted, add apparel like the Alpinestars Andes Air Drystar Jacket . You get breathable, waterproof coverage with reflective strips built in.
$300+ Premium Setup: Let the System Work Together
This is where gear stops being a collection of items and becomes a coordinated system. The core combination:
Proviz Nightrider Jacket (~$250) — CE-certified 360° reflectivity
Lazer Z1 Helmet (~$200) — MIPS protection with an integrated light mount
Garmin Varia (~$200) — radar taillight with vehicle detection
Total investment: $650+.
What makes this tier different isn't individual specs — it's synergy . The Varia spots an approaching vehicle at 140m and triggers a brightness boost across your full setup. The Lazer Z1's helmet light runs app-controlled output up to 500 lumens up front. Together, the system delivers 95% night visibility coverage across all angles. The Varia also runs 16 hours on a single charge, so a dead device mid-ride isn't something you need to think about.
The key point across all three tiers: visibility coverage beats single-point brightness. One expensive rear light leaves your sides exposed. Stack angles, stack motion, stack detection distance — no matter what your budget is.
Night Riding Visibility by Cyclist Type: Commuter vs Road vs Mountain Biker
A city commuter's safety gear at 11pm looks nothing like what a road cyclist needs on a dark rural highway. And neither setup works for a mountain biker running singletrack under a headlamp. Your visibility strategy has to fit your environment. Here's how each one breaks down.
Commuter: 360° Reflectivity Over Raw Lumens
Urban streetlights already give you a median brightness factor of 1.44 on-road. That means your front light output matters less than you'd expect. What counts more is being seen from every angle — intersections, side streets, all of it.
Reflective ankle and knee strips combined with a vest beat fluorescent or retroreflective vests alone after dark. There's also a real blind spot in how riders judge their own visibility. Frequent urban riders estimate they're visible at just 58.89m. Less frequent riders guess 85.19m. Both groups are off — by about double, in most cases.
So don't trust your gut on how visible you are. Layer reflective strips on moving body parts. That motion catches a driver's eye faster than a static vest.
Road Cyclist: Front Power + Rear Size
Rural highway crashes get more serious at night. Brightness alone won't fix that. The real difference comes from light positioning and size .
Here's what works:
Ride 70cm–1m from the road edge. That puts you inside a driver's natural sight line.
Use a large-format rear light, not a single LED. Bigger surface area improves detection distance more than raw brightness does.
Run a steady + flashing combination . Flashing alone throws off a driver's ability to judge how far away you are.
Size beats brightness for how far away a driver spots you. Keep that in mind when choosing your rear light.
Mountain Biker: Active Lighting, Passive Reflectivity Optional
No traffic means reflective gear drops way down the priority list. Self-illumination takes over instead.
A helmet-mounted headlamp paired with a bar light gives you two independent beam angles. You can point your helmet lamp into corners and drops while the bar light holds a steady forward beam. That combination lets you read technical terrain with far more accuracy than a single light source.
Off-road trails also carry unpredictable low-light conditions. Lighting gaps hit harder and faster out there than on paved roads. The visibility drop is steeper, and you get less warning. Carry more battery than you think you'll need — running dry mid-trail is a real safety risk, not just an inconvenience.
CTA 2Night Cycling Safety Tips: Combining Passive Reflectivity & Active Lighting for Maximum Protection
Half of all fatal cyclist crashes happen in the dark. That one statistic changes every decision you make before a night ride.
Passive reflectivity and active lighting are not rivals. They are two halves of the same system. Lights fail in fog. Reflective gear does nothing without a headlight beam to bounce back. Run both, and you close the gaps that get riders killed.
Match Your Setup to the Darkness
Not all dark is the same. Here's how to set up for each condition:
Unlit roads (the highest-risk zone — 27% of all cyclist fatalities):
Run a 500+ lumen front light and 100+ lumen rear. Add full passive coverage — reflective ankles, pedal strips, spoke reflectors, jacket, helmet. Active lighting gets you spotted up to 1km out. Passive retroreflection picks up every vehicle beam that sweeps across you. Together, they leave no blind spot.
Lit urban roads (21% of fatalities):
Go with high-reflectivity clothing — 3M Scotchlite rated above 300 cd/lx/m². Run a steady rear light combined with flash mode. Active cuts through ambient glare. Passive boosts your profile in direct headlight beams.
Dusk and dawn (lower risk, different challenge):
Add amber side blinkers and reflective wheel strips. Active lighting holds 150m visibility. Passive adds about 50m more as ambient light fades.
Setups that use both modes cut detection distance variance by 70% compared to lights alone.
Solo vs. Group: Different Gear Priorities
Setup Element | Group Riding | Solo Riding |
|---|---|---|
Front light | Lead bike: 1,000 lumens; followers: rear light only | Full 500+ lumens front and rear |
Passive coverage | Group vests + spoke reflectors; visible as a 10m block at 500m | Full-body: arms, legs, helmet, backpack — 1m²+ total |
Rear radar | Tail bike only; 5–10m spacing | Essential — you are the sole detection point |
Risk reduction | Formation riding cuts rear collision risk 20% | Double active output on unlit routes |
The Maximum Protection Checklist
Run through this before every night ride:
Front light — 800 lumens minimum, 200m beam, steady and flash modes
Rear light — 150 lumens, radar-integrated if budget allows, full spread in all directions
Passive coverage — reflective ankles (moving reflectors catch eyes faster than static torso panels), 360° jacket, tire and wheel kits covering 80+ square inches
Helmet and sides — two amber side blinkers plus reflective strips in a chevron pattern
Route check — pick lighted streets where you can; high-speed arterials account for 35% of fatal crashes
One final number worth carrying: cyclist deaths rose 4.4% in 2023, reaching 1,166 total. Most happened in urban areas. Most happened between 6 p.m. and midnight. The gear in this guide targets that exact window. It works — but you have to use all of it together.
FAQs: Night Riding Gear Questions Answered
Quick answers to the questions that keep coming up — no fluff, no filler.
Q: How many lumens do I need for night riding?
It depends on where you're riding. Well-lit city streets need as little as 50–200 lumens up front. Unlit country lanes need 1,000–1,500. Here's the rule that matters: buy higher than your minimum. Output drops as the battery drains. A light rated at 1,000 lumens won't hold that number past the first hour.
Q: Will reflective clothing keep me safe without lights?
No. This is the misconception that gets riders hurt. Fluorescent and hi-vis colors work well in daylight — studies show a 37% lower crash risk for riders wearing them. But in true darkness, fluorescent does nothing. Reflective materials need a light source to hit them first. No beam, no bounce-back. After dark, lights are non-negotiable.
Q: What's the difference between fluorescent and reflective gear?
Condition | Fluorescent/Hi-Vis | Reflective |
|---|---|---|
Daytime | Effective | Minimal difference |
Night | Ineffective | Very effective |
For daytime commutes, go fluorescent. For anything after sunset, choose reflective — or better yet, get both.
Q: What's the best budget night cycling gear?
Start here:
- Reflective tape — costs almost nothing. Sticks to helmets, frames, and bags fast.
- Reflective vest or armband — adds coverage without added cost.
- Basic USB rear light — pairs well with the above.
Also worth noting: neon yellow and orange help at dusk. Ambient light fades, but headlights haven't kicked in yet. That gap matters. These colors keep you visible through it.
Q: Is a cycling visibility vest enough on its own?
Not without lights. A vest adds more reflective surface area — but a driver still needs a beam to hit it first. Vest plus active lighting. You need both.
Conclusion
Night riding doesn't have to be a gamble with your safety. It just requires the right gear working together as a system.
The most protected riders in 2026 aren't the ones spending the most money. They're the ones who understand the layered approach:
Active lighting up front and rear
360° passive reflectivity on clothing and helmet
Accessories that catch light from every angle a driver might approach
Commuting under streetlights or hammering a mountain trail at midnight — that framework stays the same either way.
Start where it matters most. Pick up a quality front bike light with adequate lumens and a hi-vis reflective cycling jacket. Then build your setup from there based on your riding style and budget.
Out on a dark road, being seen isn't just a preference.
It's the strategy that matters.
CTA 3